A Finish & A Start

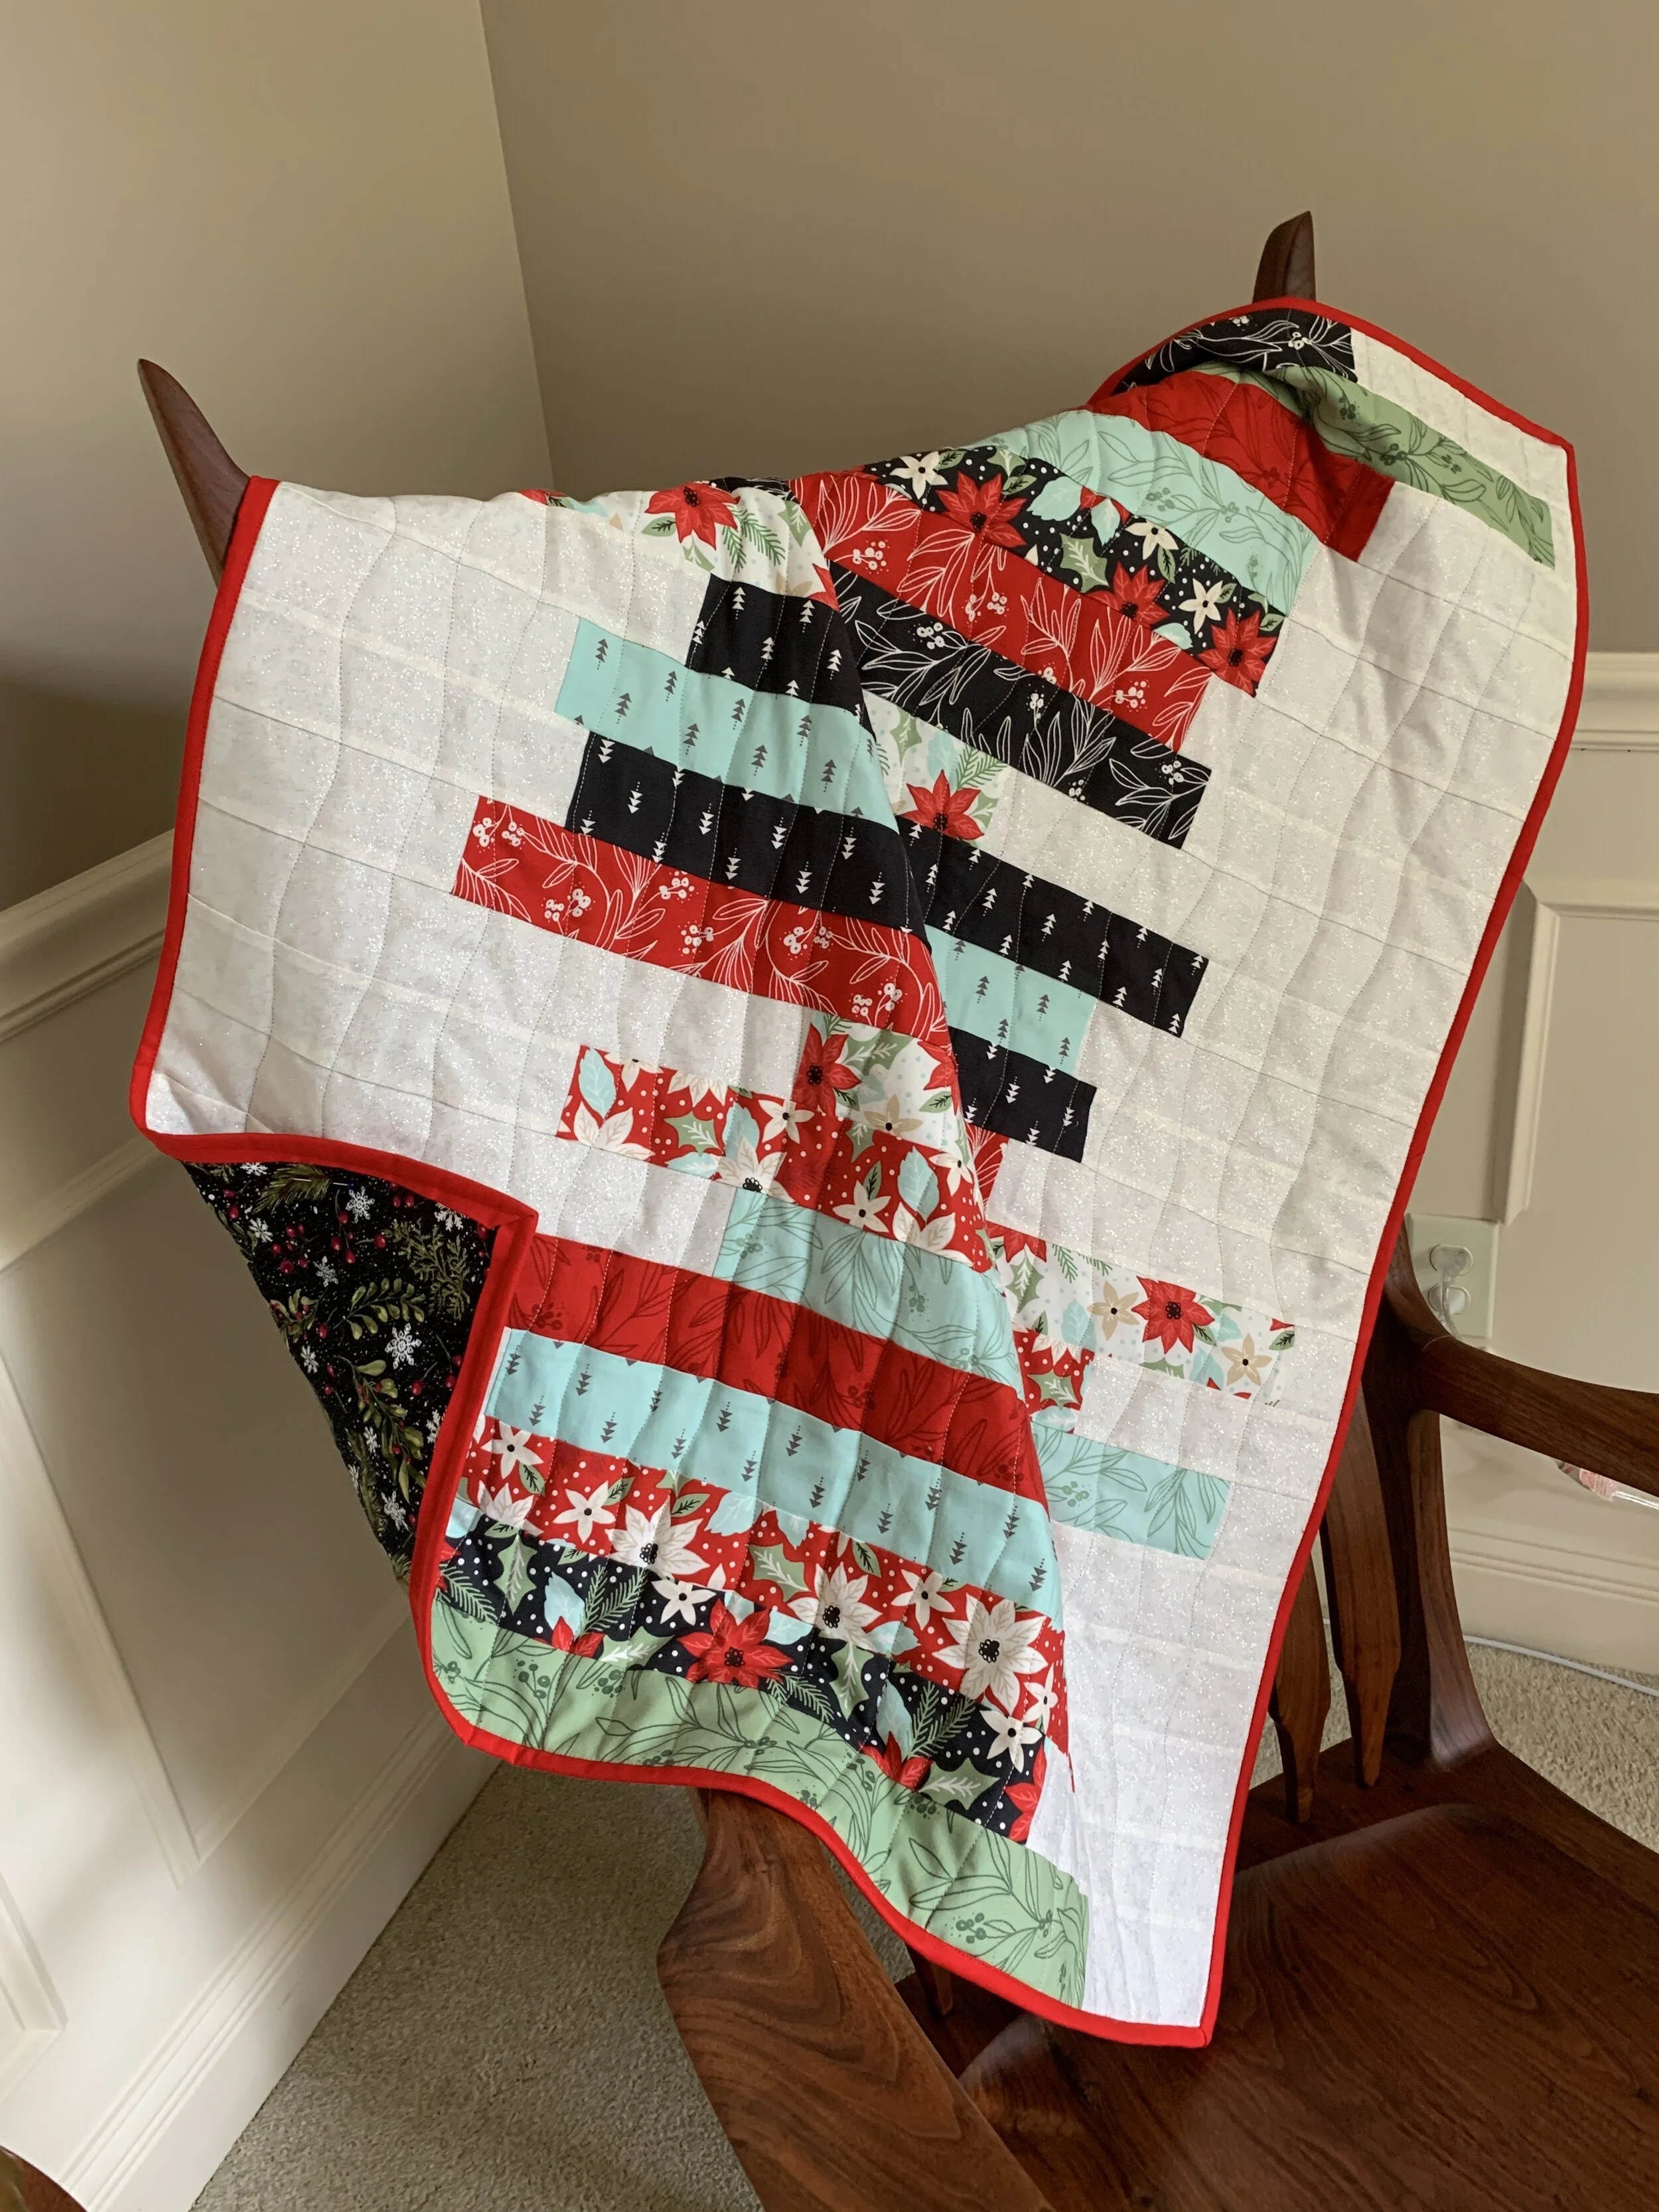
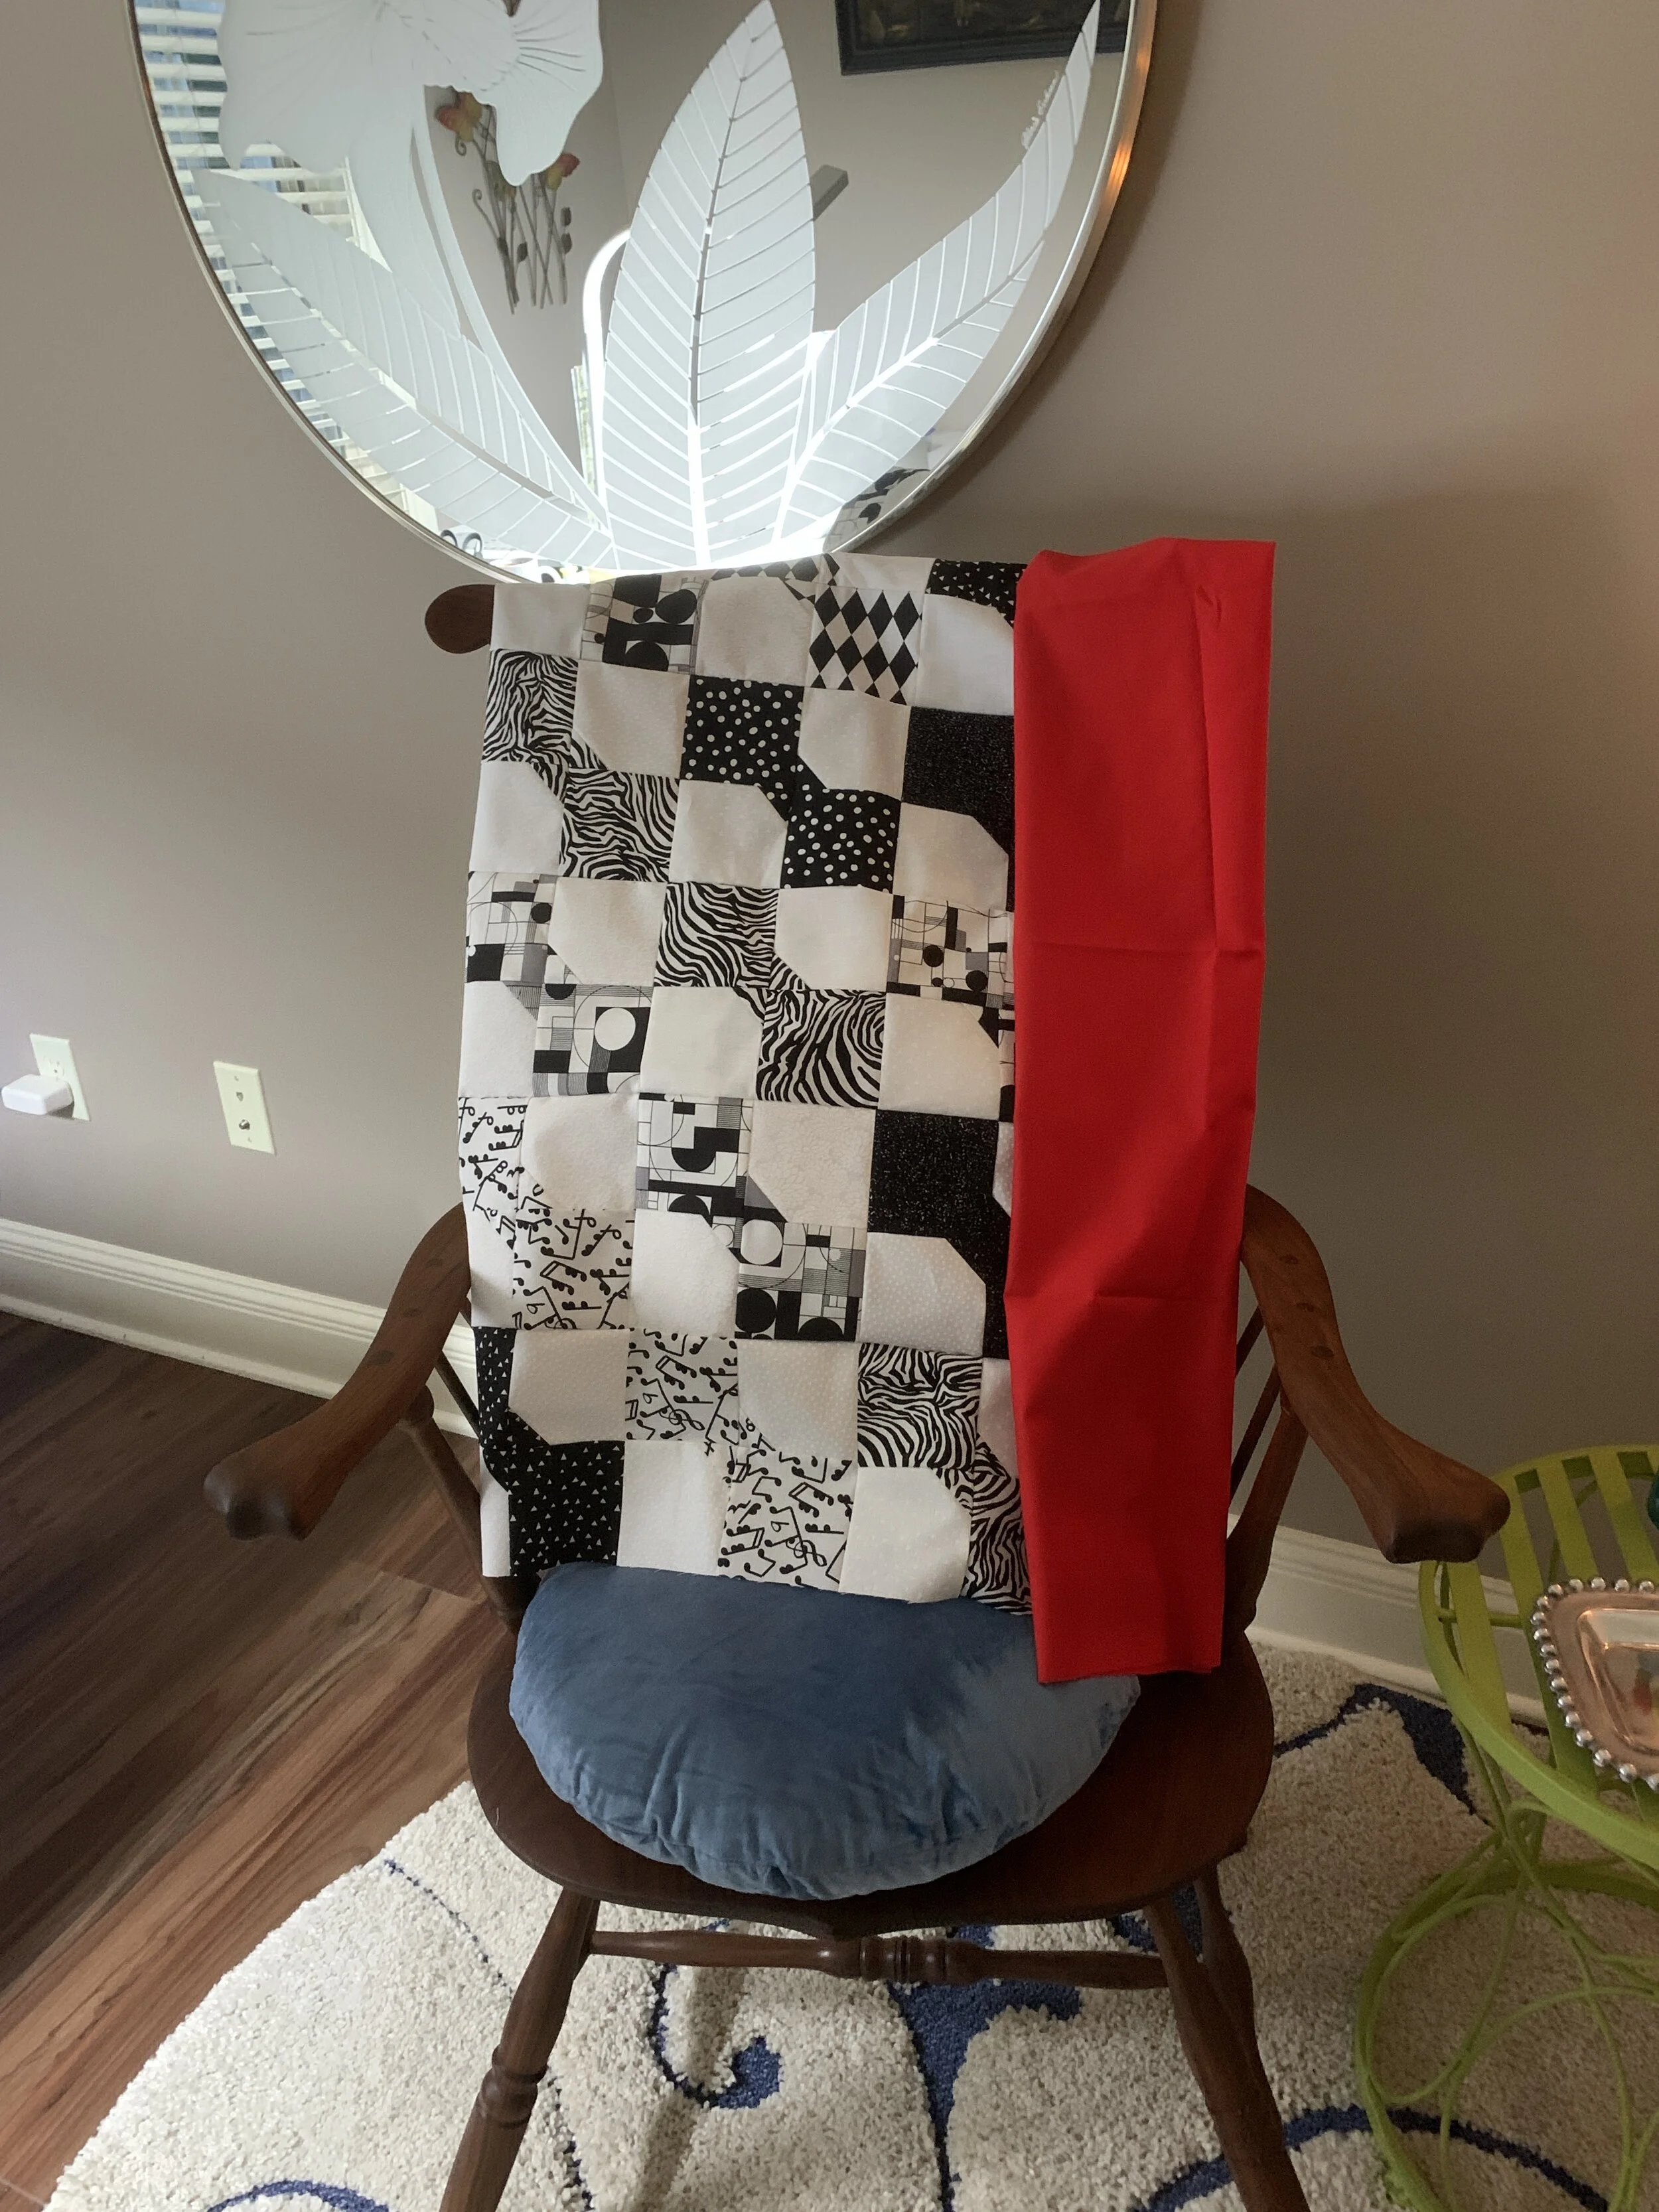
I can’t tell you how excited I am about my completed Kaffe Fasset peacock quilt. I threw caution to the wind and let Amy, the longarm quilter, make the decision on the quilting pattern and thread color. She did a spectacular job. Here’s the quilt hanging in our dining room. You can see a little of the quilt pattern notably at the bottom left of the quilt.

Long Shot of Quilt.jpg

Here’s a closeup picture of the back of the quilt. She used violet thread throughout the quilt and a pattern I would describe as “a loose flower”. If you zoom in really closely you can see the color of the thread.

Closeup of Quilting Pattern.jpg

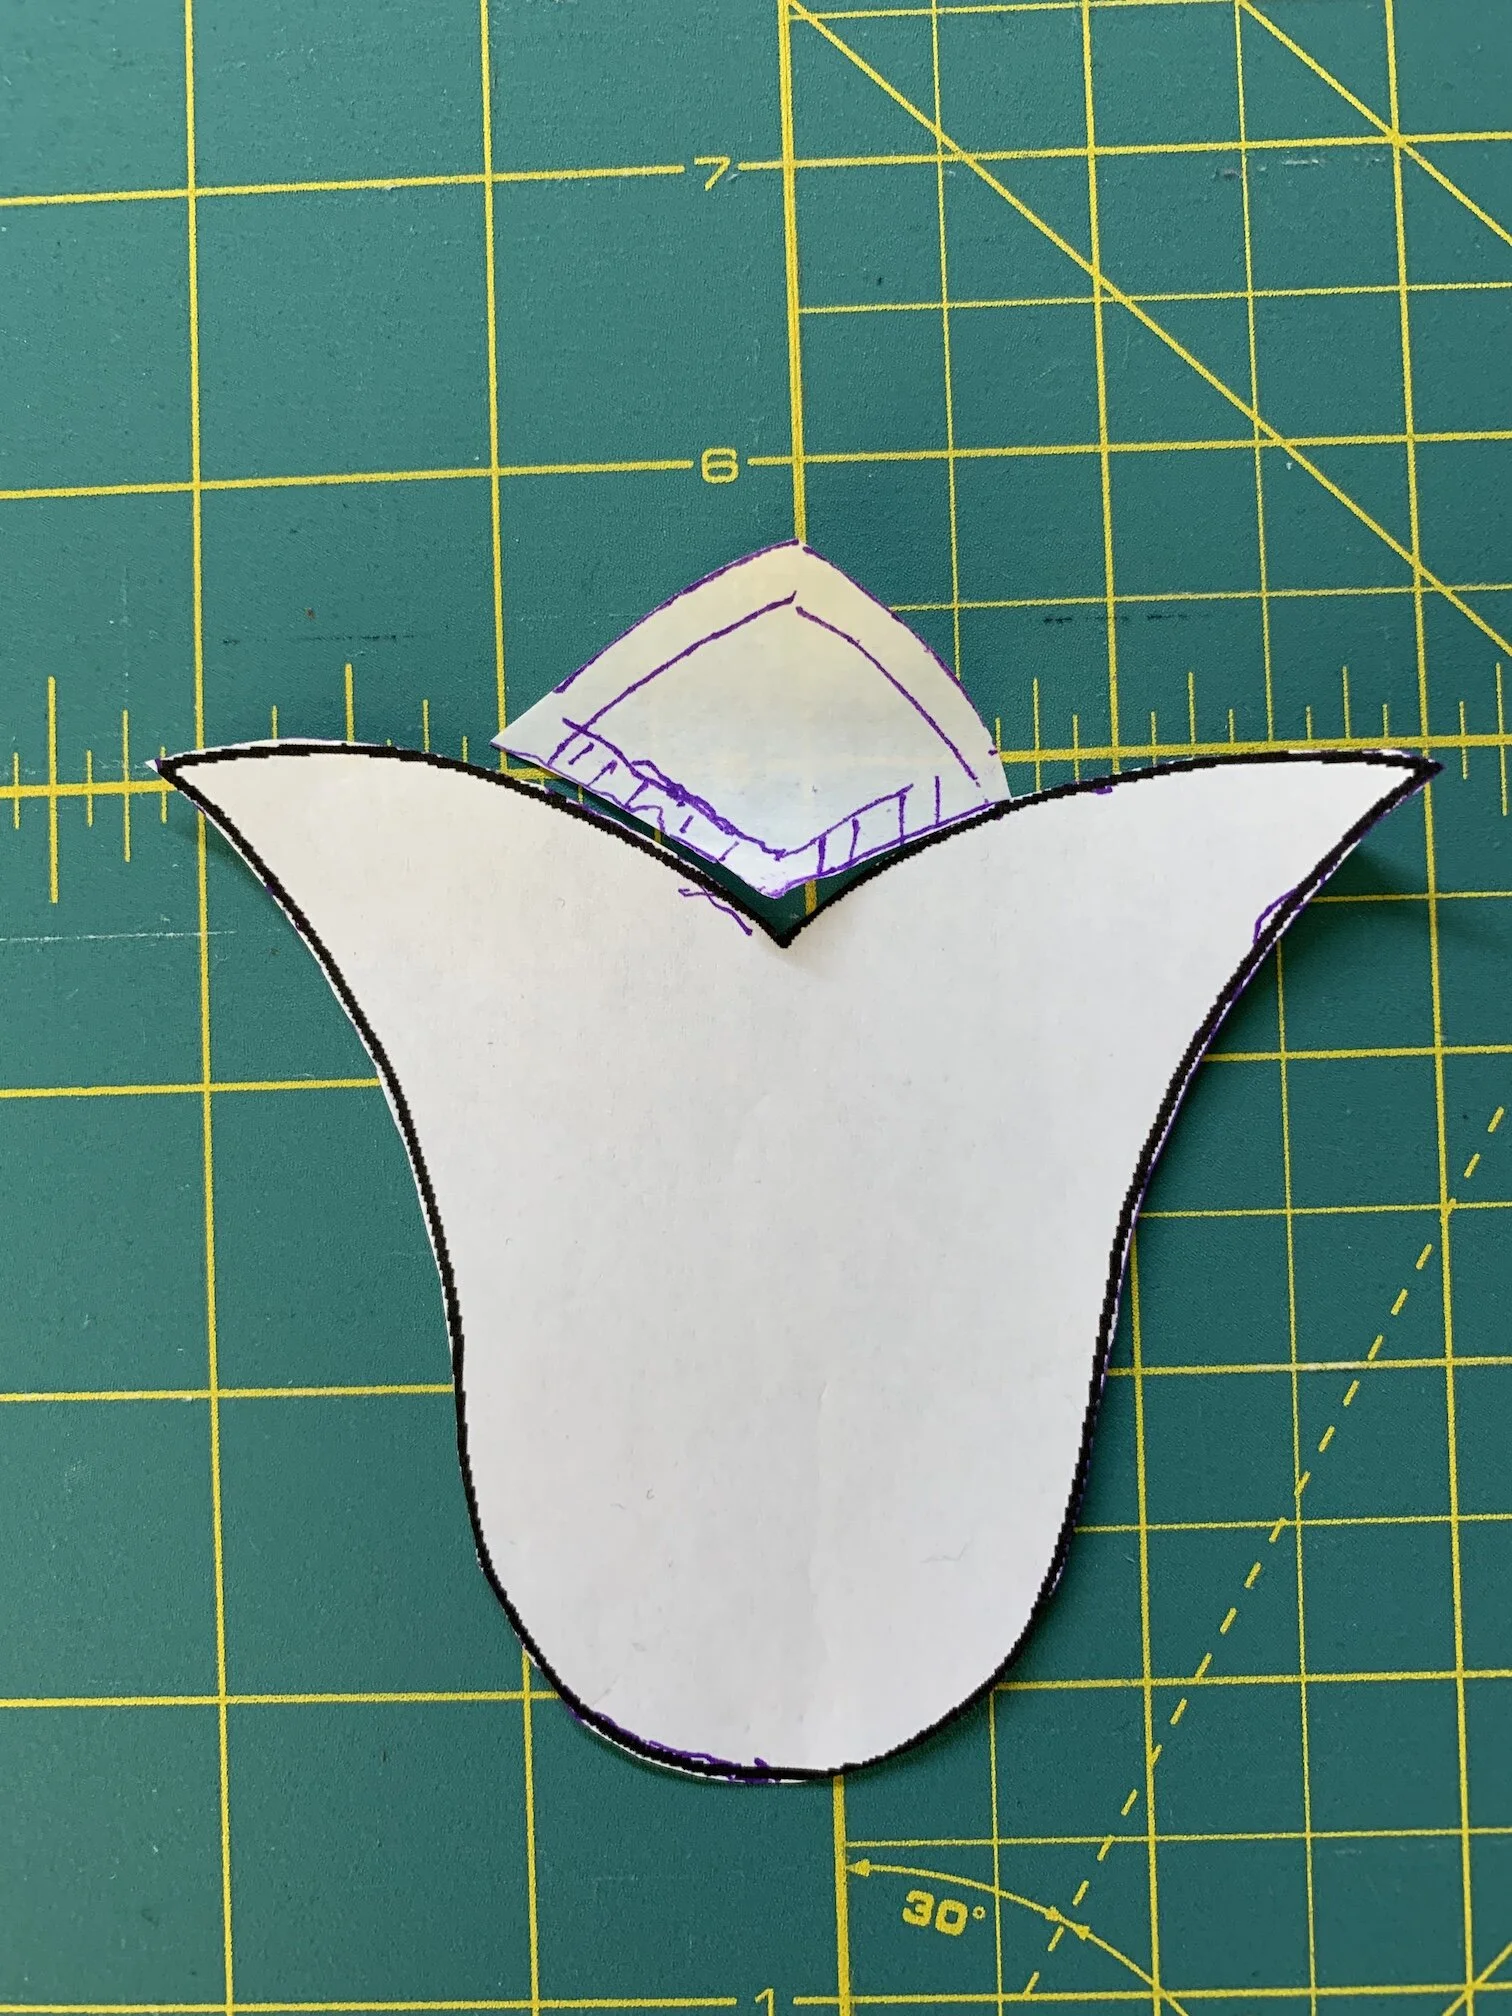
I’ve begun work on the Orange Peel quilt, which I call “petal quilt”. The picture below are some test blocks I created. On the left I was messing around with the length & width of the blanket stitch which holds the petal to the 5” background block. It took some practice to stitch along the bottom and top of the petal but muscle memory seems to be firmly in place now and the blocks I’ve recently created look good. Along the edge of the upper right block I messed around with a random quilting pattern. I need to do further testing on this. . .

Orange Peel test blocks.jpg

WIP: Kaffe Fasset Peacock Fabric + New Project: Orange PeelI

I completed the peacock fabric quilt top. You notice I emphasized “top” because I’ve dropped this off at the longarm quilter. She will create the quilt sandwich and use a quilting machine to quilt the sandwich. The quilt is too large for me to do the quilting myself. This might be the largest quilt I’ll ever make. . .

Quilt Top Finished.jpg

I’ve begun a new quilt; the block is called “orange peel”. I’ve been wanting to do a curved block for a while, so here it is! According to most sources, the orange peel block was introduced back in the late 1800s and like most things, comes in and out of fashion.

Here’s my inspiration quilt and then the fabric (both below) I’ll be using. The blue fabric is called ombre and moves from dark blue to light blue; I loved the picture on the Fabric.com website and crossed my fingers that the fabric would match the picture — it does and I think it will work out wonderfully. I’ll be using a medium blue to set off the orange peels.

Inspiration Orange Peel.png
Orange Peel Fabric.JPG

WIP: Kaffe Fassett Peacock Fabric

I fell in love with the designer Kaffe Fassett fabric collection and I’ve always been drawn to the peacock colors. A match made in heaven, right?! I searched for a quilt pattern that would showcase the fabric and chose the pattern “Simple Sashing and Rectangles Quilt” from AllPeopleQuilt.com. The inspiration quilt is on the left and my “design wall” version is on the right.

Collage 01-16-2021.jpg

This is the largest quilt I’ve made so far: 58 1/2” by 81 1/2”. I’ve decided to send this out to a longarm quilter because wrestling this quilt on my home machine isn’t something I want to try — and I’d like to have a nice quilting pattern to further showcase the fabric.

WIP: Wonky Butterflies

For the first time when I saw the pattern for the Wonky Butterflies, I was drawn to batik fabric. Somewhere in my reading, I stumbled on to the pattern (with a tutorial) which is available here. Here’s my take on the pattern. Since these are somewhat freeform, you can see that the blocks need to be straightened and cut to a more similar height and width. This will be a table topper, so this will be one long strip. It’ll be finished within the next week or so.

Wonky Butterflies WIP.jpg

Completed: Gray Crazy Eights

Our house isn’t on fire — that’s the LED grow lights to give our houseplants extra light :-)

The gray crazy eights quilt is complete !! This technically the best quilt I’ve finished. You’ll notice that the sashing (the white strip) lines up on itself — I’ve found that difficult a couple of quilts ago. The stitch-in-the-ditch (the “ditch” being the seam line between blocks) is much better than it’s been in the past. I’m excited to see my skills growing.

On to the next project 👍 👍 not firmly established yet. . .

Gray Crazy Eight Complete.jpg

WIP: Gray Crazy Eights

Mike’s quilt is coming along nicely. I’ve completed the rows with white sashing and have sewn together two of the three rows divided by horizontal sashing. I’m off today to buy the batting; I’m going to use Quilters Dream 100% pure cotton batting which drapes beautifully. This is a very high grade batting and is very easy to work with.

Mike has been very involved in the project. He laid out the quilt top and was particular about the layout. So the small blue painters tape you see on some blocks is to remind me that the block is the left block. He went back and forth on the sashing color and width but ended up with 3/4” white. Each individual block is 8” finished (hence the name “crazy eights”) and four blocks go together to create a 16” finished block. The quilt will be approximately 51” by 51”. It will have black binding (unless he changes his mind 😄 😃 )

Gray Crazy Eights 10-15-2020.jpg

WIP: Gray Crazy Eights

When I was working on the Stars & Stitches (completion here) my husband saw a black & white picture I took to see the gradations of color - pale to dark. He instantly said that he wanted me to make a quilt for him in shades of gray. So that’s what I’ve been working on. I ordered a fat quarter of gray fabric (12 fabrics measuring 22” by 18”) with shades of dark charcoal to pale gray. He rejected six colors because they were closer to brown hue rather than to blue. So I ordered four more fat quarters and started hand cutting. I couldn’t use the Cricut Maker that I recently bought because of the odd angles in the crazy eight templates.

Gray Fabric half cut.jpg

I’ve finished cutting all the blocks and have 23 of them put together (left side) — only 16 more to go. He initially thought he wanted black sashing but has changed his mind and decided on white. I’ve ordered that fabric and hope it will be in late next week.

Complete: Christmas Quilt + What’s ahead

The Christmas quilt is complete and I’m pleased with the outcome. I bought a binding tool that makes joining the ends of the binding fabric dead simple !!  Happy dance. . . 

Completed Christmas Quilt 1.JPG

I’ve started working on a quilt that Mike has requested - more about that in a later post.

My fabric cutting skills have gotten better but not excellent.  I decided to buy a fabric cutting machine and after much research I decided on the Cricut Maker. It arrived as an early birthday/Christmas gift (isn’t he wonderful !!) on Friday Oct 16th.  I unboxed it this morning and it’s extremely well-built and easy to use.  I got the Maker connected via Bluetooth to my Mac easily and following the lead of a brief tutorial, cut a circle and a square with no difficulty at all.  

You can see the Maker here. I got the mint green which looks nice in my sewing room.

I’m going to do a mini quilt to get to know the machine and Cricut’s design space where you lay out the components of the block(s) to be cut. Riley Blake, a fabric manufacturer, has partnered with Cricut and several quilt designers to create simple designs and quilt kits that use the Maker to cut the fabric.  I might use one of their kits. You can see the quilt designs here. Or maybe I’ll use a pattern I already have and do my own thing.

Looking beyond that, here are some thoughts I have for my next quilts (the images below were snipped from the Web and I have no idea how to make them the same size 😞 ):

  • Mike’s requested quilt - picture to come in a later post

  • A bookcase quilt (see picture below) - I stumbled into a blog post somewhere about bookcase quilts, which were a craze about 10 years ago. I looked at many images dismissively until —— I was gobsmacked when I saw this one. I want to make something similar to this.

  • A wonky butterfly quilt (see picture below) - I already bought the pattern and will, for the first time, use batik fabric. Batik fabric never called to me until I saw this block and a light shined in my brain.

Bookcase Quilt.png
Wonky Butterfly.png

Christmas Quilt

This project is moving along rapidly. I used a “jelly roll” which is a collection of related fabric that is 2.5” wide by 42” long. Cutting and piecing was a breeze. I wanted to try something new for the quilting pattern so I used a practice block to create wavy lines. Once I got the rhythm down, I was able to complete the quilting in about 2 1/2 days. I’m pretty pleased with the outcome. Next I’ll bind the quilt with the red fabric on the left.

Christmas Quilt 1 10-1-2020.jpg

A Completion & A Start

The bow tie quilt is complete !! So far, we’ve been draping the quilts on the back of chairs but I wanted another way to display them. I researched a couple of ways to display quilts and decided on the curtain rod ! This quilt is in my sewing room and I can easily change the quilts out — just unclip one and clip another onto the rod.

Bow Tie Quilt Complete.jpg

I’ve begun working on a Christmas quilt (yes, I know it’s September but time flies !). On the left is the inspiration for the quilt and on the right is the Christmas fabric I’ll use.

Christmas Quilt 1 Collage.jpg

WIP: Bow Tie Quilt

Well, the quilting process is almost complete ! I did use the echo quilting — outlining the white sections of the blocks in black thread. I think that worked very well to highlight the bow tie. The picture shows the quilt top, with the backing fabric on the left and the red fabric I’ll use for the border on the right.

Quilting almost finished.jpg

WIP: Bow Tie Quilt

The quilt top is complete !! Happy dance 😁😁 Here’s a picture of the top folded in half over a chair in my sewing room with the red binding fabric I’ll be using. The binding will be narrow and not nearly as wide as the picture shows.

I’ll be echo quilting (outlining) the white almost-squares with black thread. I haven’t selected the backing fabric yet, but that will probably happen tomorrow.

Quilt Top Complete.JPG

WIP: Bow Tie Quilt + Side Project

I’ve been cutting and sewing — that’s what quilters do !! The bow tie blocks are almost done. Here’s the completed stack; the turquoise strips separate groups of ten. I have three or four more blocks to sew and then I can play with the quilt top block placement.

Bow Tie Blocks 07-31_Fotor.jpg

I’m also working on a side project to replace the very first placemats I quilted. The quality of those placemats are awful - but, hey, they were my first ones. Among the first orders I placed for fabric were the “cats” 10” squares. I love the fabric and thought they’d make good placemats. The picture below is the quilt sandwich; you can barely see the black backing, then the batting and the top layer, the cat fabric. The binding on the red mat will be turquoise and black for the blue.

Cat Placemat Collage.jpg

New Project - Bow Tie Quilt

So a new project starts. On the left is the inspiration quilt - a lovely, modern-looking bow tie quilt. According to Discovering Vintage America, the bow tie — a new style of necktie — entered the male fashion scene in the 19th century and by the 1880’s it was a staple in a man’s wardrobe. Quilts had to follow, of course. Many bow tie blocks are very too “scrappy” in my opinion and don’t really display the bow tie well. But I fell in love with the inspiration quilt and decided to do it in black and white (fabric on the right). I was able to find fat quarters (fabric measures about 22” by 18”) and I also bought a quarter of a yard of several others.

This quilt will be about 36” wide and 42” long — crib size.

Bow Tie Collage - Inspiration & Fabric.jpg

Miscellaneous - Applique + Quilt Label

I’ve been waiting for some black fabric to arrive so I haven’t made any progress on the Stars & Stitches quilt. More on that in my next post.

I’m ready to add my name now to quilts that I create so I ordered quilt labels like the picture below. These are folded in half and stitched into the quilt binding.

My Label.JPG

While I’m waiting for the fabric I turned my attention to appliqué. The pictures below are my first attempt and I’m pretty pleased with the steps and the outcome. The first picture is the pattern and the second is the finished block. I used this fantastic tutorial by Julie from The Crafty Quilter — thanks for her clear instructions with lots of pictures. I want to use appliqué in a small way on some baby quilts - perhaps and elephant or a giraffe or . . .

Tulip Pattern.JPG
Tulip Block.JPG

WIP - Stars & Stitches

The quilt top is complete (whoop, whoop) and I’ve chosen the backing (bottom picture). I bought the backing fabric at our local quilt shop; the person helping me and I shared a quiet laugh about having to explain what a “record” is.

This is the largest quilt I’ve made — it is 50” by 50”. Quilt fabric is usually 42” wide, so I’m going to have to piece the backing, something I’ve never done before. I’ve had to order some extra black fabric and when it comes in I’ll create the backing, build the quilt sandwich and then quilt the whole thing together.

WIP Collage 2020-05-31.jpg

WIP - Stars & Stitches

All the blocks are complete and I’ve laid out the quilt top on my “design wall” (aka our living room floor). The single blocks will be grouped in a large single block of four. Between each large block will be black sashing. I’ve begun sewing the single blocks together and I expect to have that completed in the next post. Perhaps I’ll have completed the quilt top, but that might be a bridge too far. We’ll see. . .

Initial Color Layout.jpg

WIP - Stars & Stitches

I’ve done a LOT of cutting in the last two weeks and I’ve also done a fair amount of sewing. The picture on the left shows the block segments labeled A - E on the templates. I cut most of the segments and started sewing the segments together to create the blocks (pictured on the right). I have a lot more sewing to do !

WIP Collage 2020-05-02.jpg

New Project - Stars & Stitches

This project edges toward “crazy” quilting which were very popular in the late 1800s and are an icon of the Victorian era. The last couple of years crazy quilts have had a resurgence with the “2020 Crazy Quilt Challenge”. According to the challenge guidelines, you are to create a crazy quilt with 2,020 items. To my eye this is far too much but I like the more understated crazy quilts.

My new project is to create a quilt like the picture below. I love the vivid colors and look forward to using some of the decorative machine stitches I have. Jennie at Missouri Star Quilt Company has a tutorial on this quilt which you might like to watch.

Stars & Stitches with Jenny.png