Maypole in Red // Square in Square // Bird Quilt

The Maypole quilt in Red top is complete. I’m waiting for the backing material so I’ll make a start on my next quilt — Square in Square with fabric from Kaffe Fassett. In the planning stages is a third quilt which I’m calling the Bird Quilt.

Here’s a picture of the fabric for the Square in Square quilt. I love the designs that Fassett and his collaborators create. The heavily patterned pieces are 6” strips, 42” long; they’ll be cut to create the center square. The folded fabric will be used to create the frame around the central square.

The Bird Quilt is in the planning stage. I’ve downloaded the block patterns; I’ll need to calculate how much fabric I need to create the quilt itself. This is the inspiration quilt that called my name and tripped me as I went by 😁 😁

A start -- Maypole Baby Quilt

I’ve long admired the pattern “Maypole” by Suzy Quilts. I finally decided this was a quilt I wanted to make. After looking at many, many Maypoles other quilters created I decided on this quilt as my inspiration quilt.

So off I went to my local quilt shop and here’s the fabric one of the staff helped me put together.

I’ll begin cutting the fabric and will have more for you soon. . . .

A Start -- Kettle of Fish

I’ve begun working on a quilt titled “A Kettle of Fish” using batik fabric. Here’s a picture of some of the fabric I’m using

Kettle of Fish Fabric.JPG

And I’ve created a couple of blocks one of which looks like this

If you squint you can the dark green fish heading toward your left.

Batik (pronounced 'Bah-Teak') is a technique used to dye fabrics. First, melted wax is applied to the fabric in the areas that are to be free of dye. There are various methods used to apply the liquid wax, but brushing or directly pouring the wax are the most common. Once the molten wax cools, it hardens and penetrates into the fabric. Next the fabric is soaked in dye. The wax prevents dye from penetrating onto the fabric and therefore keeps those areas of fabric in their original color.

To remove the wax after the dyeing process, a solvent can be used. Alternatively, the hardened wax can be pressed out with an iron; the hot surface melts the wax it is pressed through the fabric. If a multiple-colored design is desired, the process is repeated for each color.

This project will take a while to complete, but I’ll update you as I go along.

No Progress Report

I’ve been occupied with projects other than sewing and quilting — and I’m beginning to get withdrawal symptoms 😳 😢 . I’ve

  • been deadheading flowers,

  • planting new ones,

  • moving from one computer system to another,

  • finding a new picture editor since the free one I’ve been using decided to go subscription model and

  • just generally been busy with “stuff”.

I’m hoping to get back to sewing and quilting soon !!


WIP: Baby Quilt

The Orange Peel quilt is still on hold, but not abandoned.

In the meantime I used a very simple pattern to create another baby quilt. The fabric is “All Our Stars” by Jennifer Pugh for Wilmington Prints and it is called 10 Karat Crystals (also called a “layer cake” by other manufacturers). The quilt is 40” by 50”.

I’m getting a bit more adventurous with my quilting: wavy lines using navy thread 😄. The binding will also be navy.

WIP: Repair Work & a Table Topper

The orange peel quilt is on hold, but not abandoned. I need to consult with the quilt community about some. . . issues. . . with the quilt blocks.

In the meantime a quilt that stares me in the face when I’m at my computer was weeping because the binding was a mess.

Binding Repair.JPG

You can see in the picture above that I didn’t catch the back of the quilt (in some places) when I applied the binding. Jenny Doan matriarch of the Missouri Star Quilt says “finished is better than perfect”, but this really was a mess and someday I’ll give it away.

So I spend a couple of useless days picking out the binding and realized I couldn’t reuse the binding. Ahhh well. I created more binding and the quilt looks much better now.

I also created a table topper using the Economy block (also called square-in-square). I fell in love with the butterfly fabric and thought the block would show it off nicely. It will be our spring/summer topper.

Butterfly Fabric with Economy block.JPG


WIP: Orange Peel Quilt

Soooo - a short, but fervent, happy dance from me !! Here’s the design wall for the orange peel quilt !! I wish I were a better photographer or my camera took better pictures (I suspect it’s more the former than the latter 😉 ) The background is a pale-to-medium blue which doesn’t come across well in my pictures. Now on to sewing together the top, building the quilt sandwich and quilting the layers together. . .

Quilt Top Layout.jpg

WIP: Orange Peel Quilt

I have little to show you in this update. The work seems quite slow to me and I have only a modest stack of blocks completed for this quilt.

A Modest Stack of Blocks 2021-03-15.jpg

I asked myself “Why does this seem to be moving so slowly”. So I thought for a bit and watched myself create a block from start to finish. There are several steps to creating the block which I outlined last update. This time I have a picture of the steps in creating the block. After I’ve cut the fabric into 5” squares, the first step is to sew the interfacing to the block. Then I trim the seam closely, cut a slit in the interfacing and turn the block inside out. Next I iron the peel onto the light blue block and finally use a blanket stitch around the edge to permanently affix it to the light blue block. A rather lengthy process which is getting a little faster but not much faster. No wonder I only have a modest stack of blocks 😁 I’m thinking of adding sashing which will widen and lengthen the top.

Steps in process.jpg

WIP: Orange Peel Quilt

The Orange Peel block goes back to at least 1880. Legend has it that Lafayette peeled an orange into four equal segments, in the fashion of the aristocratic French. A lady was so charmed that she designed a quilt block representing the segments. The Virginia Quilt Museum says that only yellow or orange quilts are called “orange peel”. Other colors are designated as “Rob Peter to Pay Paul”. Do you think I should rename the quilt? 🤣🤣

I thought I’d show you the steps to create a single block. I bought yardage for this quilt and so I cut a bunch of 5” squares. Next I use a plastic template to cut out the fusible interfacing in the shape of the peel. I take the blue patterned fabric and sew one fusible peel to the 5” block. I trim the block around the peel and turn it inside out. Now iron the gummed side of the peel onto the pale blue 5” block. Now machine appliqué the peel around the edges (using the blanket stitch) so it it permanently attached.

Repeat many times. I estimate I’ll need around 100 blocks to create a 40” x 40” quilt.

WIP 2021-02-27.jpg

A Finish & A Start

I can’t tell you how excited I am about my completed Kaffe Fasset peacock quilt. I threw caution to the wind and let Amy, the longarm quilter, make the decision on the quilting pattern and thread color. She did a spectacular job. Here’s the quilt hanging in our dining room. You can see a little of the quilt pattern notably at the bottom left of the quilt.

Long Shot of Quilt.jpg

Here’s a closeup picture of the back of the quilt. She used violet thread throughout the quilt and a pattern I would describe as “a loose flower”. If you zoom in really closely you can see the color of the thread.

Closeup of Quilting Pattern.jpg

I’ve begun work on the Orange Peel quilt, which I call “petal quilt”. The picture below are some test blocks I created. On the left I was messing around with the length & width of the blanket stitch which holds the petal to the 5” background block. It took some practice to stitch along the bottom and top of the petal but muscle memory seems to be firmly in place now and the blocks I’ve recently created look good. Along the edge of the upper right block I messed around with a random quilting pattern. I need to do further testing on this. . .

Orange Peel test blocks.jpg

WIP: Kaffe Fasset Peacock Fabric + New Project: Orange PeelI

I completed the peacock fabric quilt top. You notice I emphasized “top” because I’ve dropped this off at the longarm quilter. She will create the quilt sandwich and use a quilting machine to quilt the sandwich. The quilt is too large for me to do the quilting myself. This might be the largest quilt I’ll ever make. . .

Quilt Top Finished.jpg

I’ve begun a new quilt; the block is called “orange peel”. I’ve been wanting to do a curved block for a while, so here it is! According to most sources, the orange peel block was introduced back in the late 1800s and like most things, comes in and out of fashion.

Here’s my inspiration quilt and then the fabric (both below) I’ll be using. The blue fabric is called ombre and moves from dark blue to light blue; I loved the picture on the Fabric.com website and crossed my fingers that the fabric would match the picture — it does and I think it will work out wonderfully. I’ll be using a medium blue to set off the orange peels.

Inspiration Orange Peel.png
Orange Peel Fabric.JPG

WIP: Kaffe Fassett Peacock Fabric

I fell in love with the designer Kaffe Fassett fabric collection and I’ve always been drawn to the peacock colors. A match made in heaven, right?! I searched for a quilt pattern that would showcase the fabric and chose the pattern “Simple Sashing and Rectangles Quilt” from AllPeopleQuilt.com. The inspiration quilt is on the left and my “design wall” version is on the right.

Collage 01-16-2021.jpg

This is the largest quilt I’ve made so far: 58 1/2” by 81 1/2”. I’ve decided to send this out to a longarm quilter because wrestling this quilt on my home machine isn’t something I want to try — and I’d like to have a nice quilting pattern to further showcase the fabric.

WIP: Wonky Butterflies

For the first time when I saw the pattern for the Wonky Butterflies, I was drawn to batik fabric. Somewhere in my reading, I stumbled on to the pattern (with a tutorial) which is available here. Here’s my take on the pattern. Since these are somewhat freeform, you can see that the blocks need to be straightened and cut to a more similar height and width. This will be a table topper, so this will be one long strip. It’ll be finished within the next week or so.

Wonky Butterflies WIP.jpg

Completed: Gray Crazy Eights

Our house isn’t on fire — that’s the LED grow lights to give our houseplants extra light :-)

The gray crazy eights quilt is complete !! This technically the best quilt I’ve finished. You’ll notice that the sashing (the white strip) lines up on itself — I’ve found that difficult a couple of quilts ago. The stitch-in-the-ditch (the “ditch” being the seam line between blocks) is much better than it’s been in the past. I’m excited to see my skills growing.

On to the next project 👍 👍 not firmly established yet. . .

Gray Crazy Eight Complete.jpg

WIP: Gray Crazy Eights

Mike’s quilt is coming along nicely. I’ve completed the rows with white sashing and have sewn together two of the three rows divided by horizontal sashing. I’m off today to buy the batting; I’m going to use Quilters Dream 100% pure cotton batting which drapes beautifully. This is a very high grade batting and is very easy to work with.

Mike has been very involved in the project. He laid out the quilt top and was particular about the layout. So the small blue painters tape you see on some blocks is to remind me that the block is the left block. He went back and forth on the sashing color and width but ended up with 3/4” white. Each individual block is 8” finished (hence the name “crazy eights”) and four blocks go together to create a 16” finished block. The quilt will be approximately 51” by 51”. It will have black binding (unless he changes his mind 😄 😃 )

Gray Crazy Eights 10-15-2020.jpg

WIP: Gray Crazy Eights

When I was working on the Stars & Stitches (completion here) my husband saw a black & white picture I took to see the gradations of color - pale to dark. He instantly said that he wanted me to make a quilt for him in shades of gray. So that’s what I’ve been working on. I ordered a fat quarter of gray fabric (12 fabrics measuring 22” by 18”) with shades of dark charcoal to pale gray. He rejected six colors because they were closer to brown hue rather than to blue. So I ordered four more fat quarters and started hand cutting. I couldn’t use the Cricut Maker that I recently bought because of the odd angles in the crazy eight templates.

Gray Fabric half cut.jpg

I’ve finished cutting all the blocks and have 23 of them put together (left side) — only 16 more to go. He initially thought he wanted black sashing but has changed his mind and decided on white. I’ve ordered that fabric and hope it will be in late next week.

Complete: Christmas Quilt + What’s ahead

The Christmas quilt is complete and I’m pleased with the outcome. I bought a binding tool that makes joining the ends of the binding fabric dead simple !!  Happy dance. . . 

Completed Christmas Quilt 1.JPG

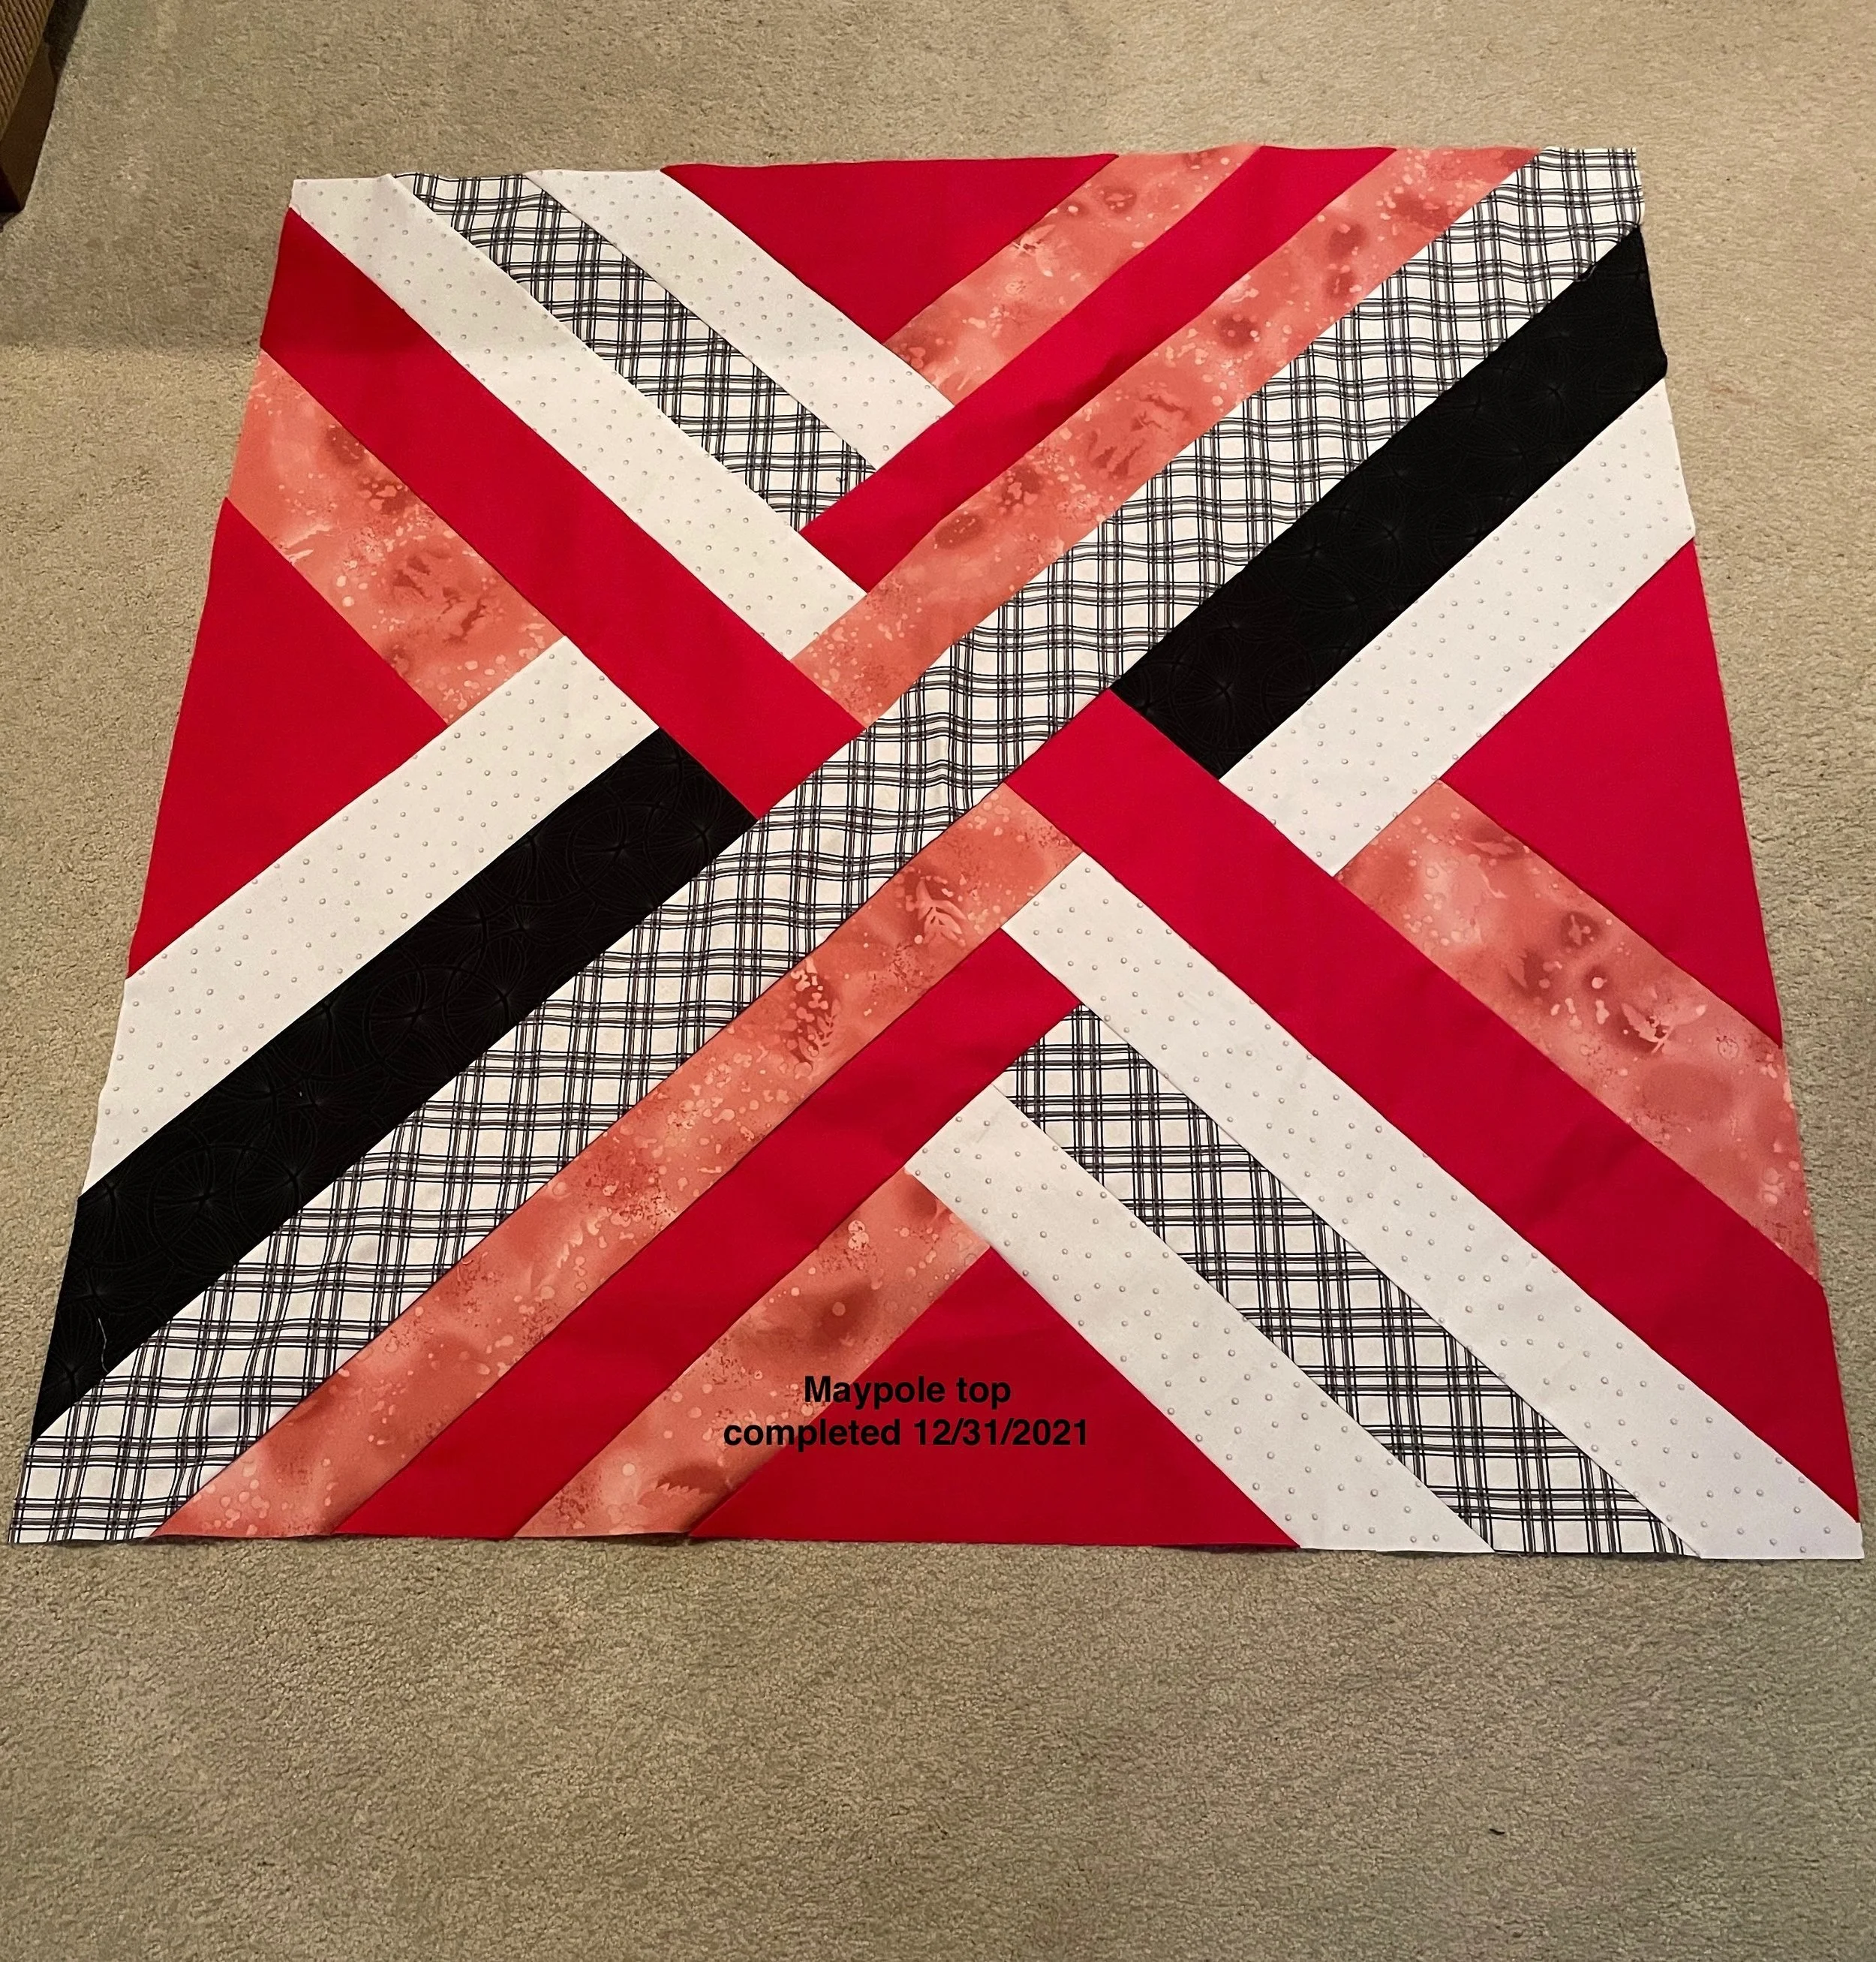
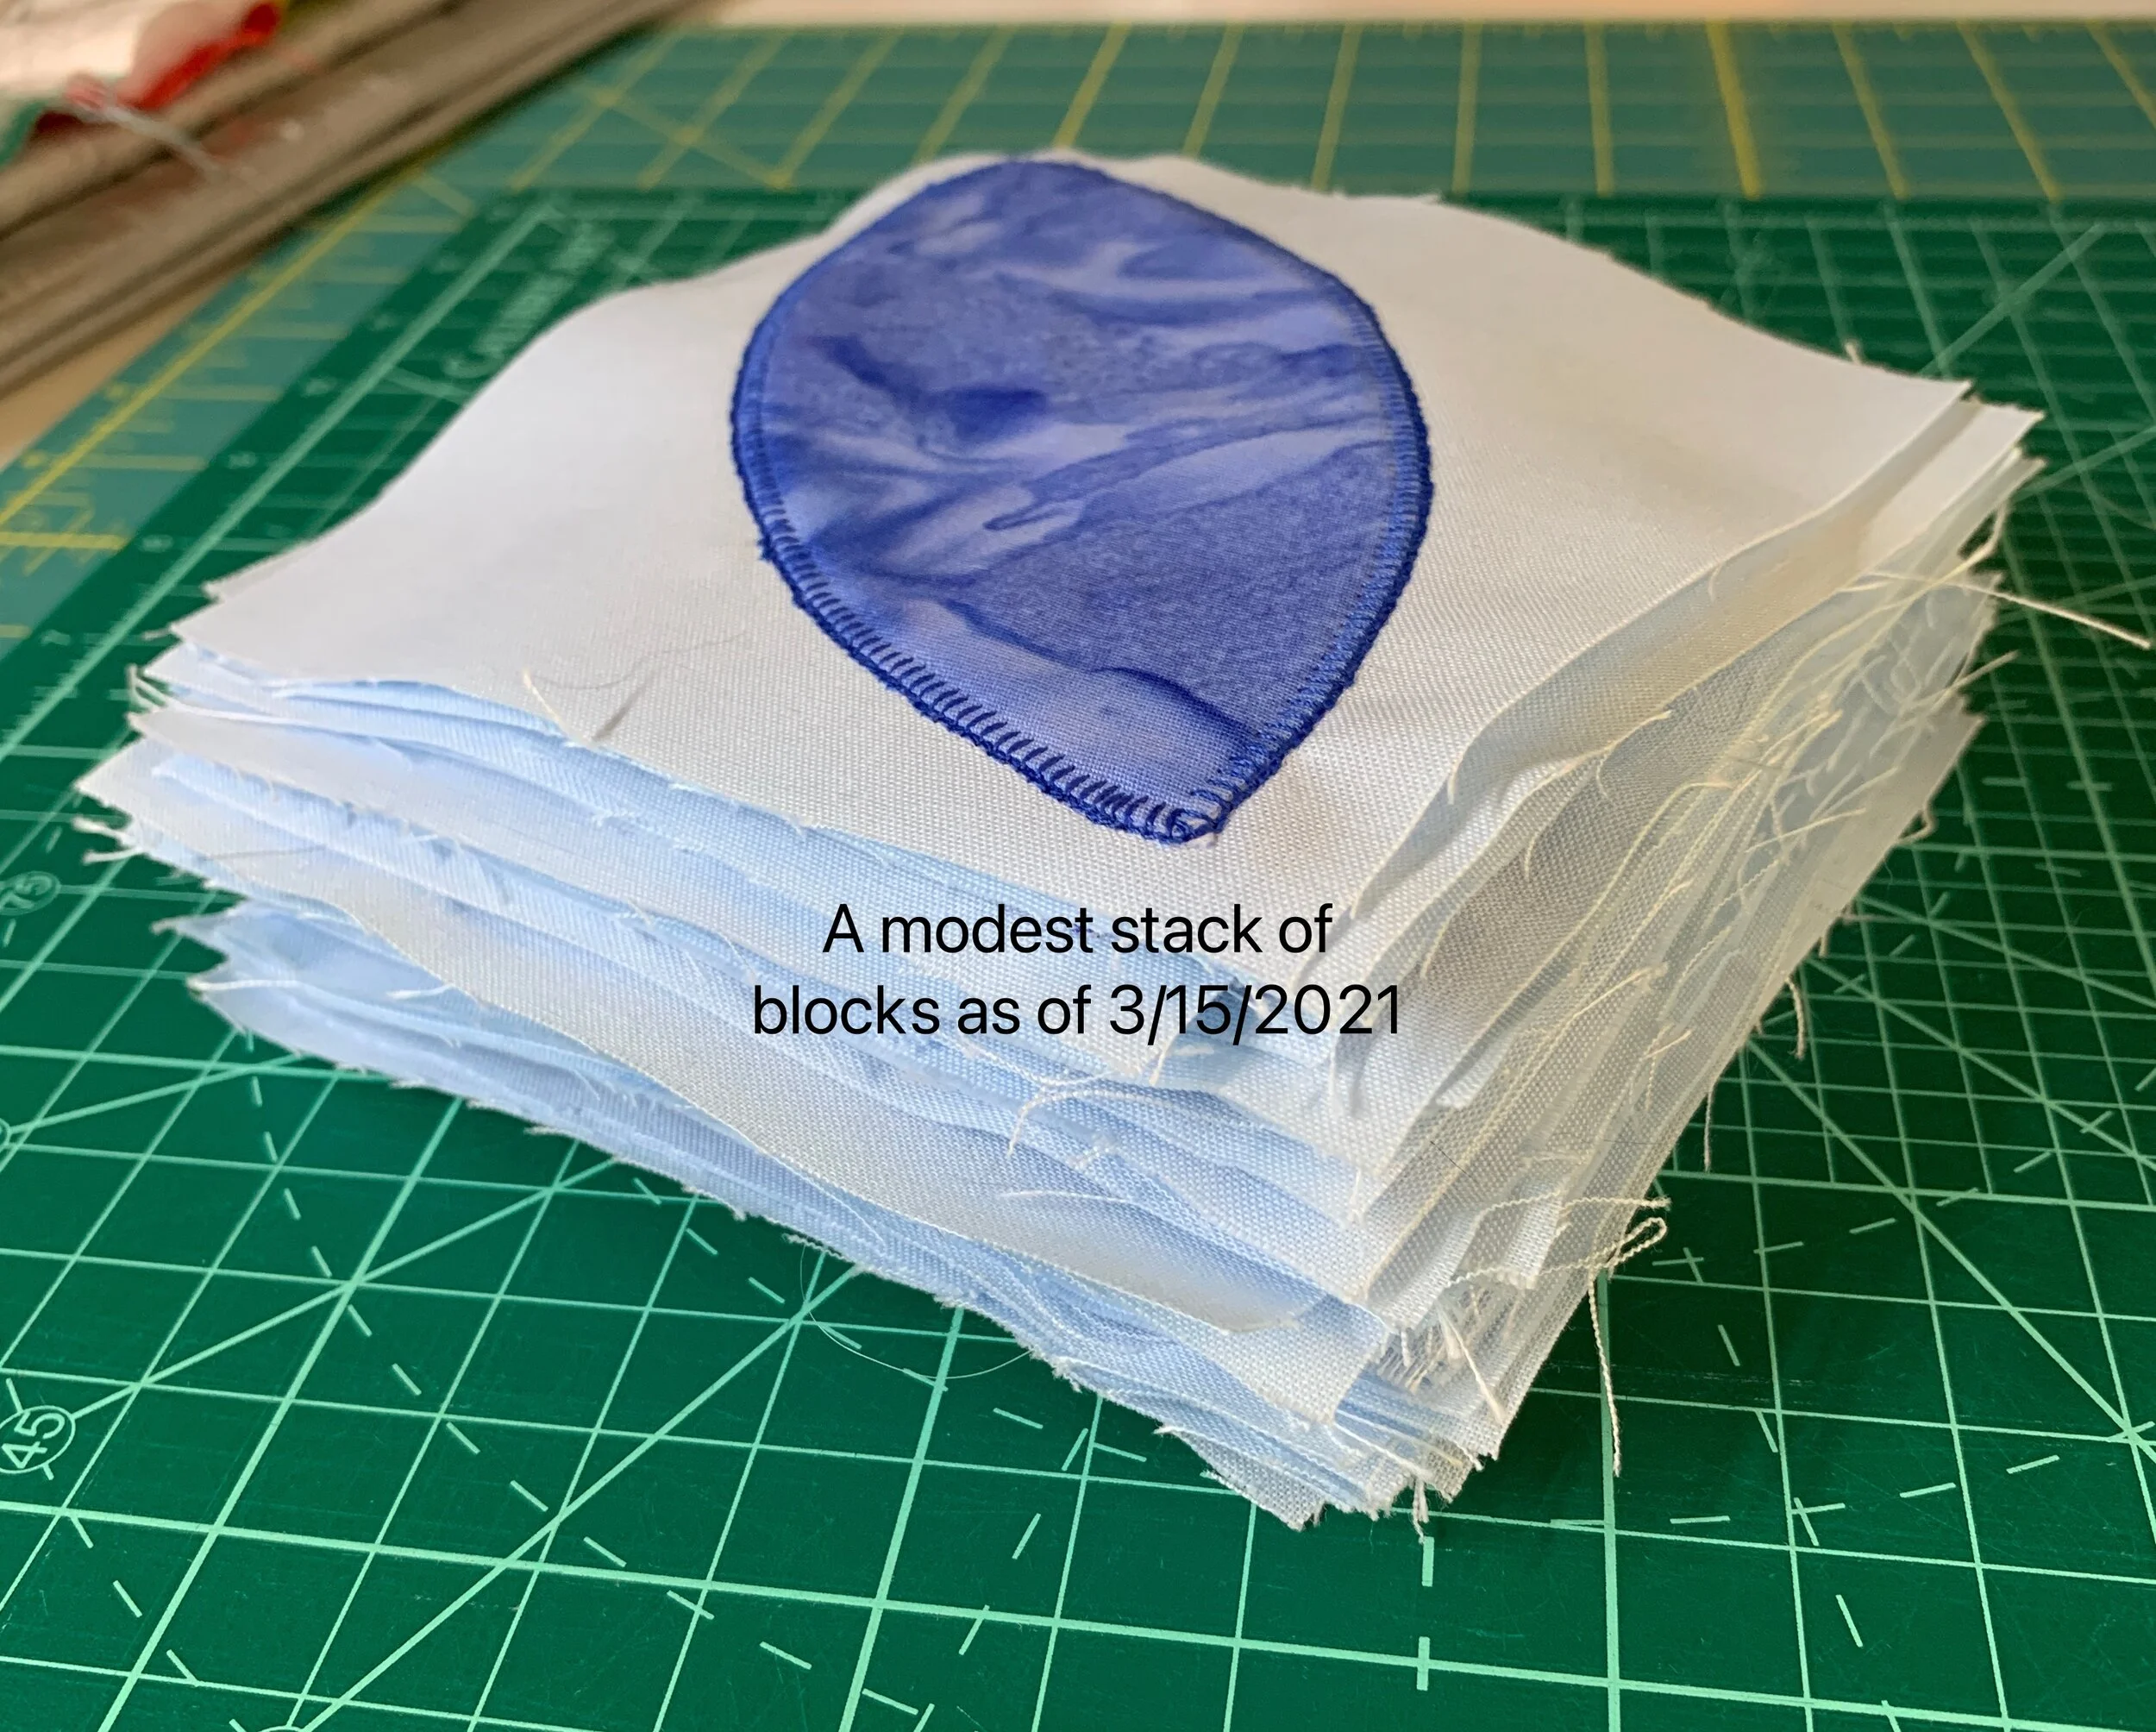
I’ve started working on a quilt that Mike has requested - more about that in a later post.

My fabric cutting skills have gotten better but not excellent.  I decided to buy a fabric cutting machine and after much research I decided on the Cricut Maker. It arrived as an early birthday/Christmas gift (isn’t he wonderful !!) on Friday Oct 16th.  I unboxed it this morning and it’s extremely well-built and easy to use.  I got the Maker connected via Bluetooth to my Mac easily and following the lead of a brief tutorial, cut a circle and a square with no difficulty at all.  

You can see the Maker here. I got the mint green which looks nice in my sewing room.

I’m going to do a mini quilt to get to know the machine and Cricut’s design space where you lay out the components of the block(s) to be cut. Riley Blake, a fabric manufacturer, has partnered with Cricut and several quilt designers to create simple designs and quilt kits that use the Maker to cut the fabric.  I might use one of their kits. You can see the quilt designs here. Or maybe I’ll use a pattern I already have and do my own thing.

Looking beyond that, here are some thoughts I have for my next quilts (the images below were snipped from the Web and I have no idea how to make them the same size 😞 ):

  • Mike’s requested quilt - picture to come in a later post

  • A bookcase quilt (see picture below) - I stumbled into a blog post somewhere about bookcase quilts, which were a craze about 10 years ago. I looked at many images dismissively until —— I was gobsmacked when I saw this one. I want to make something similar to this.

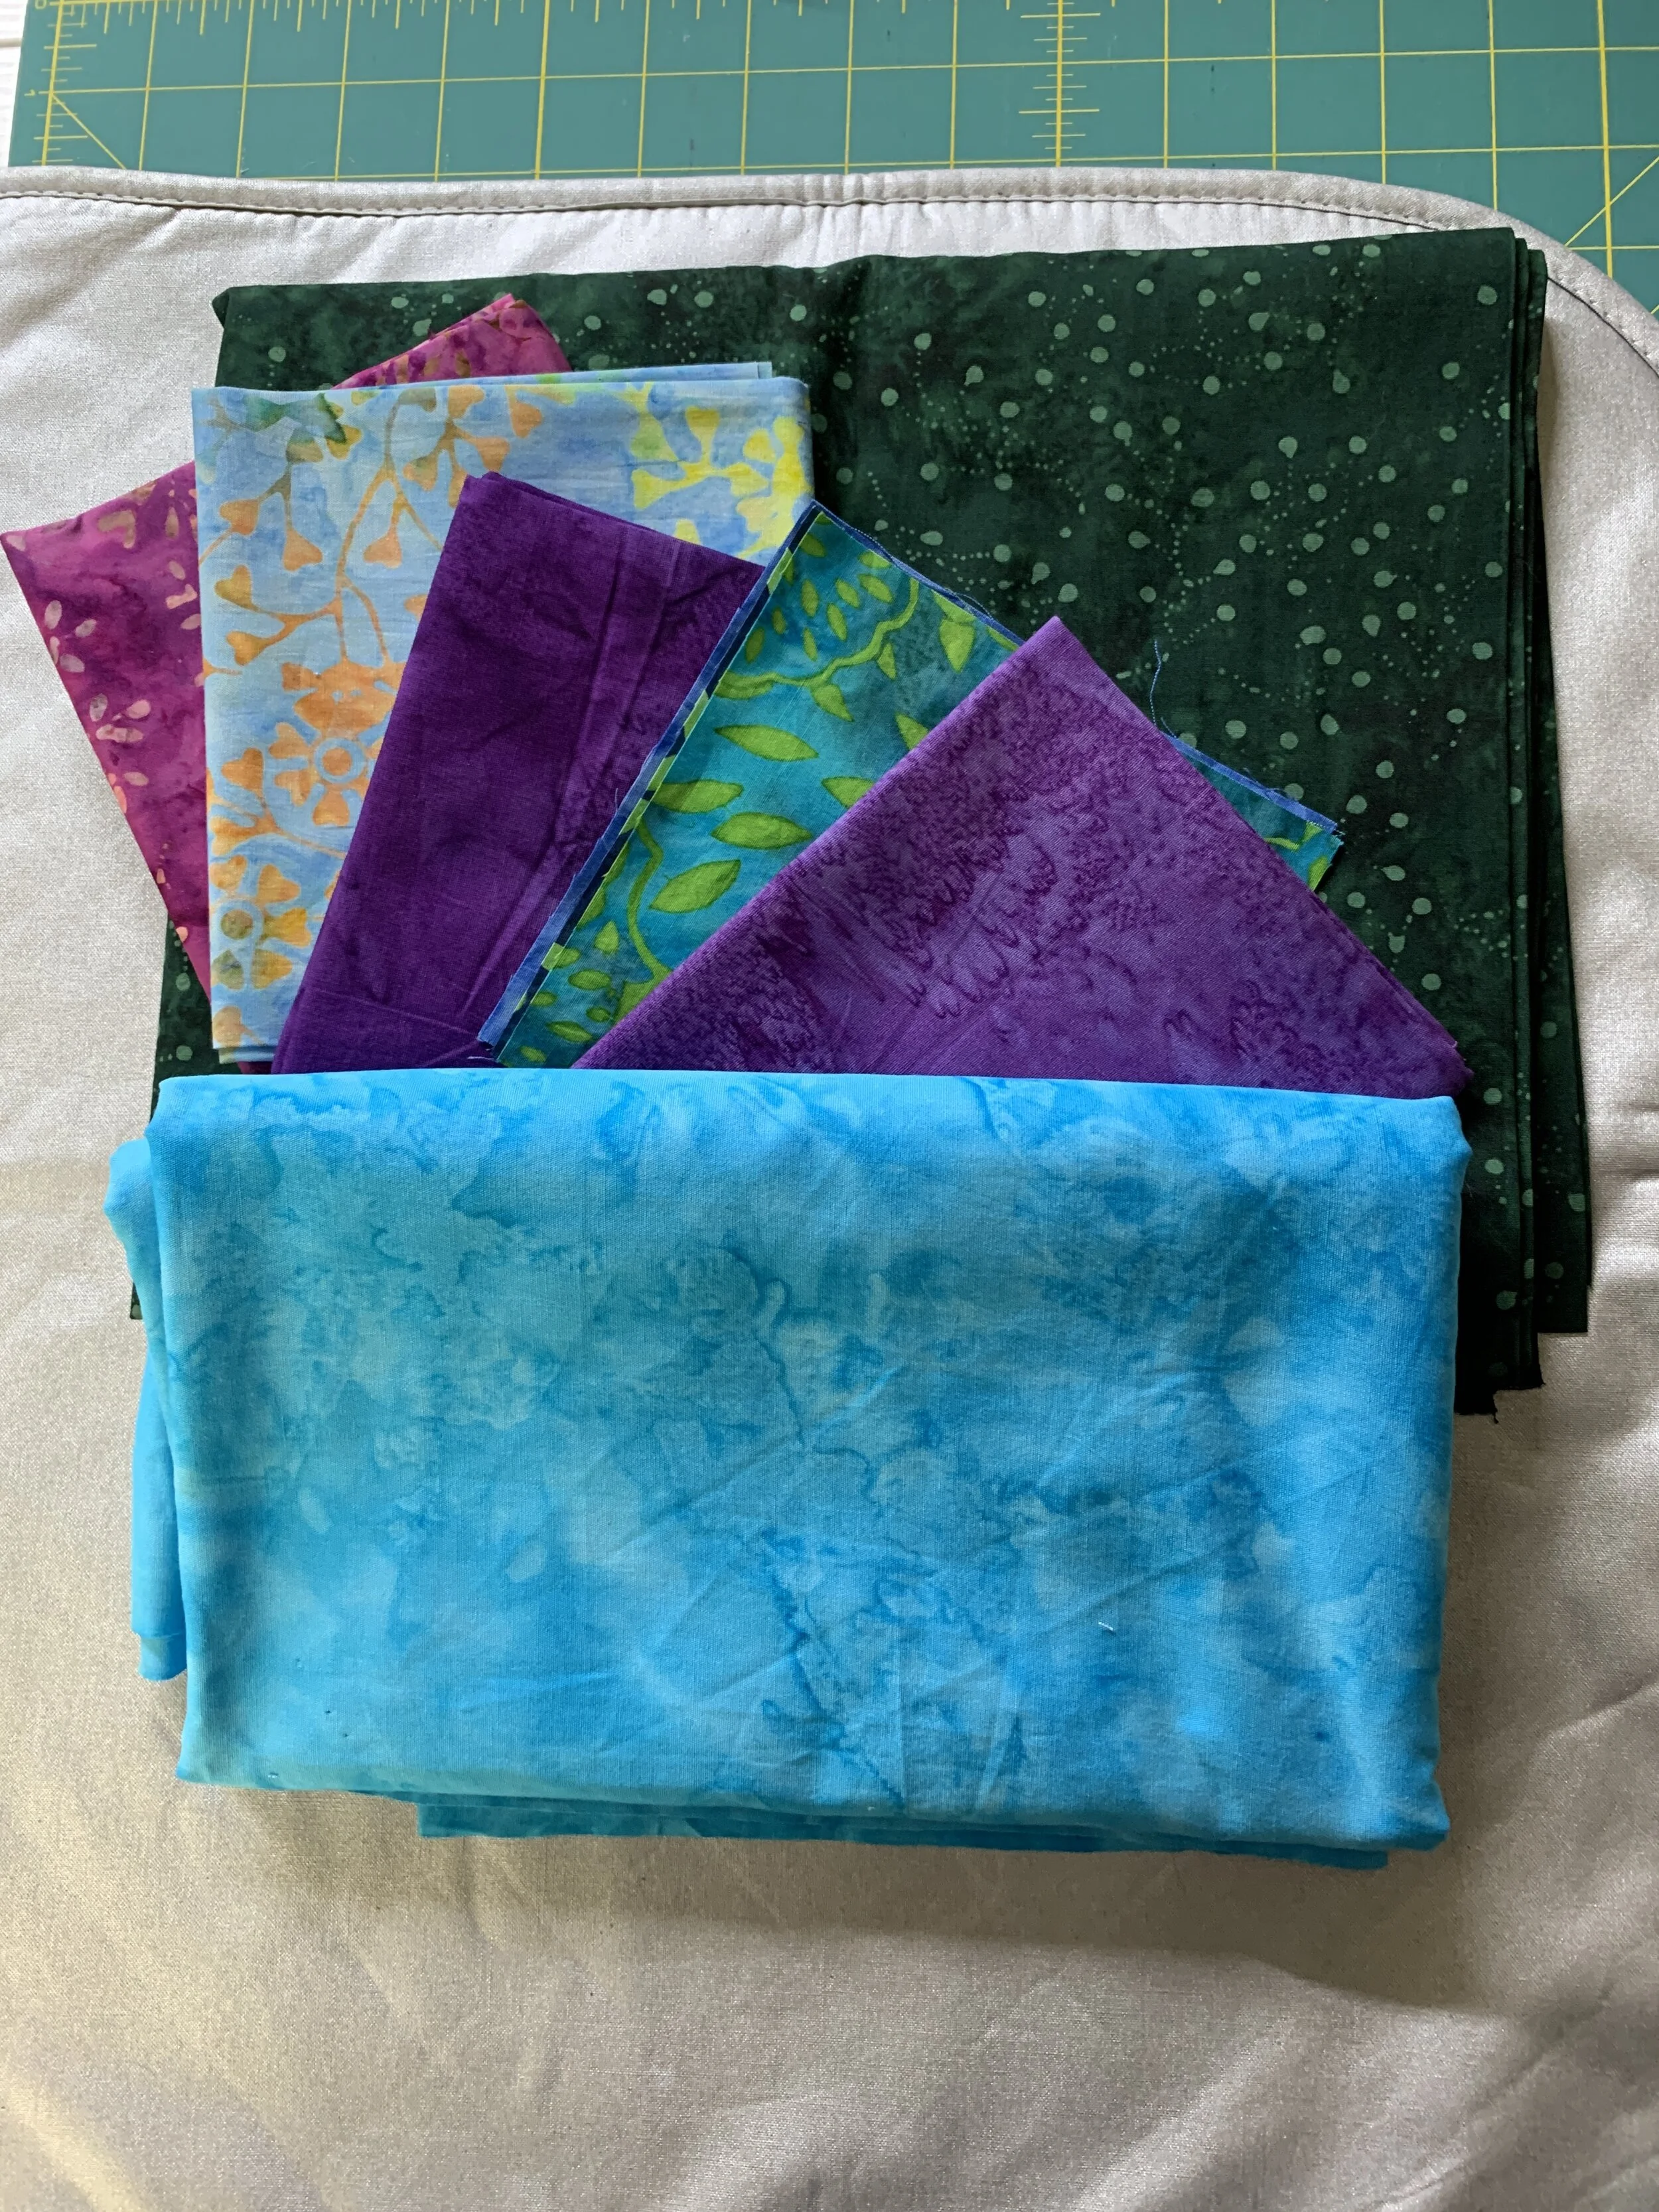
  • A wonky butterfly quilt (see picture below) - I already bought the pattern and will, for the first time, use batik fabric. Batik fabric never called to me until I saw this block and a light shined in my brain.

Bookcase Quilt.png
Wonky Butterfly.png

Christmas Quilt

This project is moving along rapidly. I used a “jelly roll” which is a collection of related fabric that is 2.5” wide by 42” long. Cutting and piecing was a breeze. I wanted to try something new for the quilting pattern so I used a practice block to create wavy lines. Once I got the rhythm down, I was able to complete the quilting in about 2 1/2 days. I’m pretty pleased with the outcome. Next I’ll bind the quilt with the red fabric on the left.

Christmas Quilt 1 10-1-2020.jpg