Complete: Dutch Wax Fabric + Mystery Quilt + Moda Love

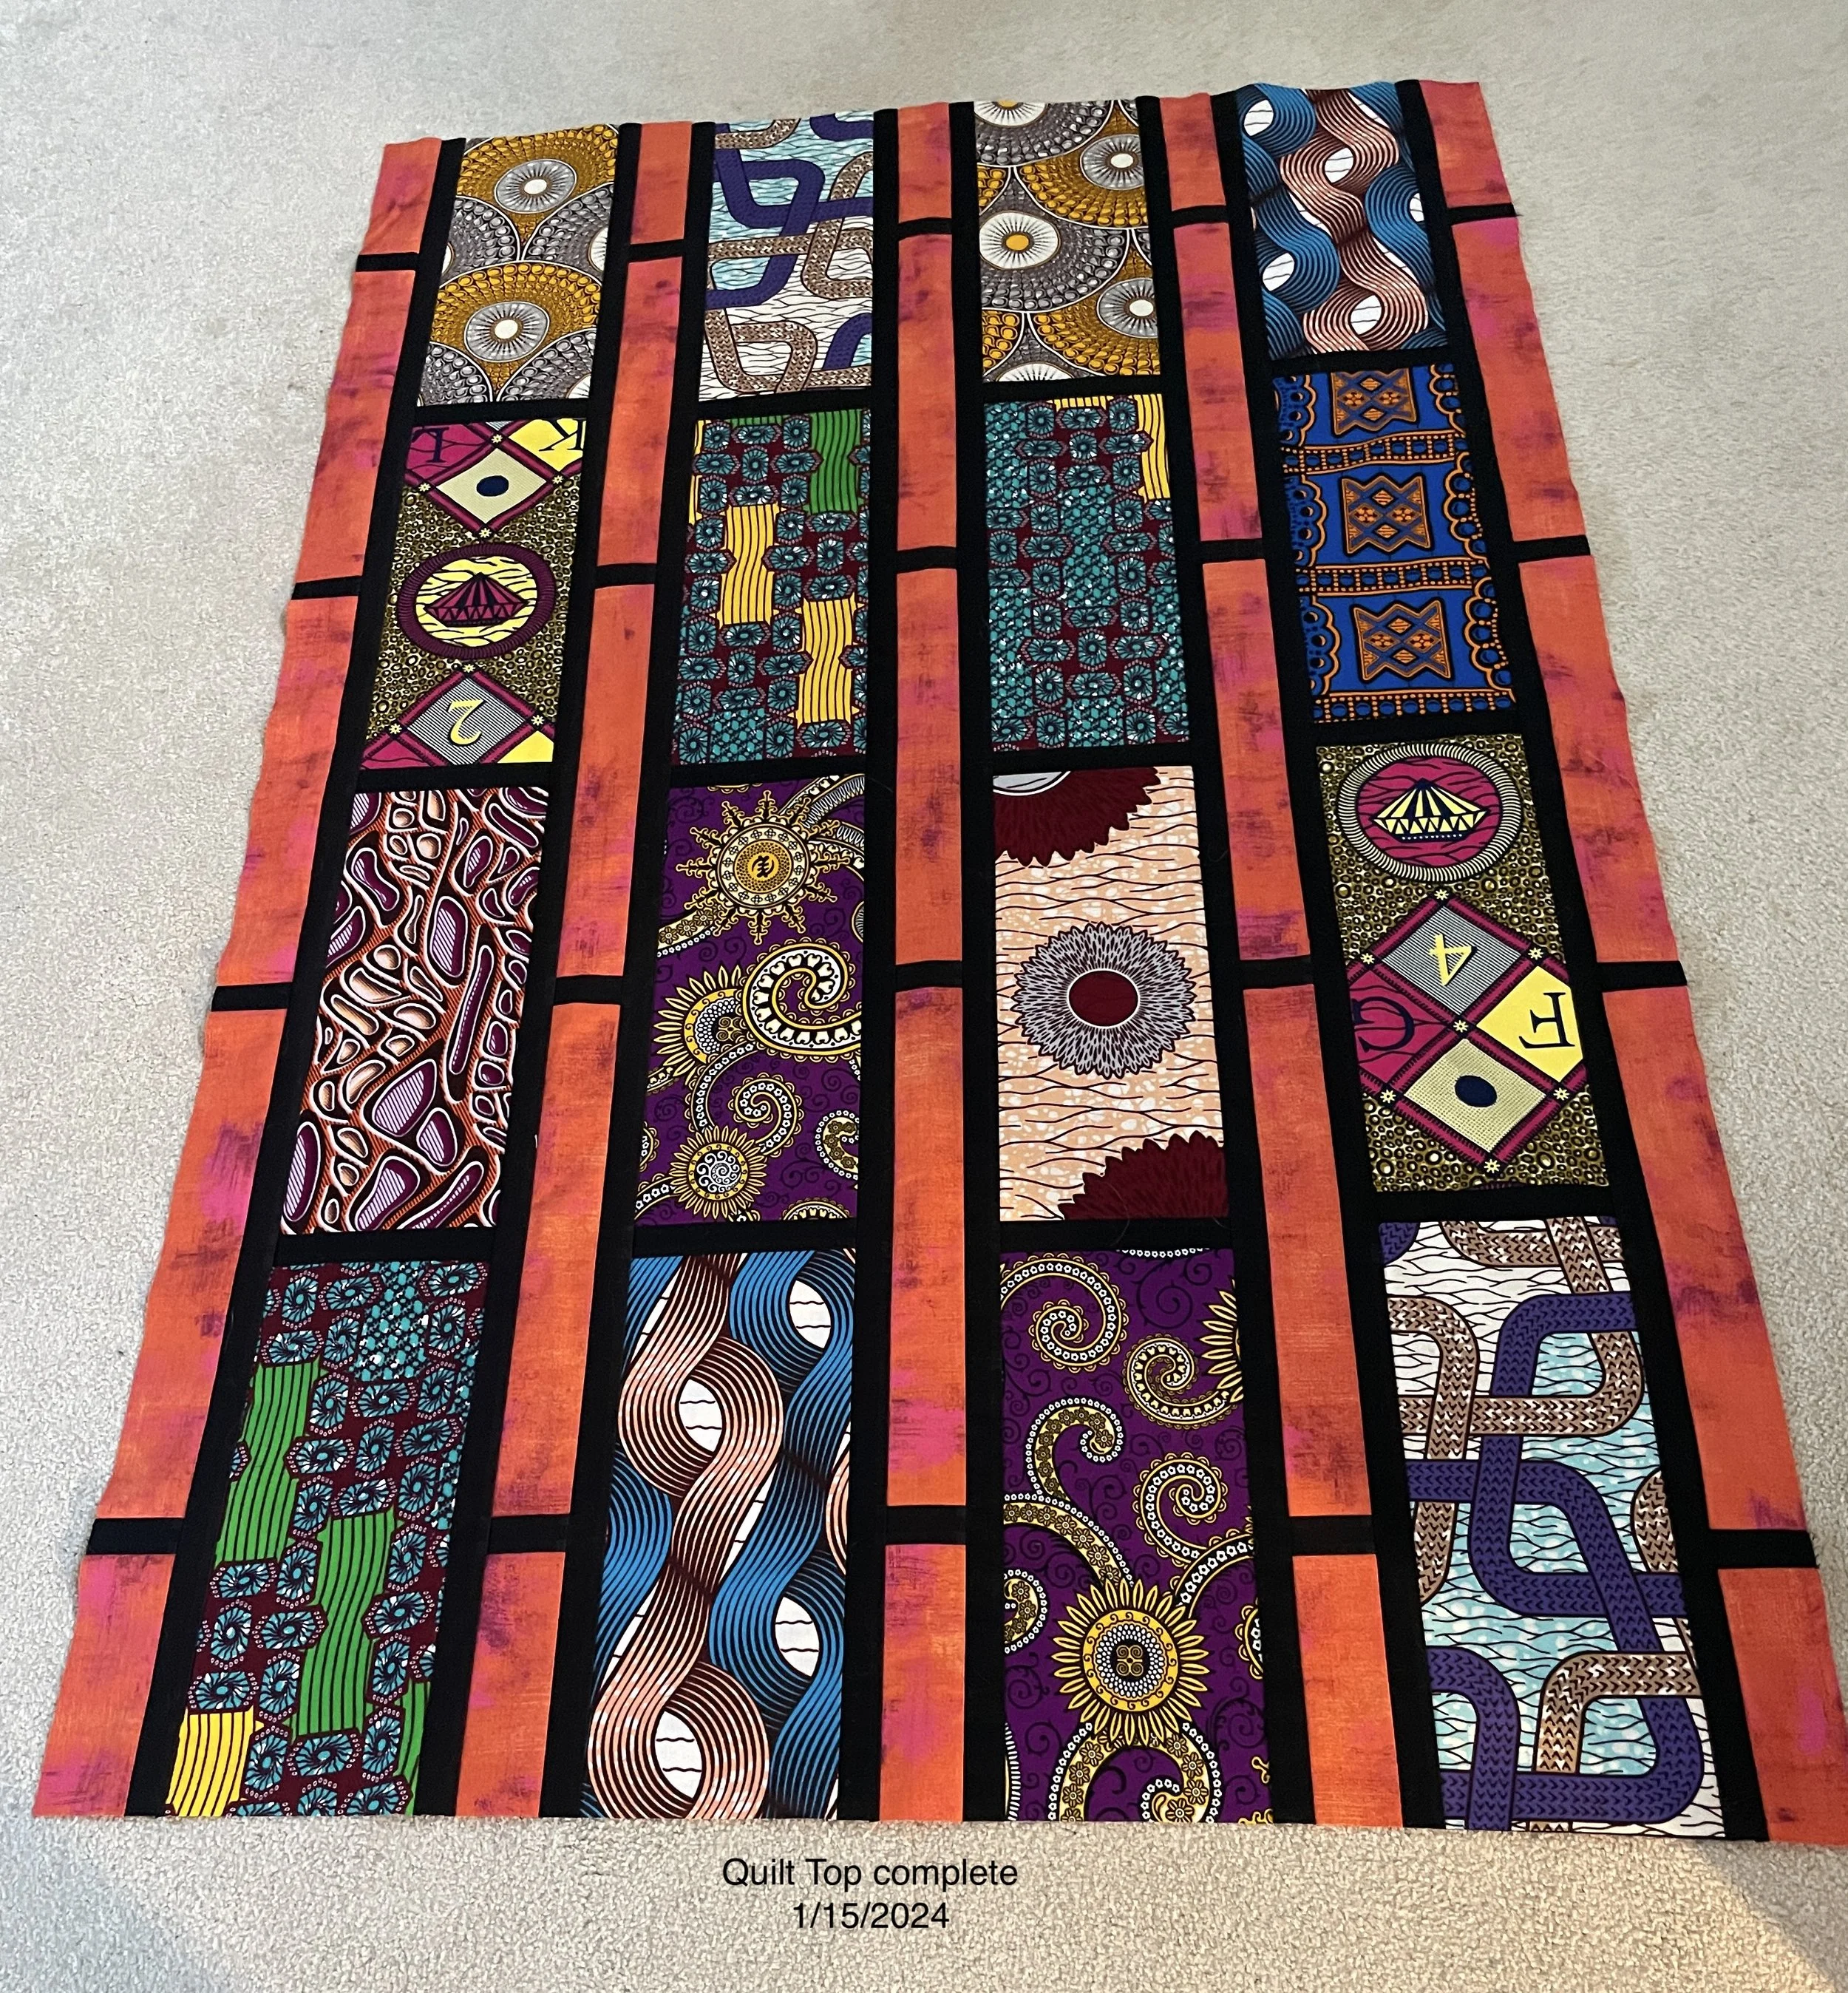
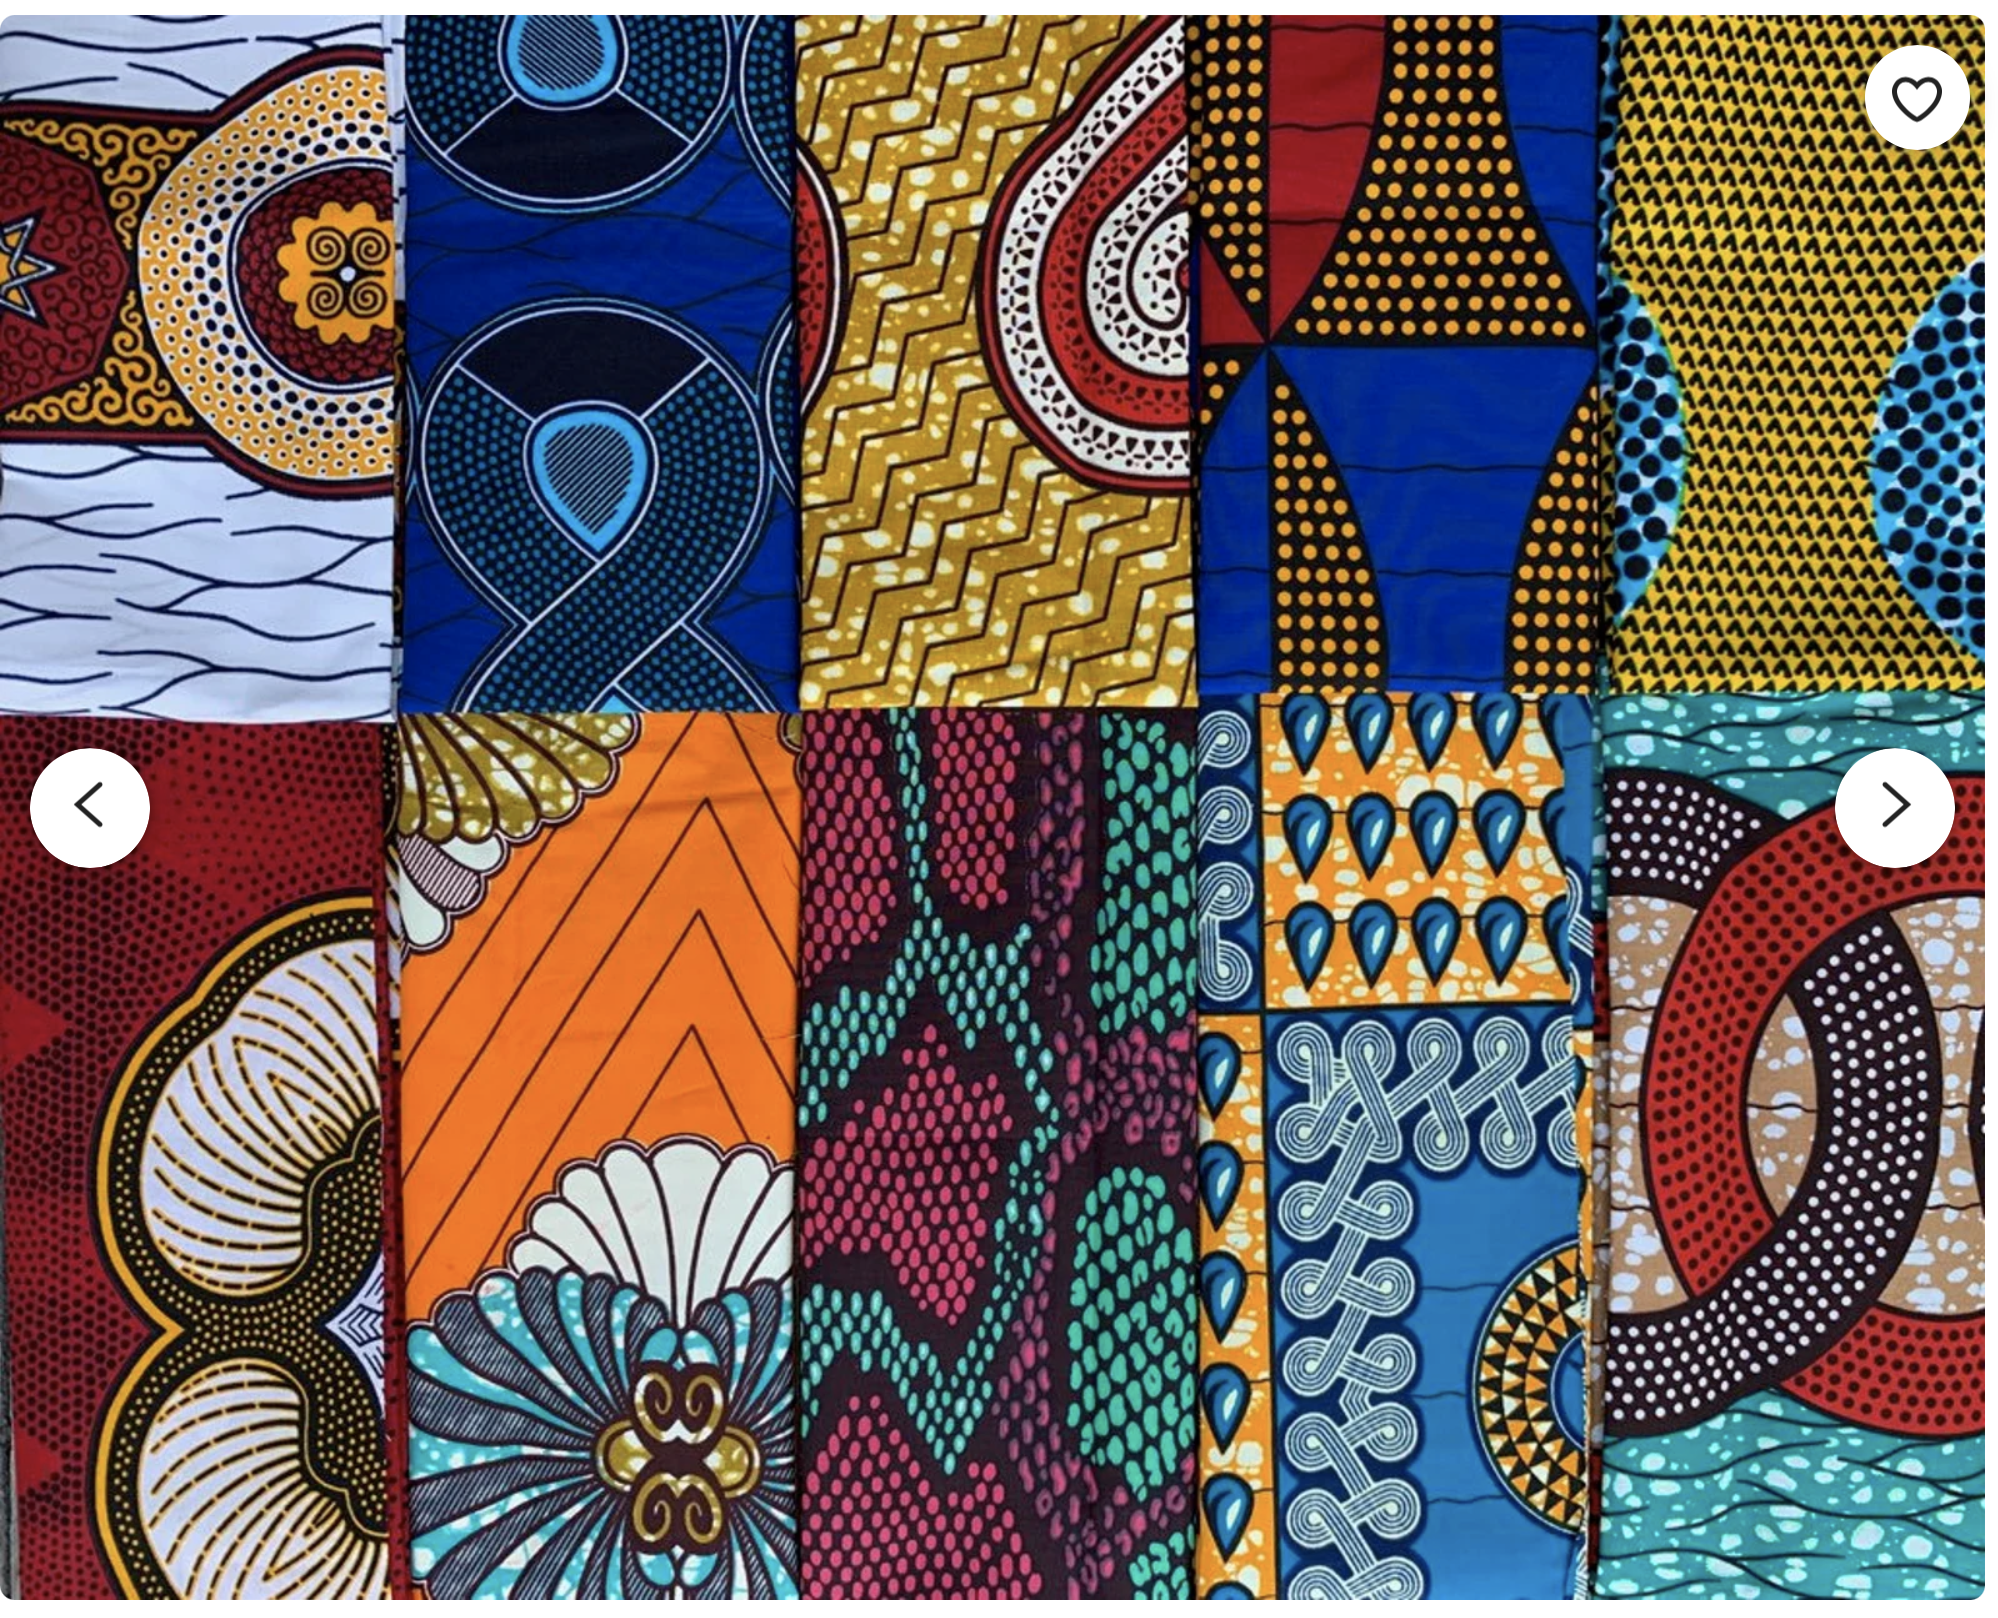
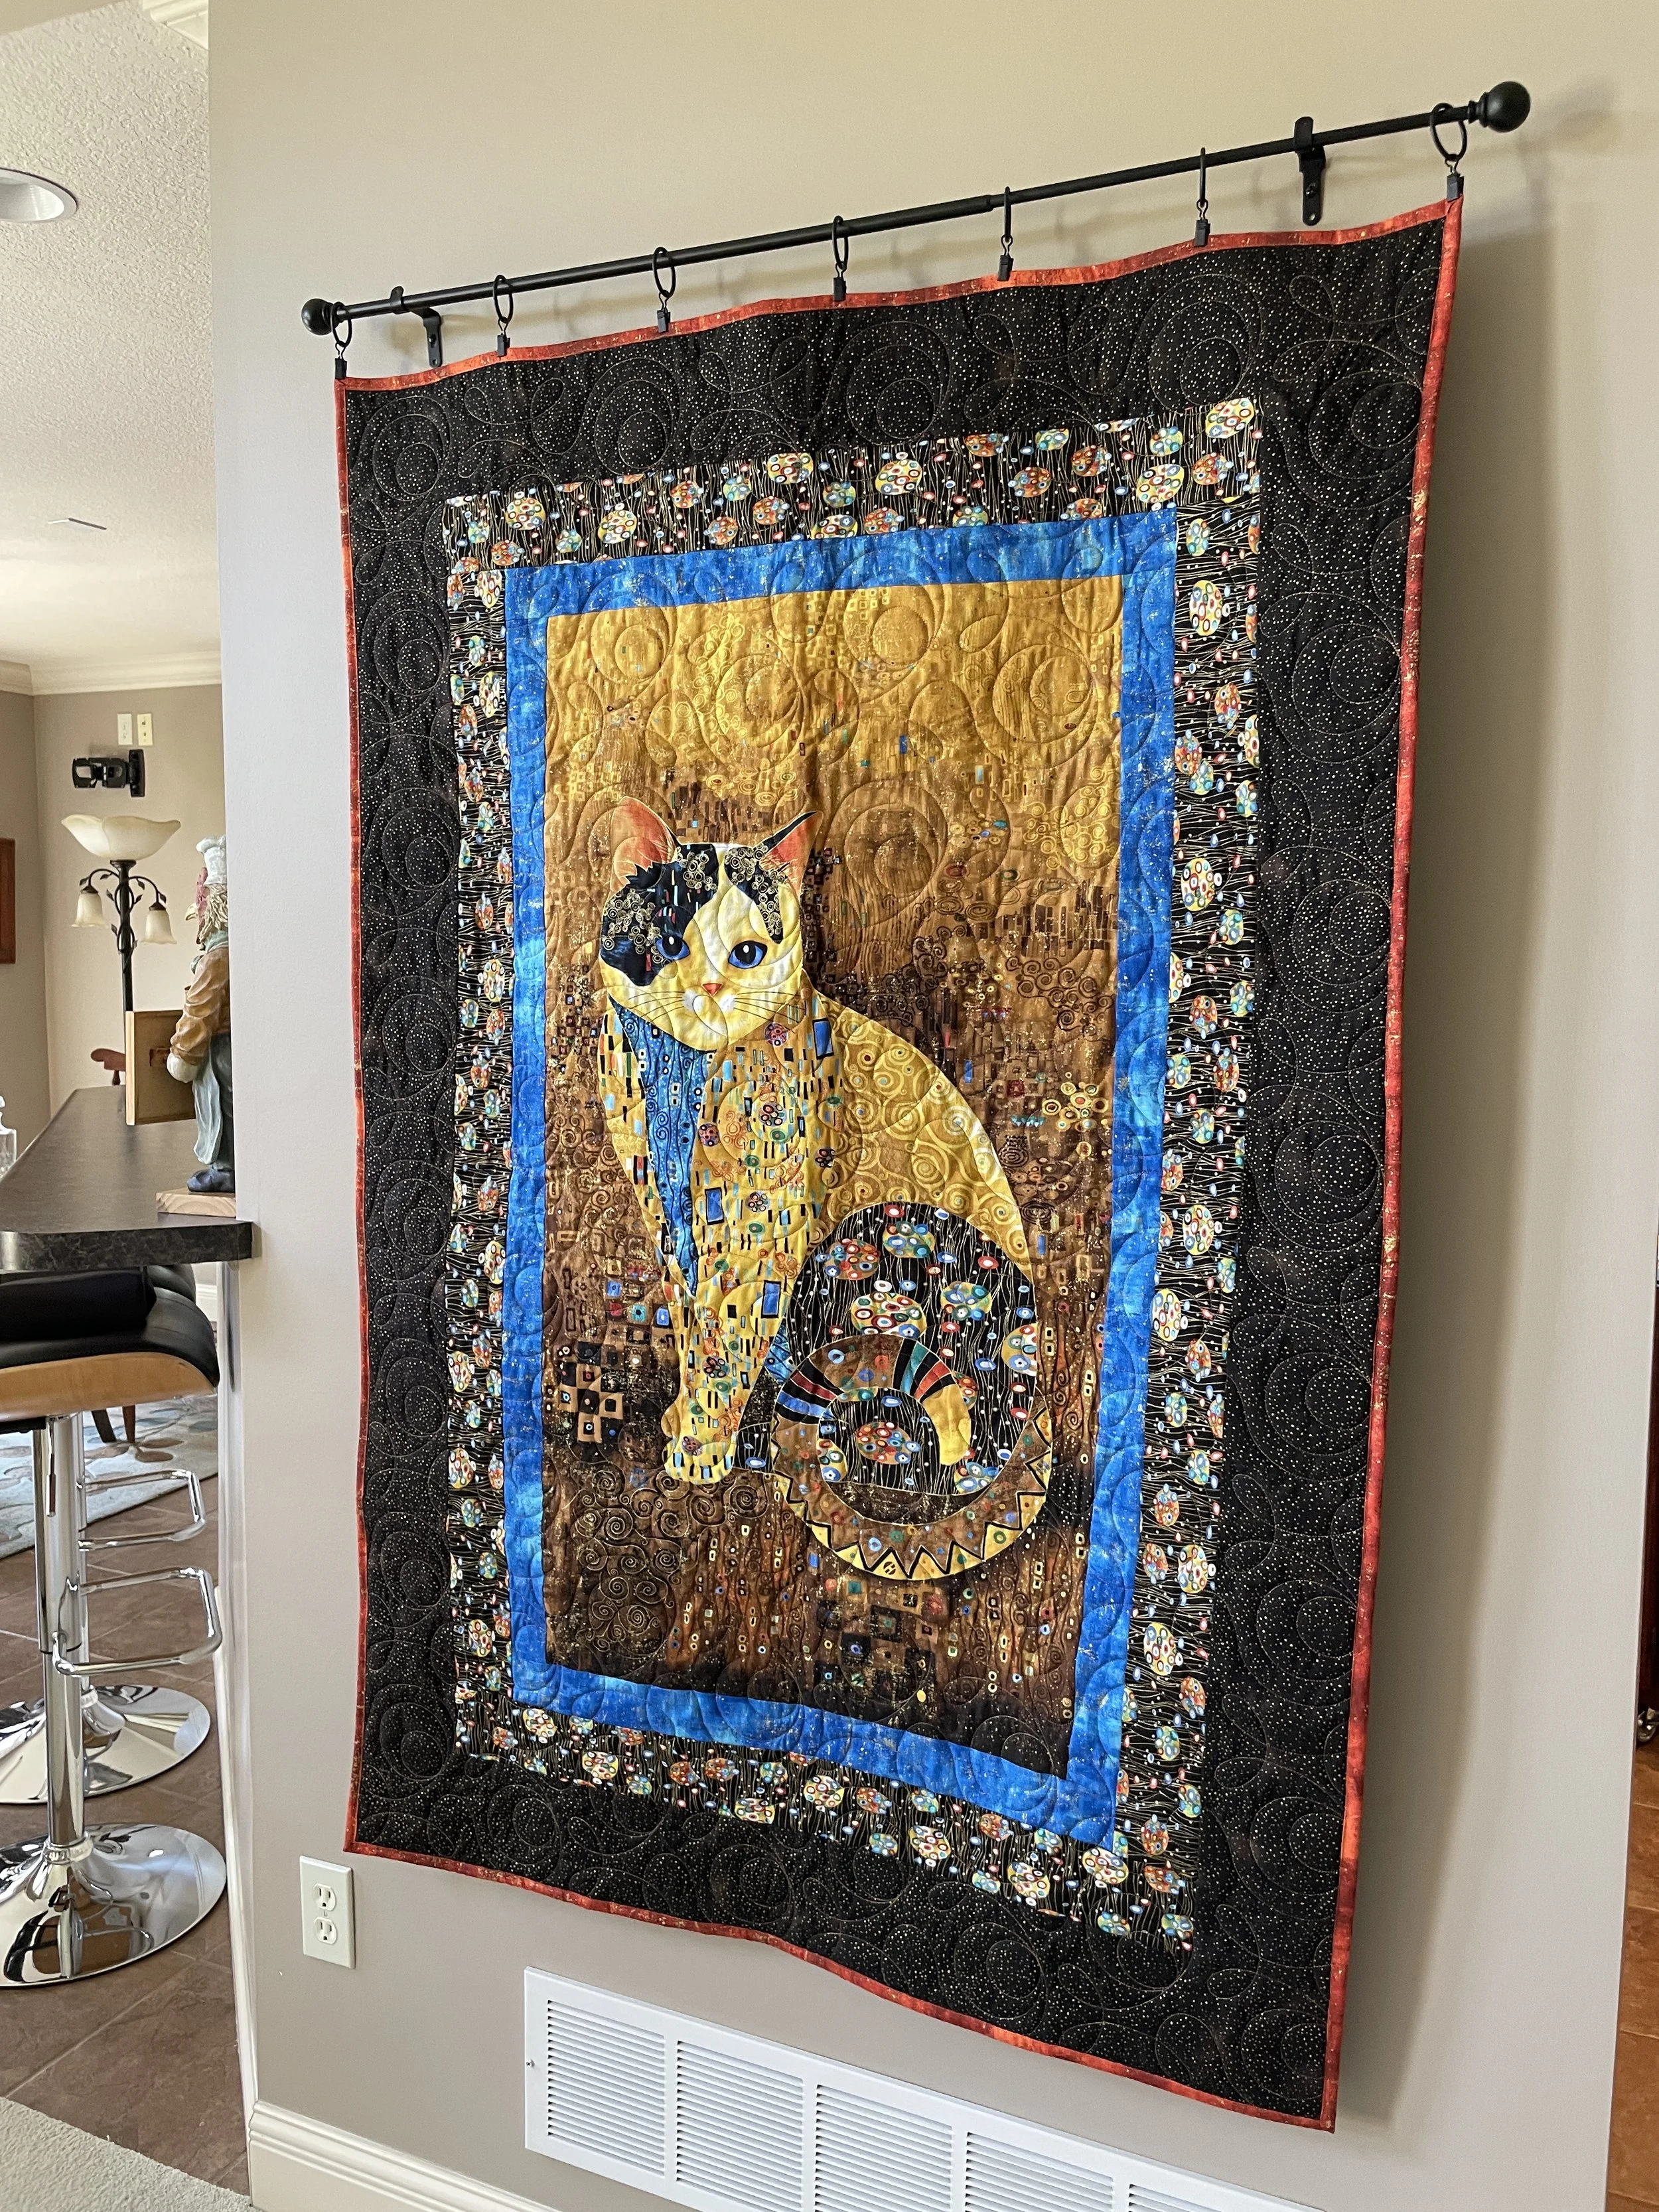
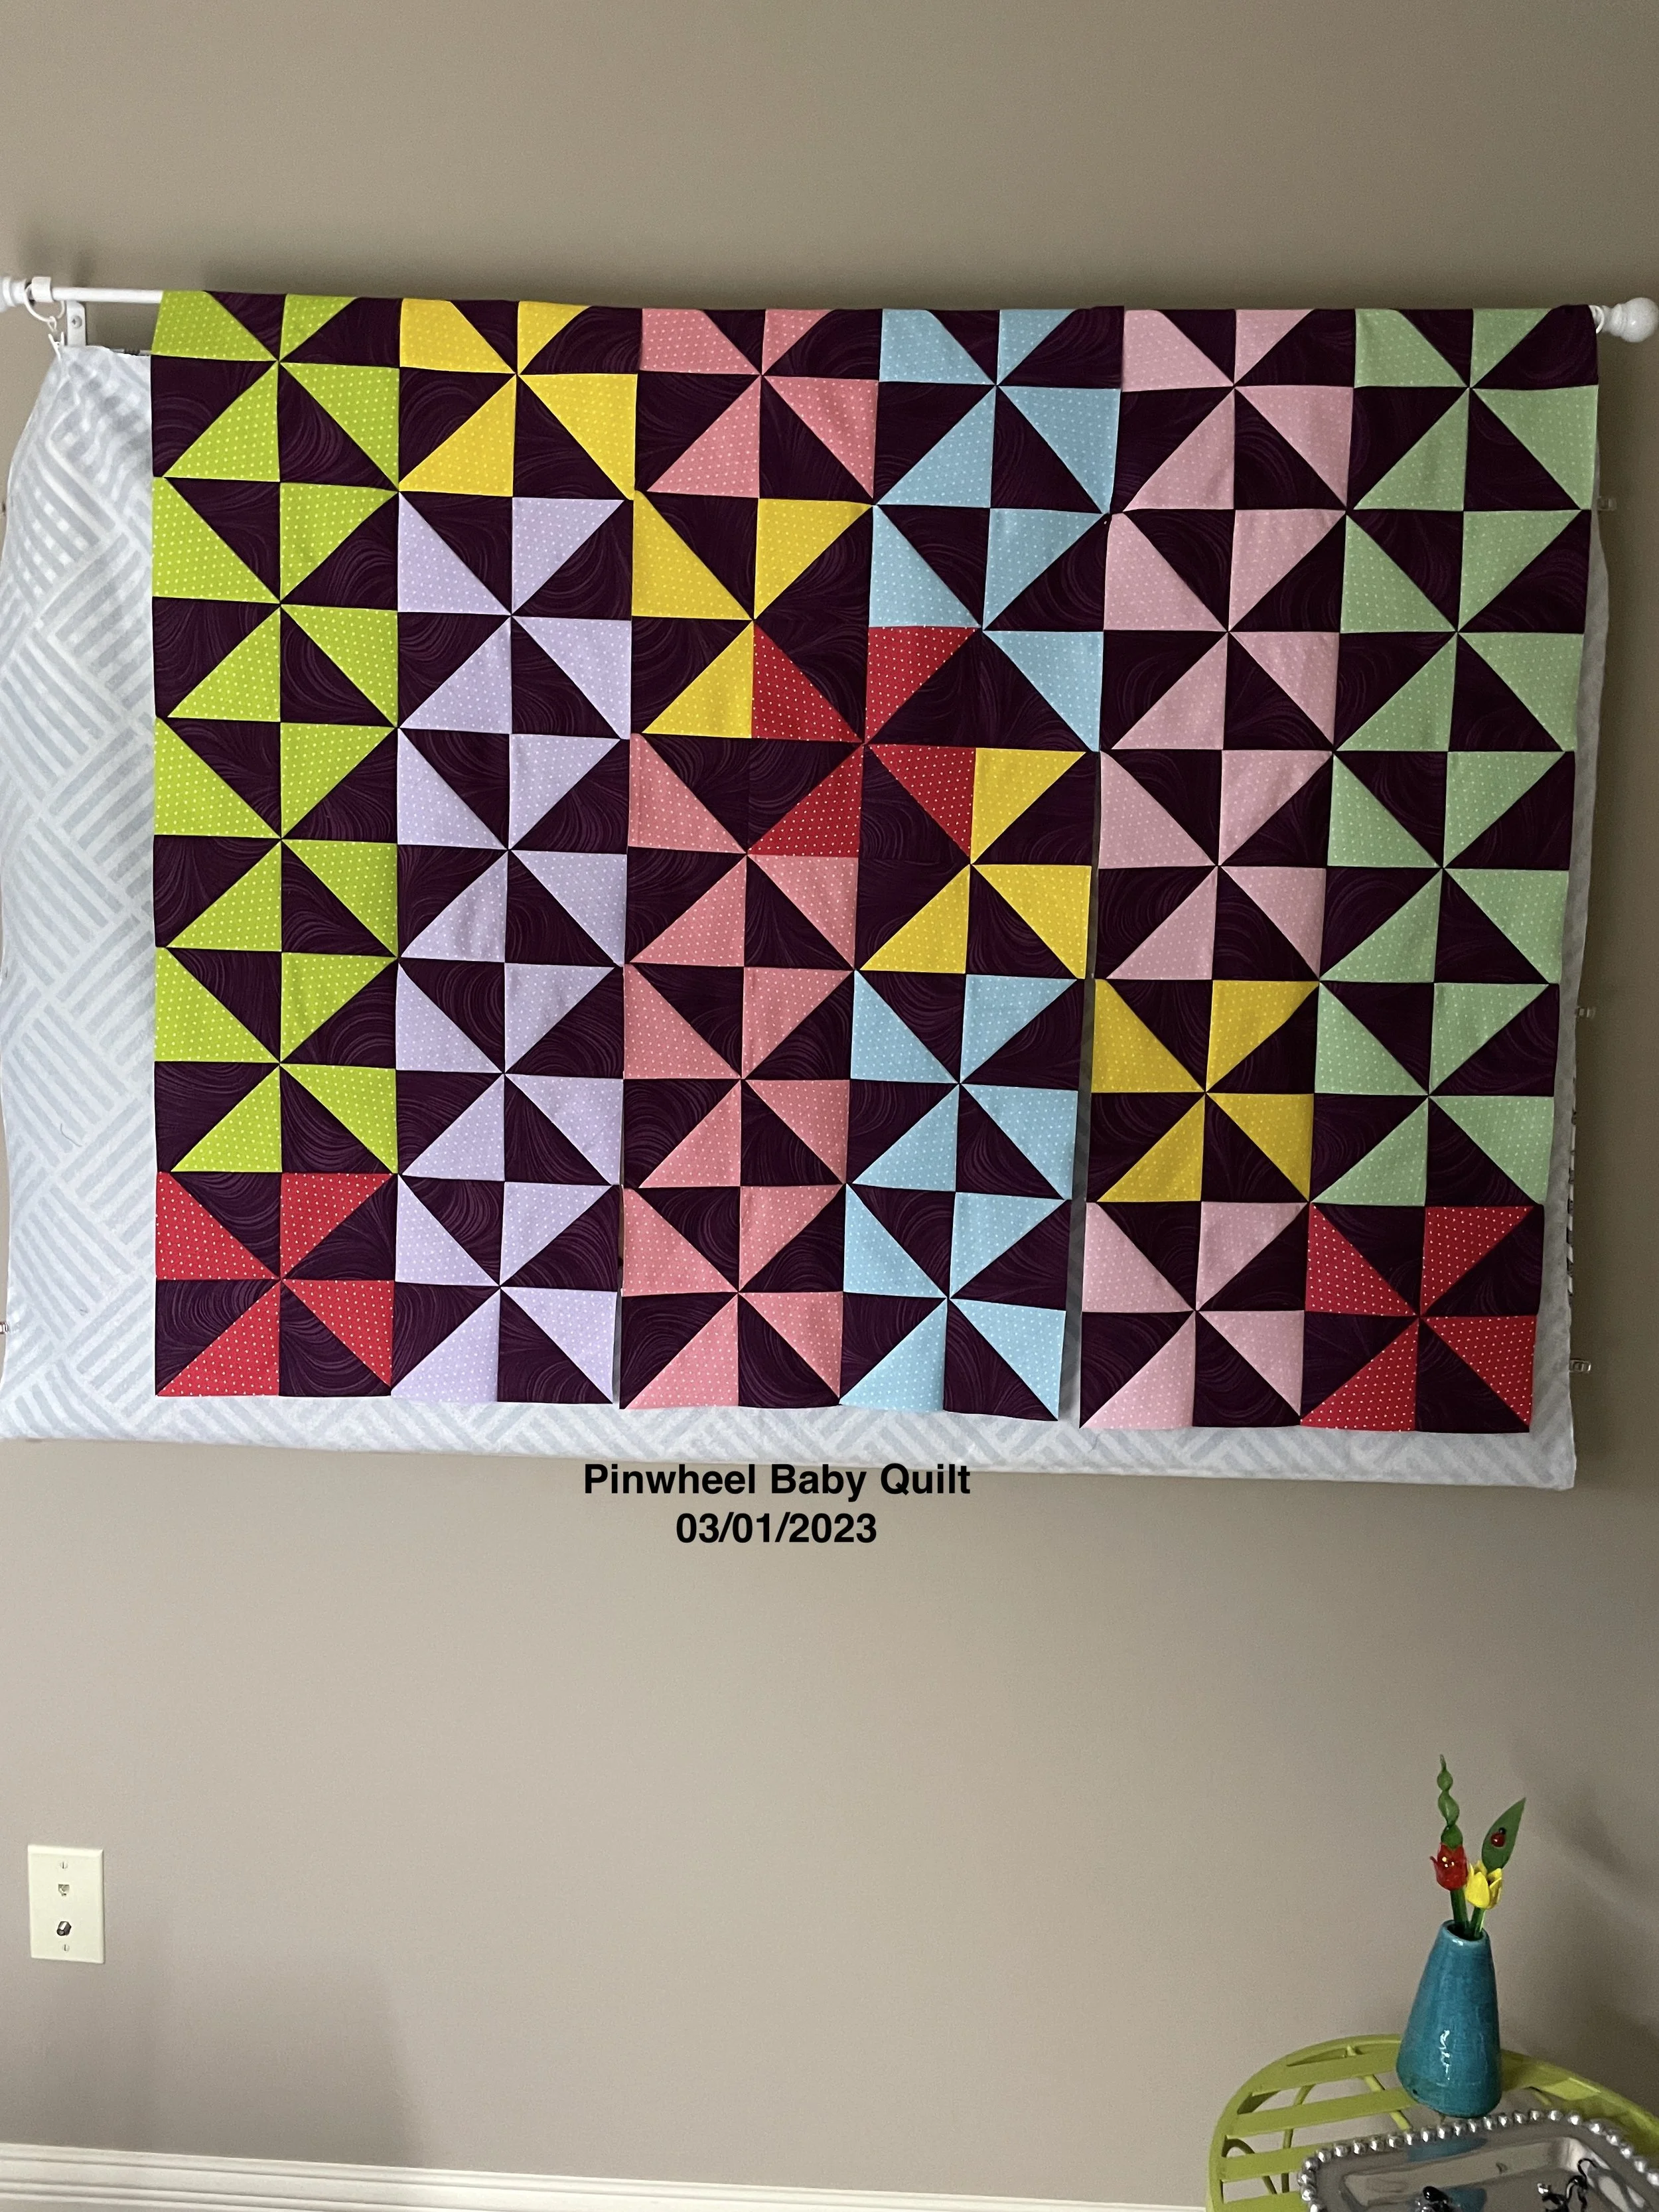
I finished the Dutch Wax Fabric quilt and I think it’s a real winner !!

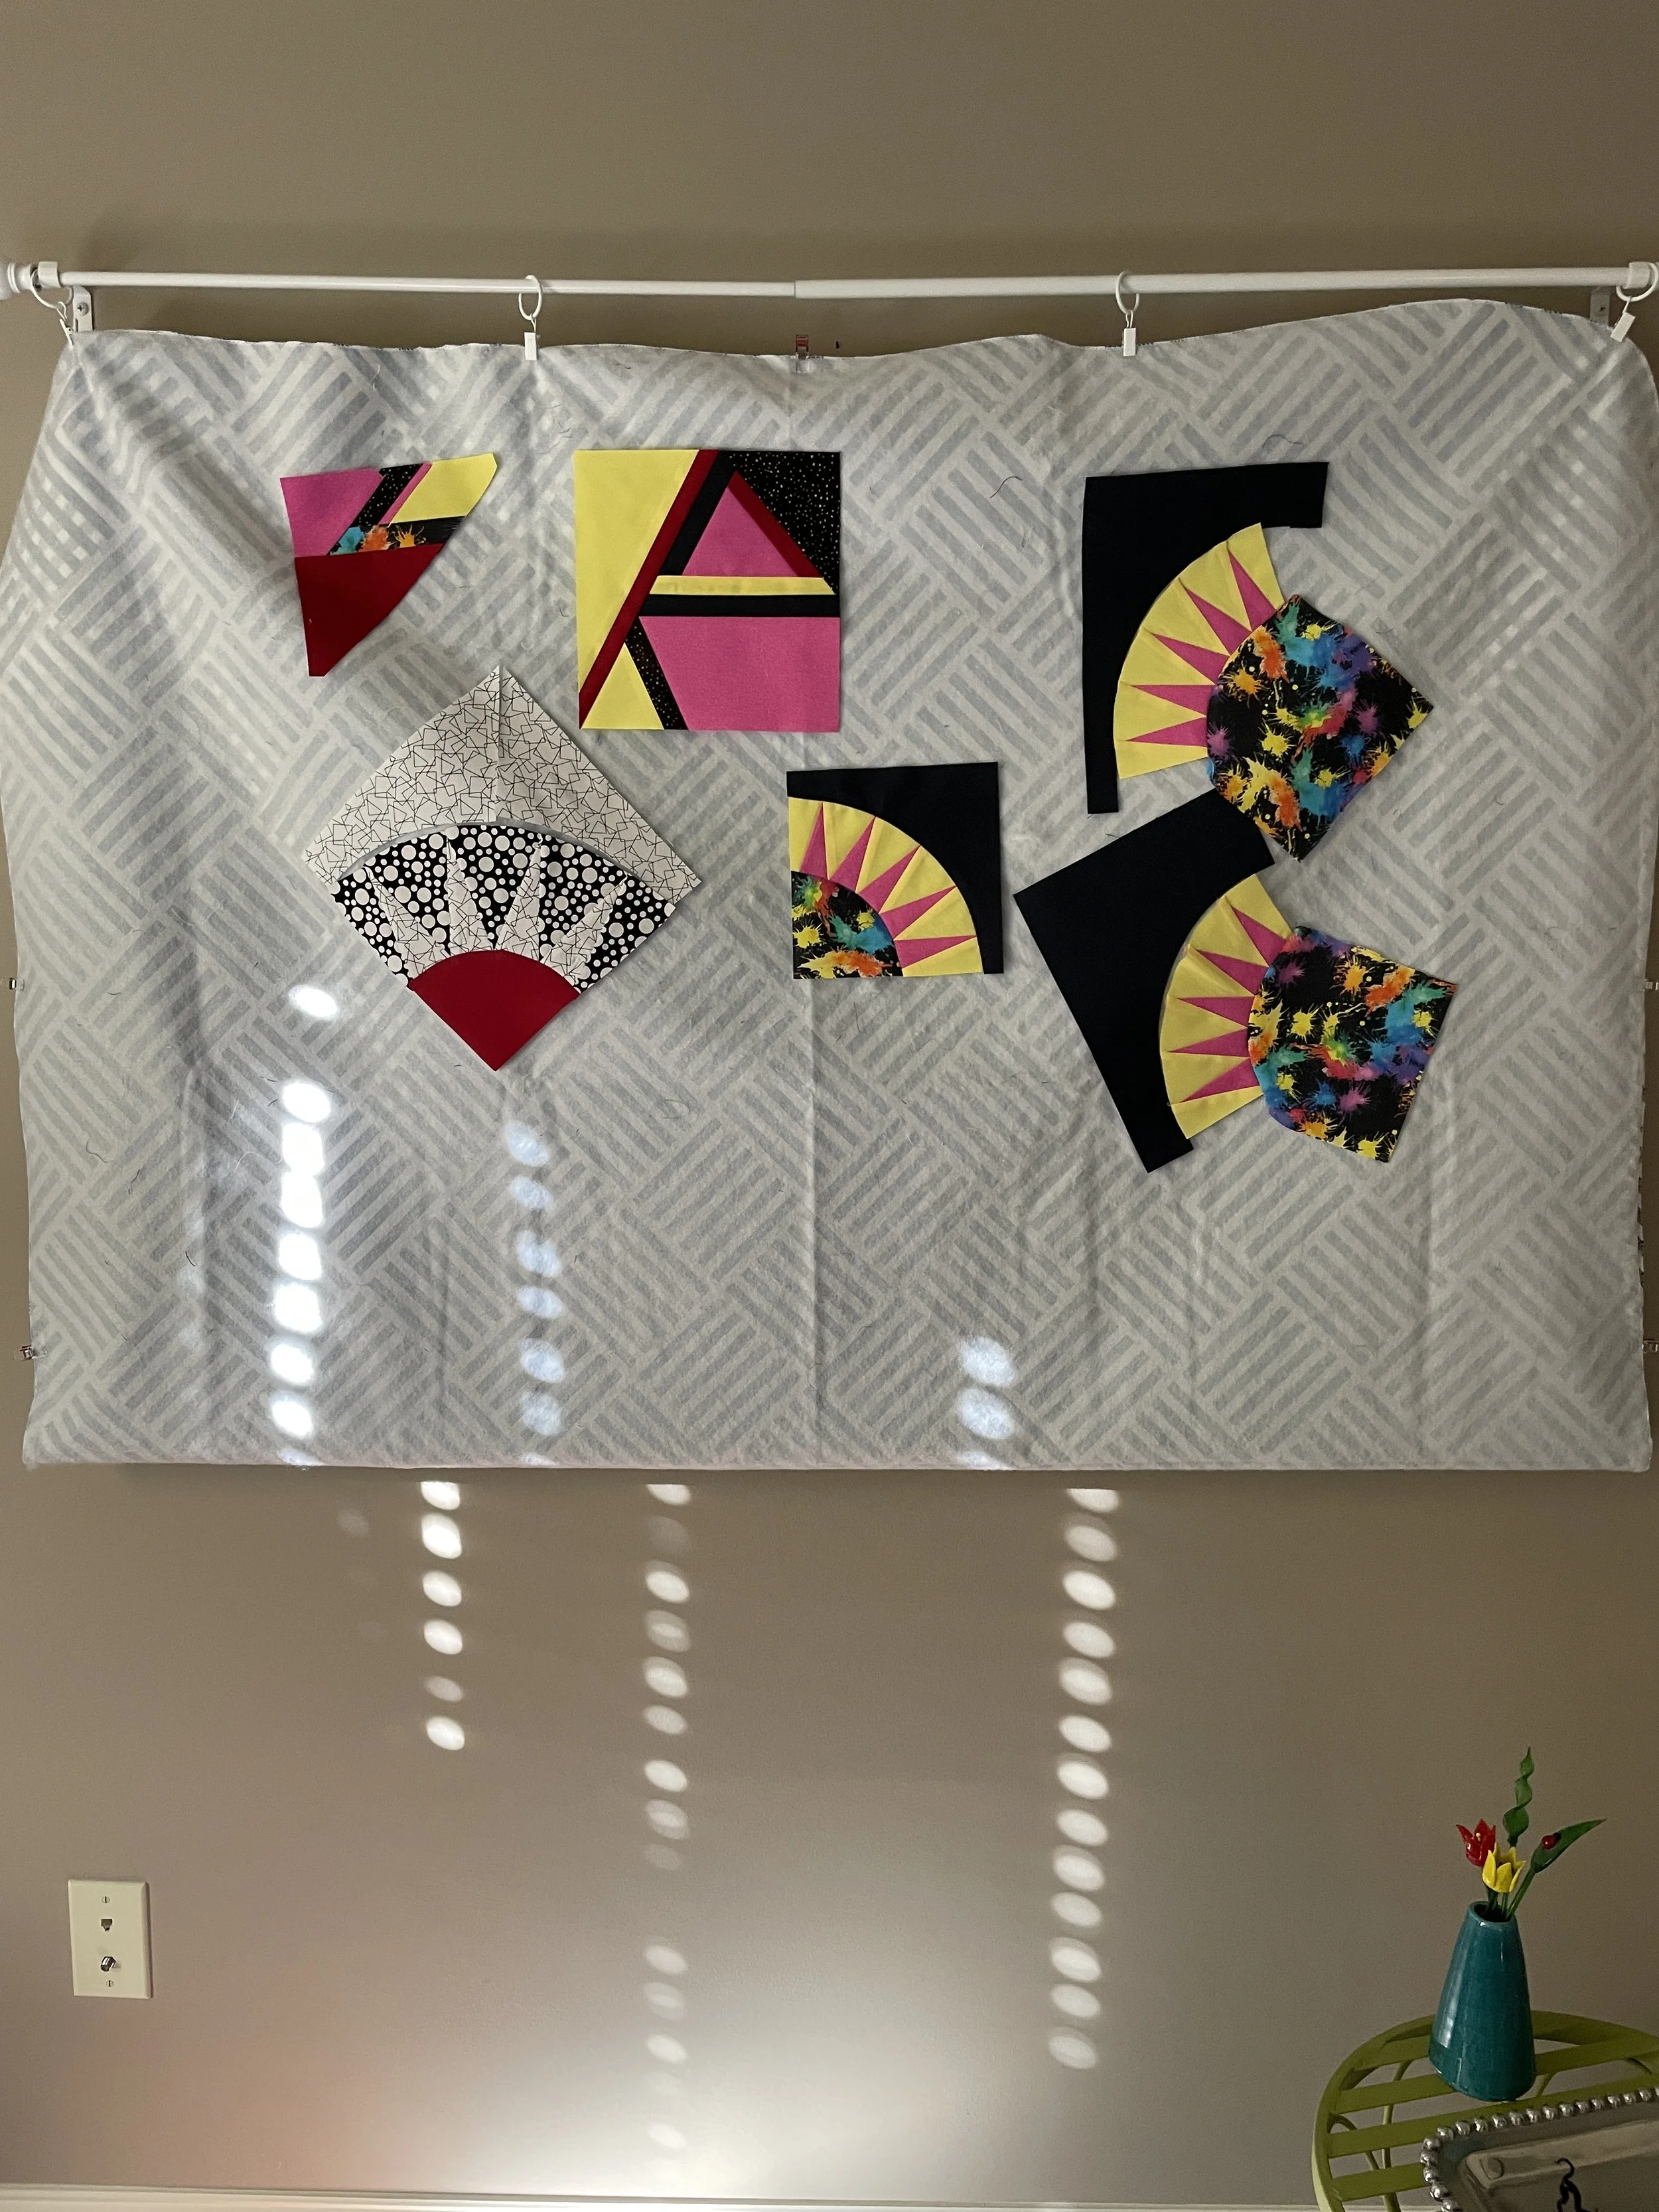
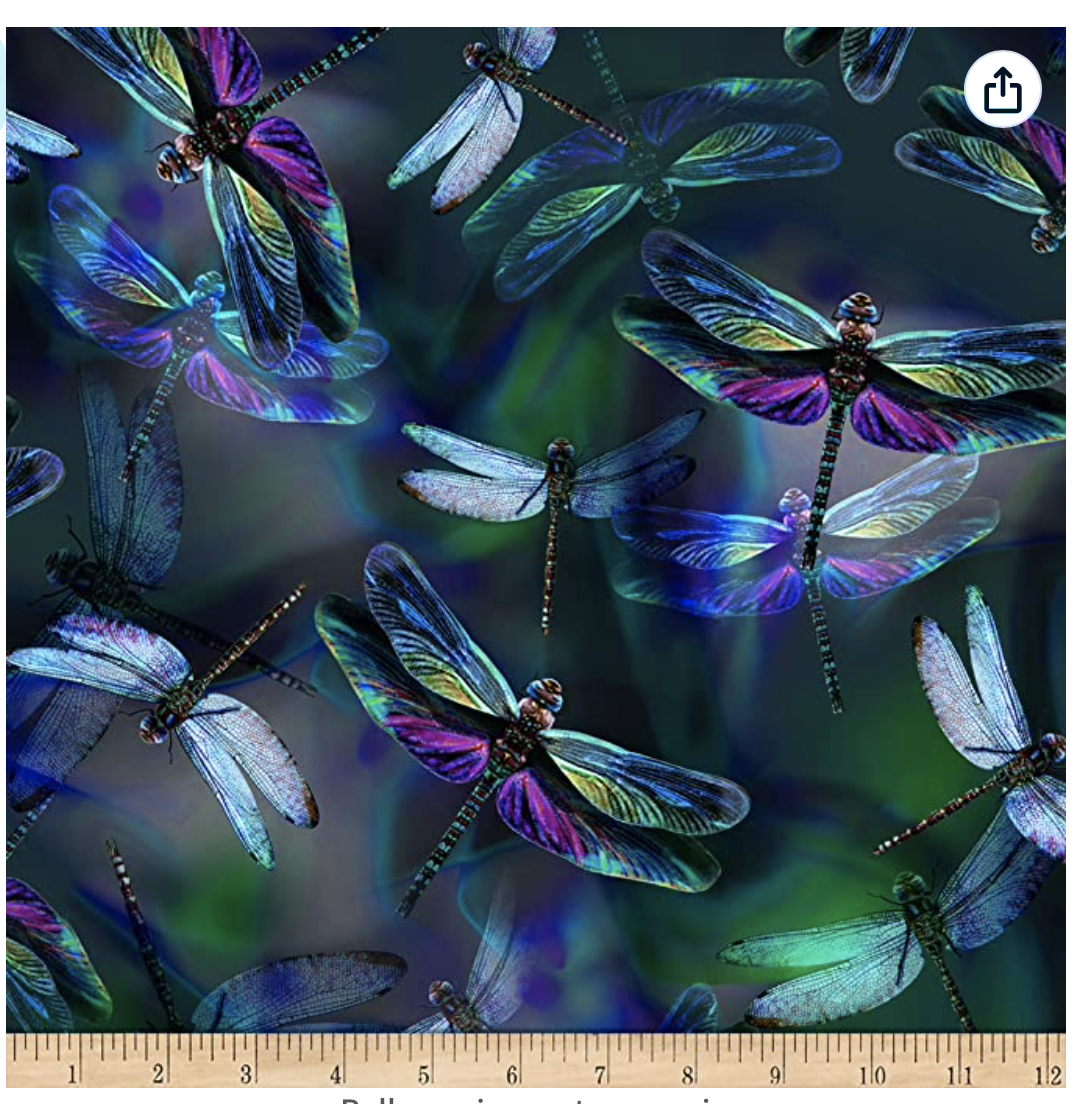
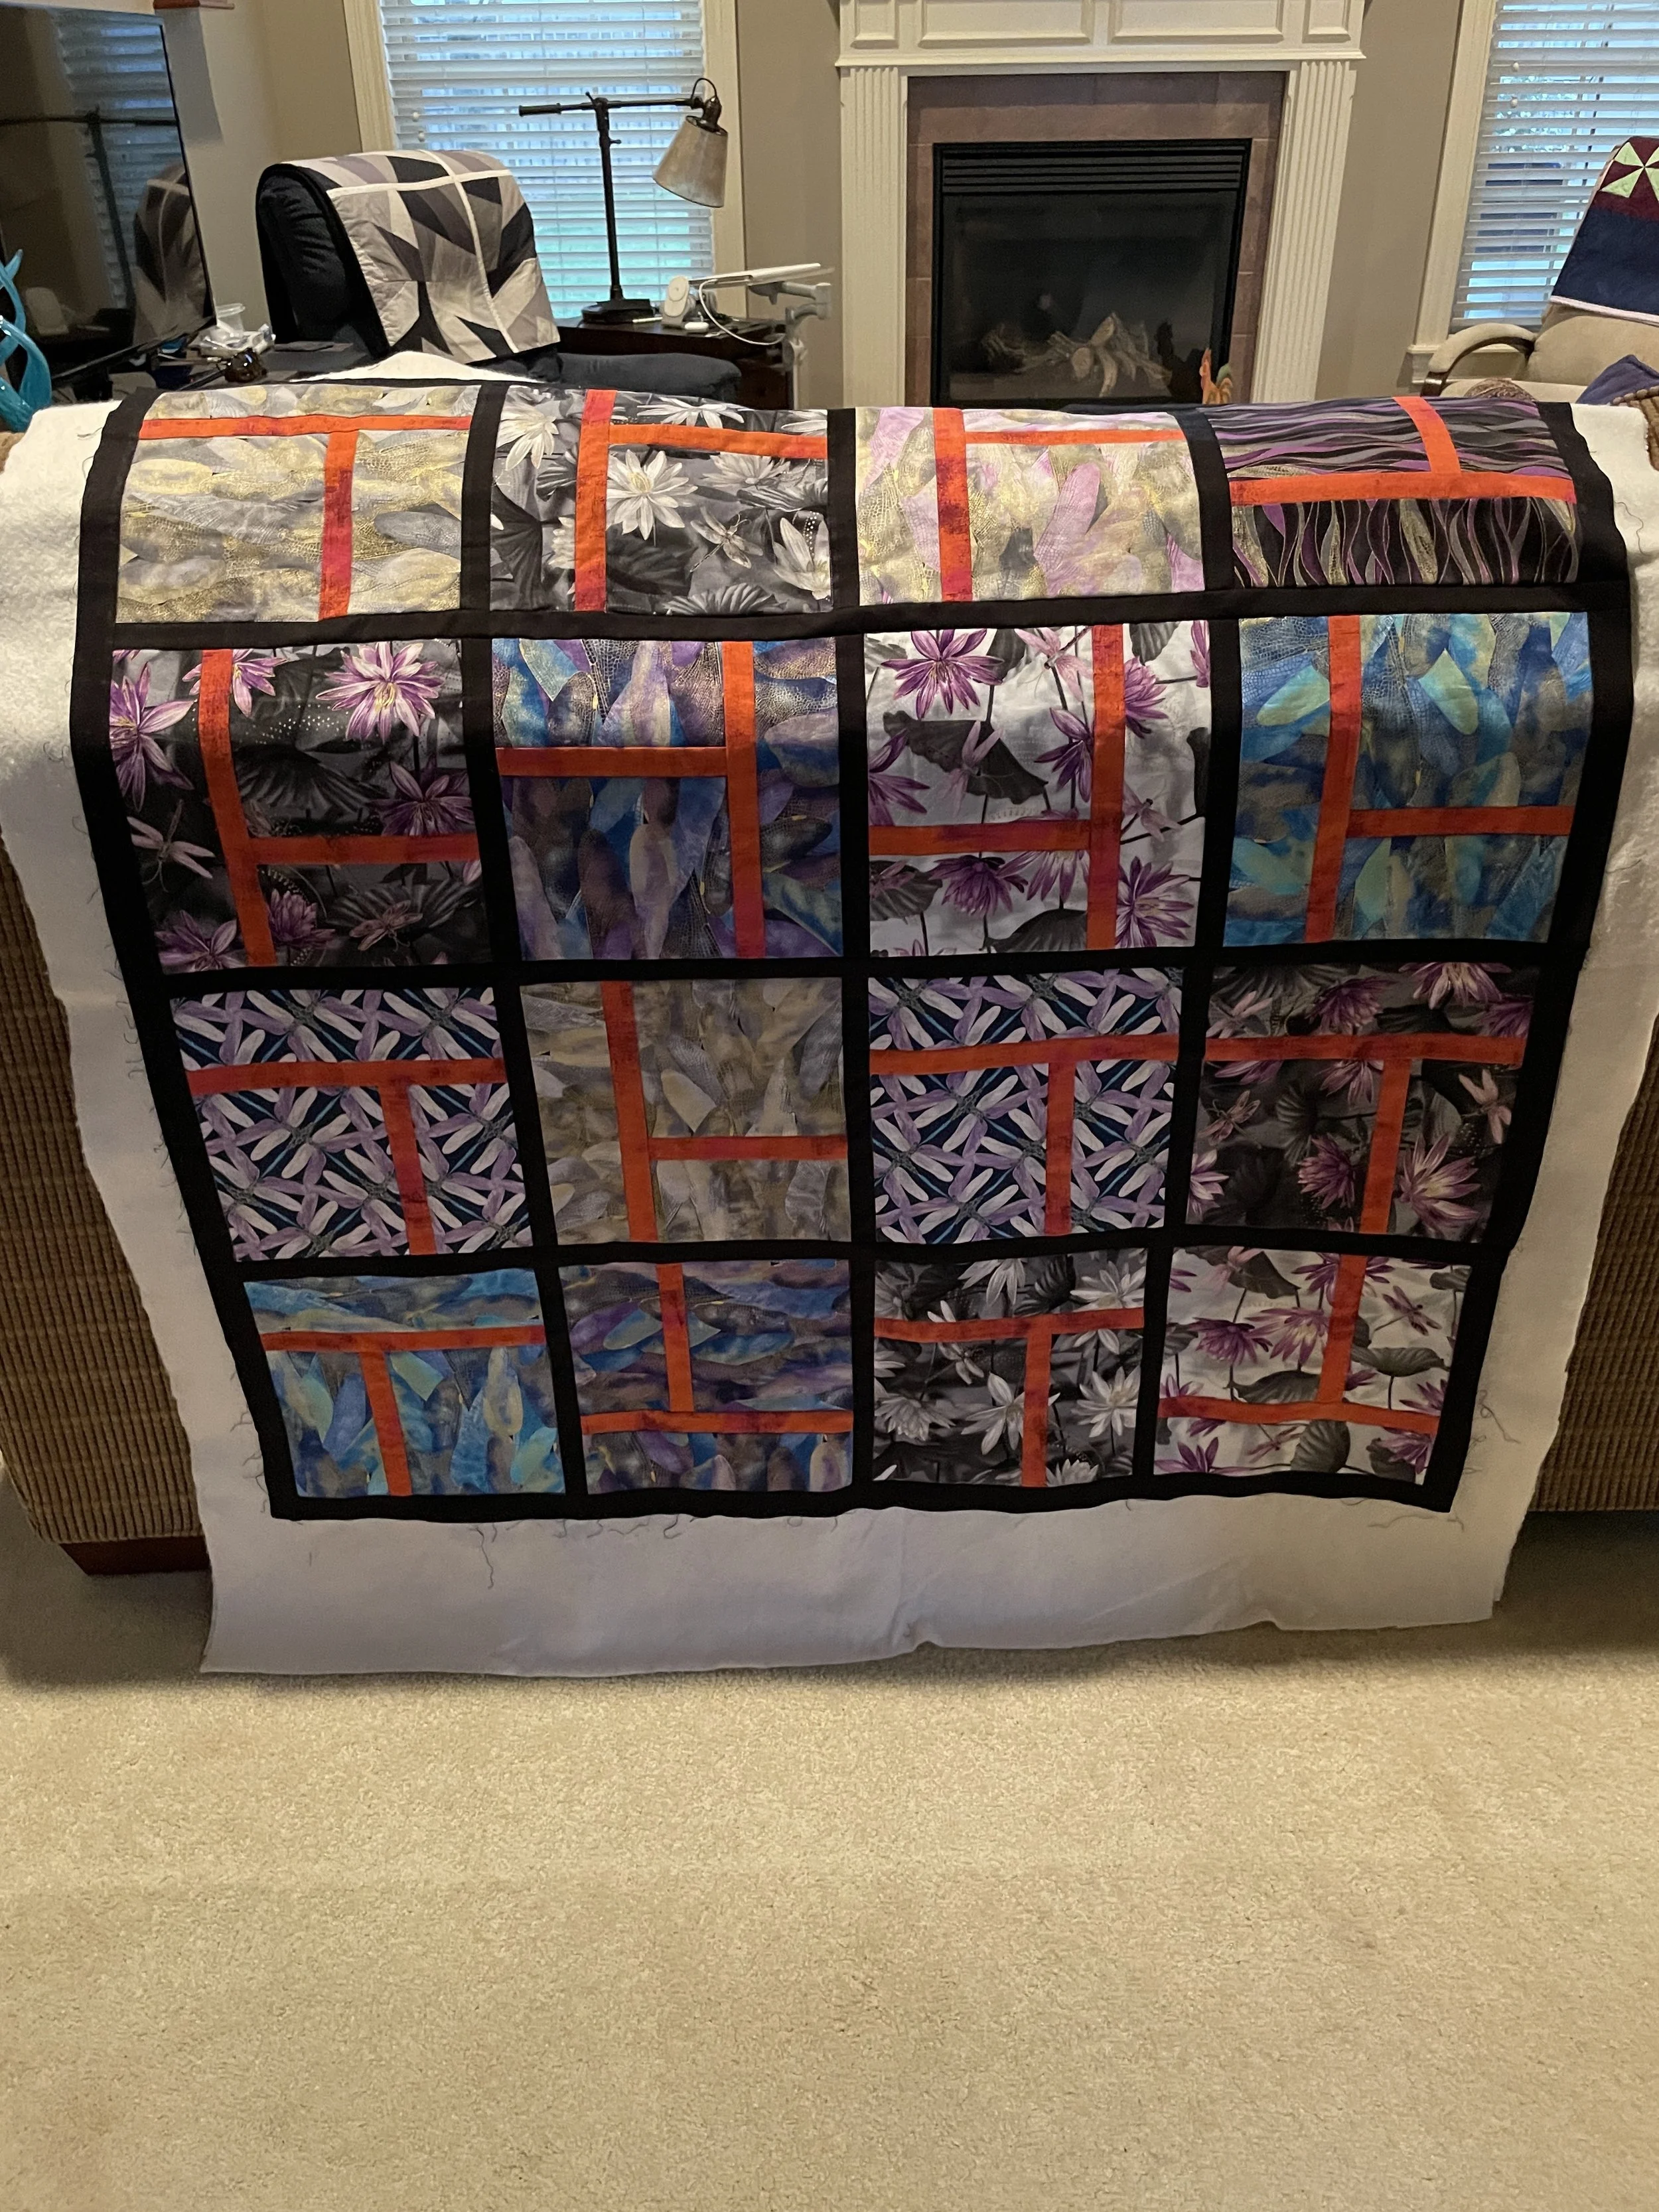
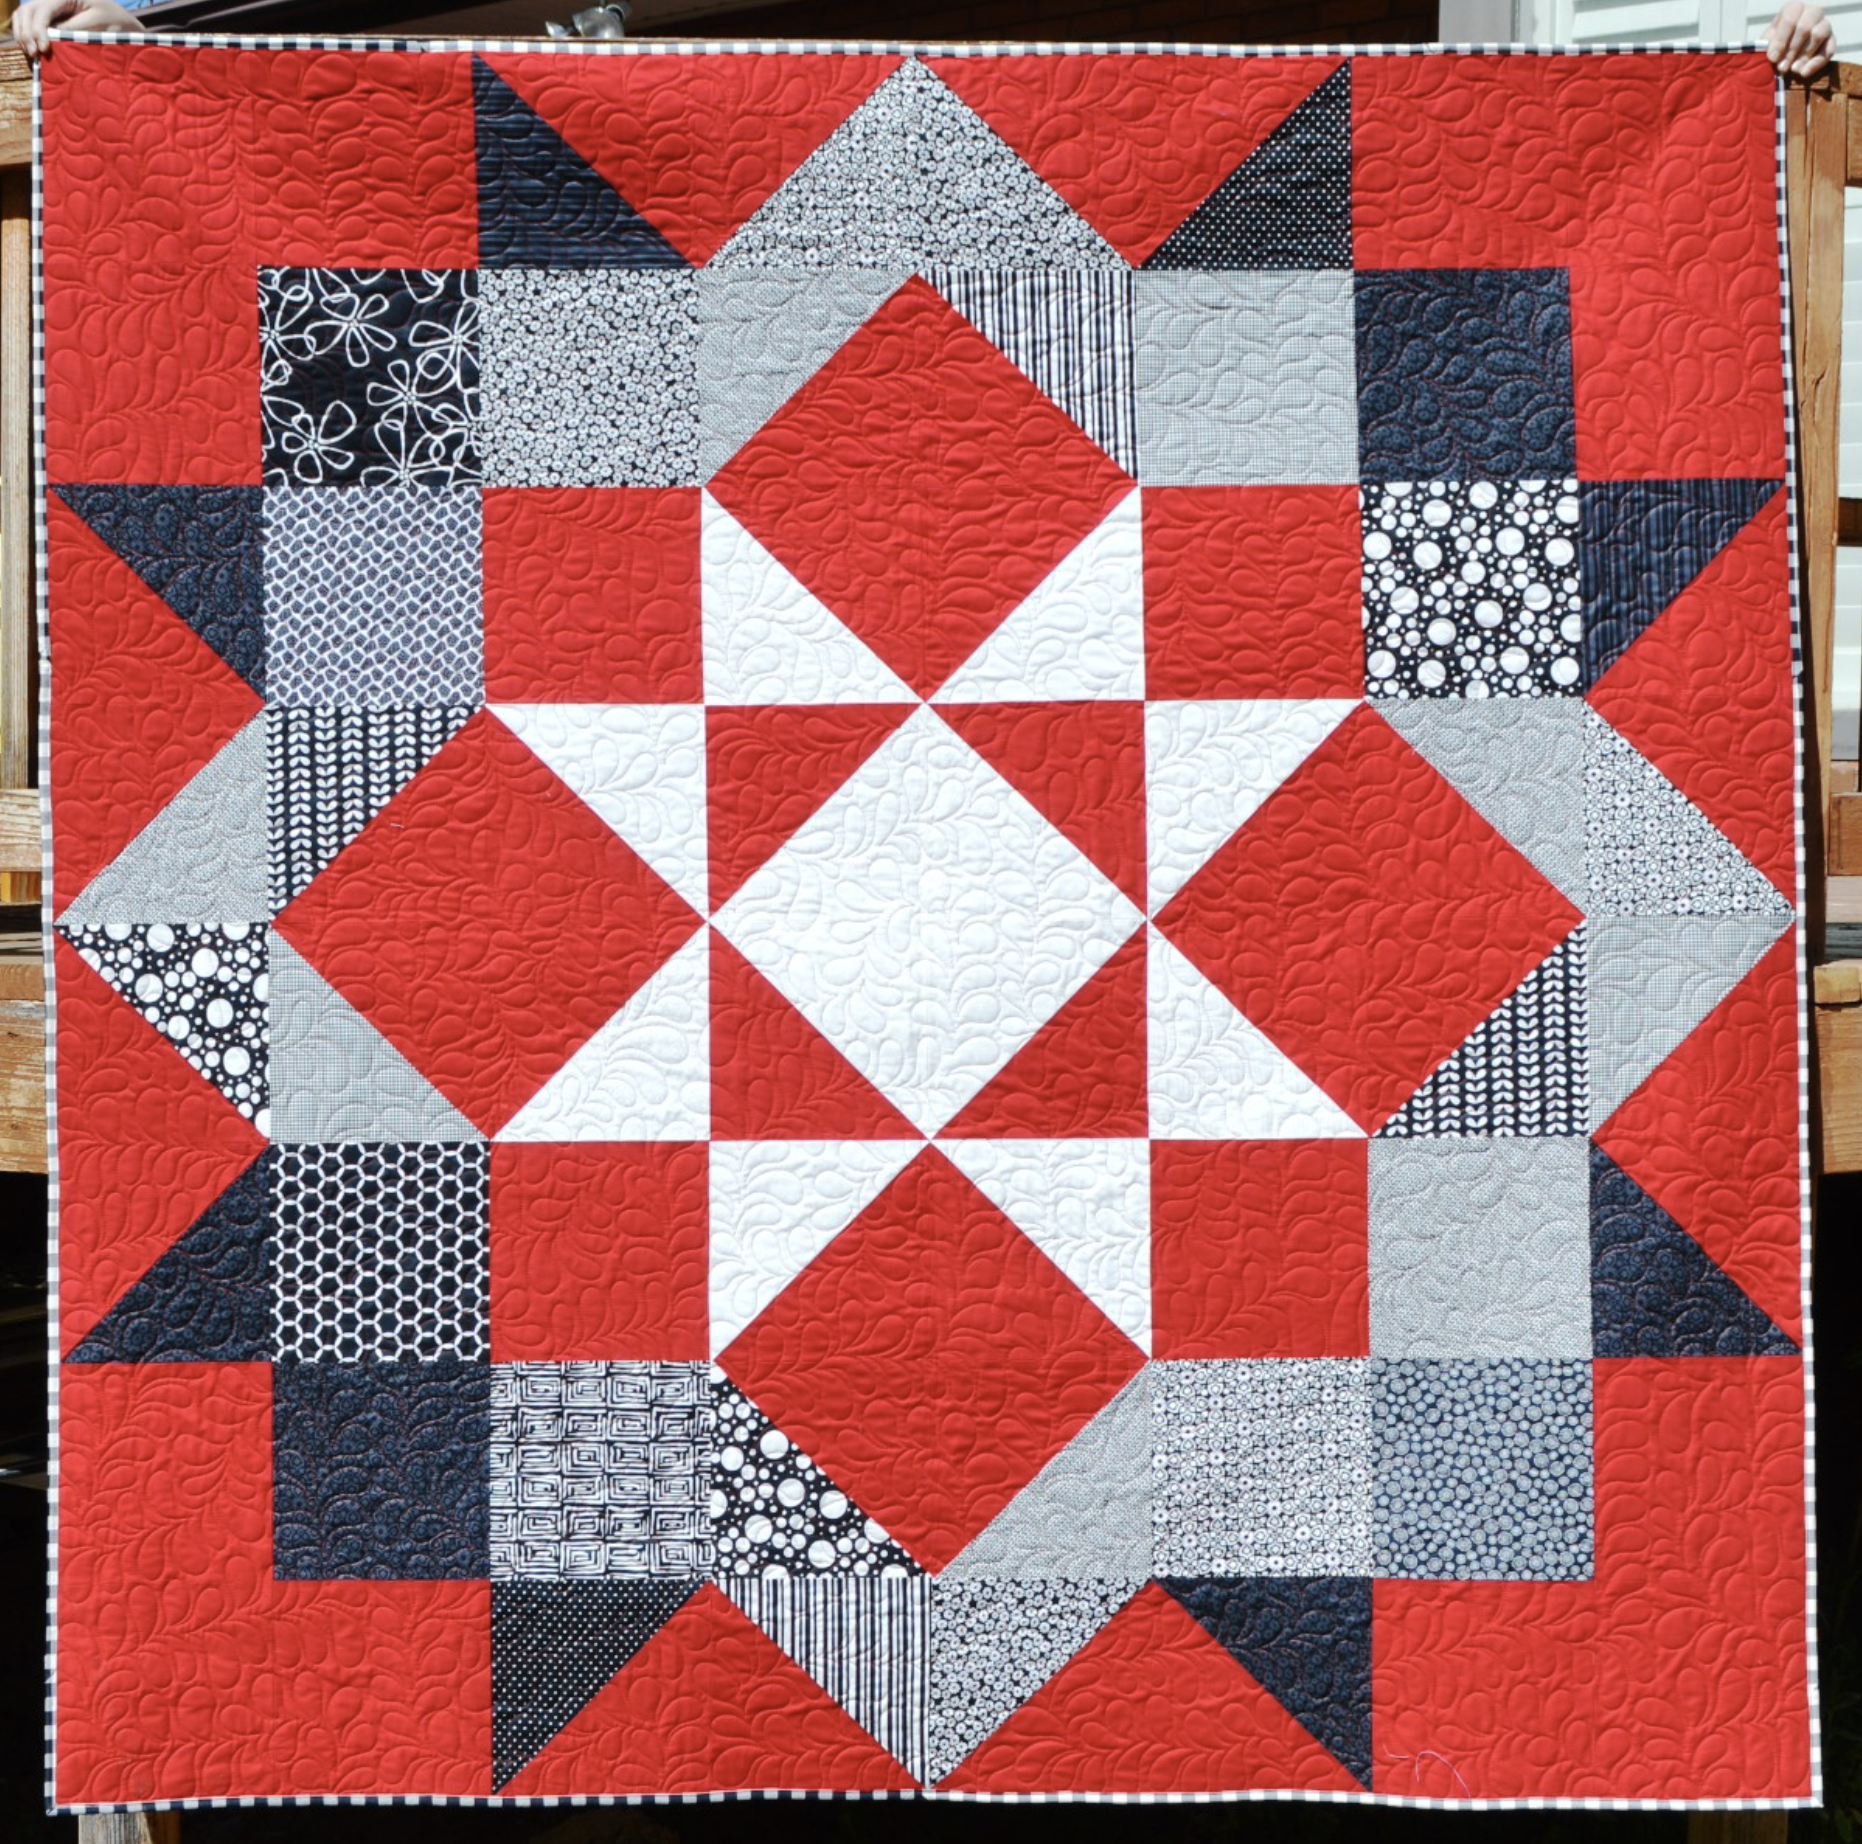
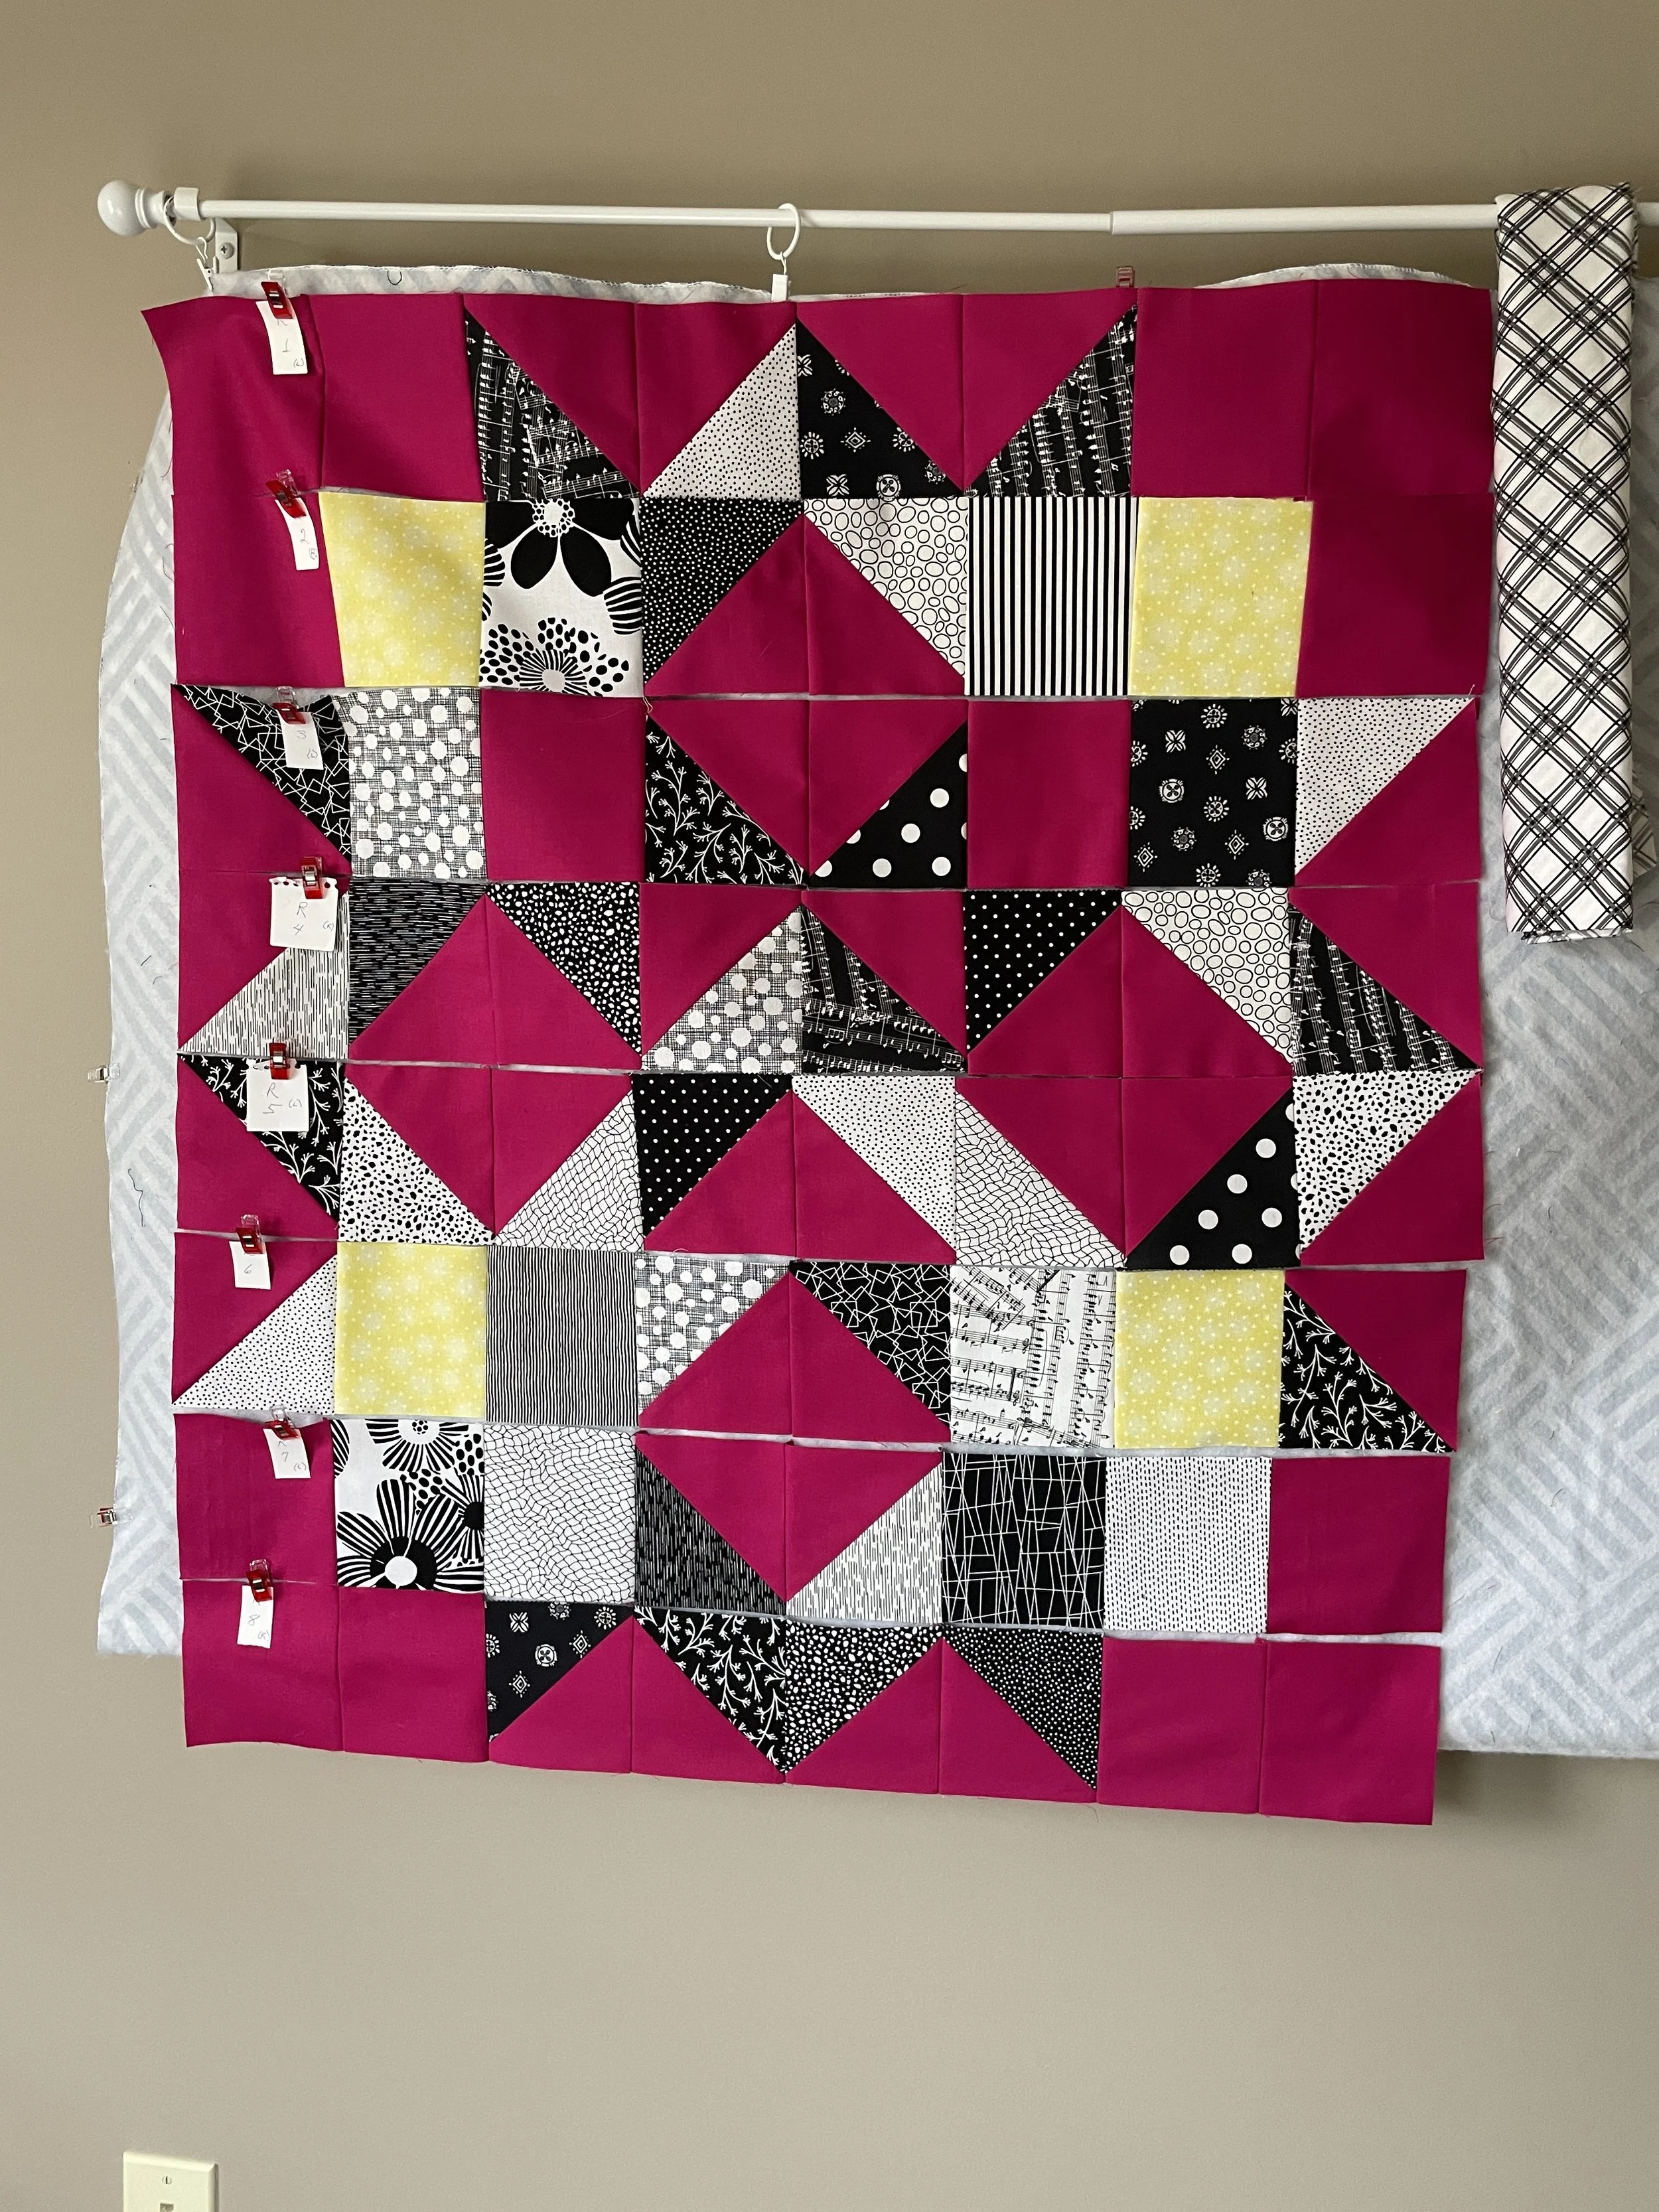
I fell in love with a layer cake (package of 40 10” squares) that is black and white and knew I wanted red. Here’s the inspiration picture and my in-progress picture.

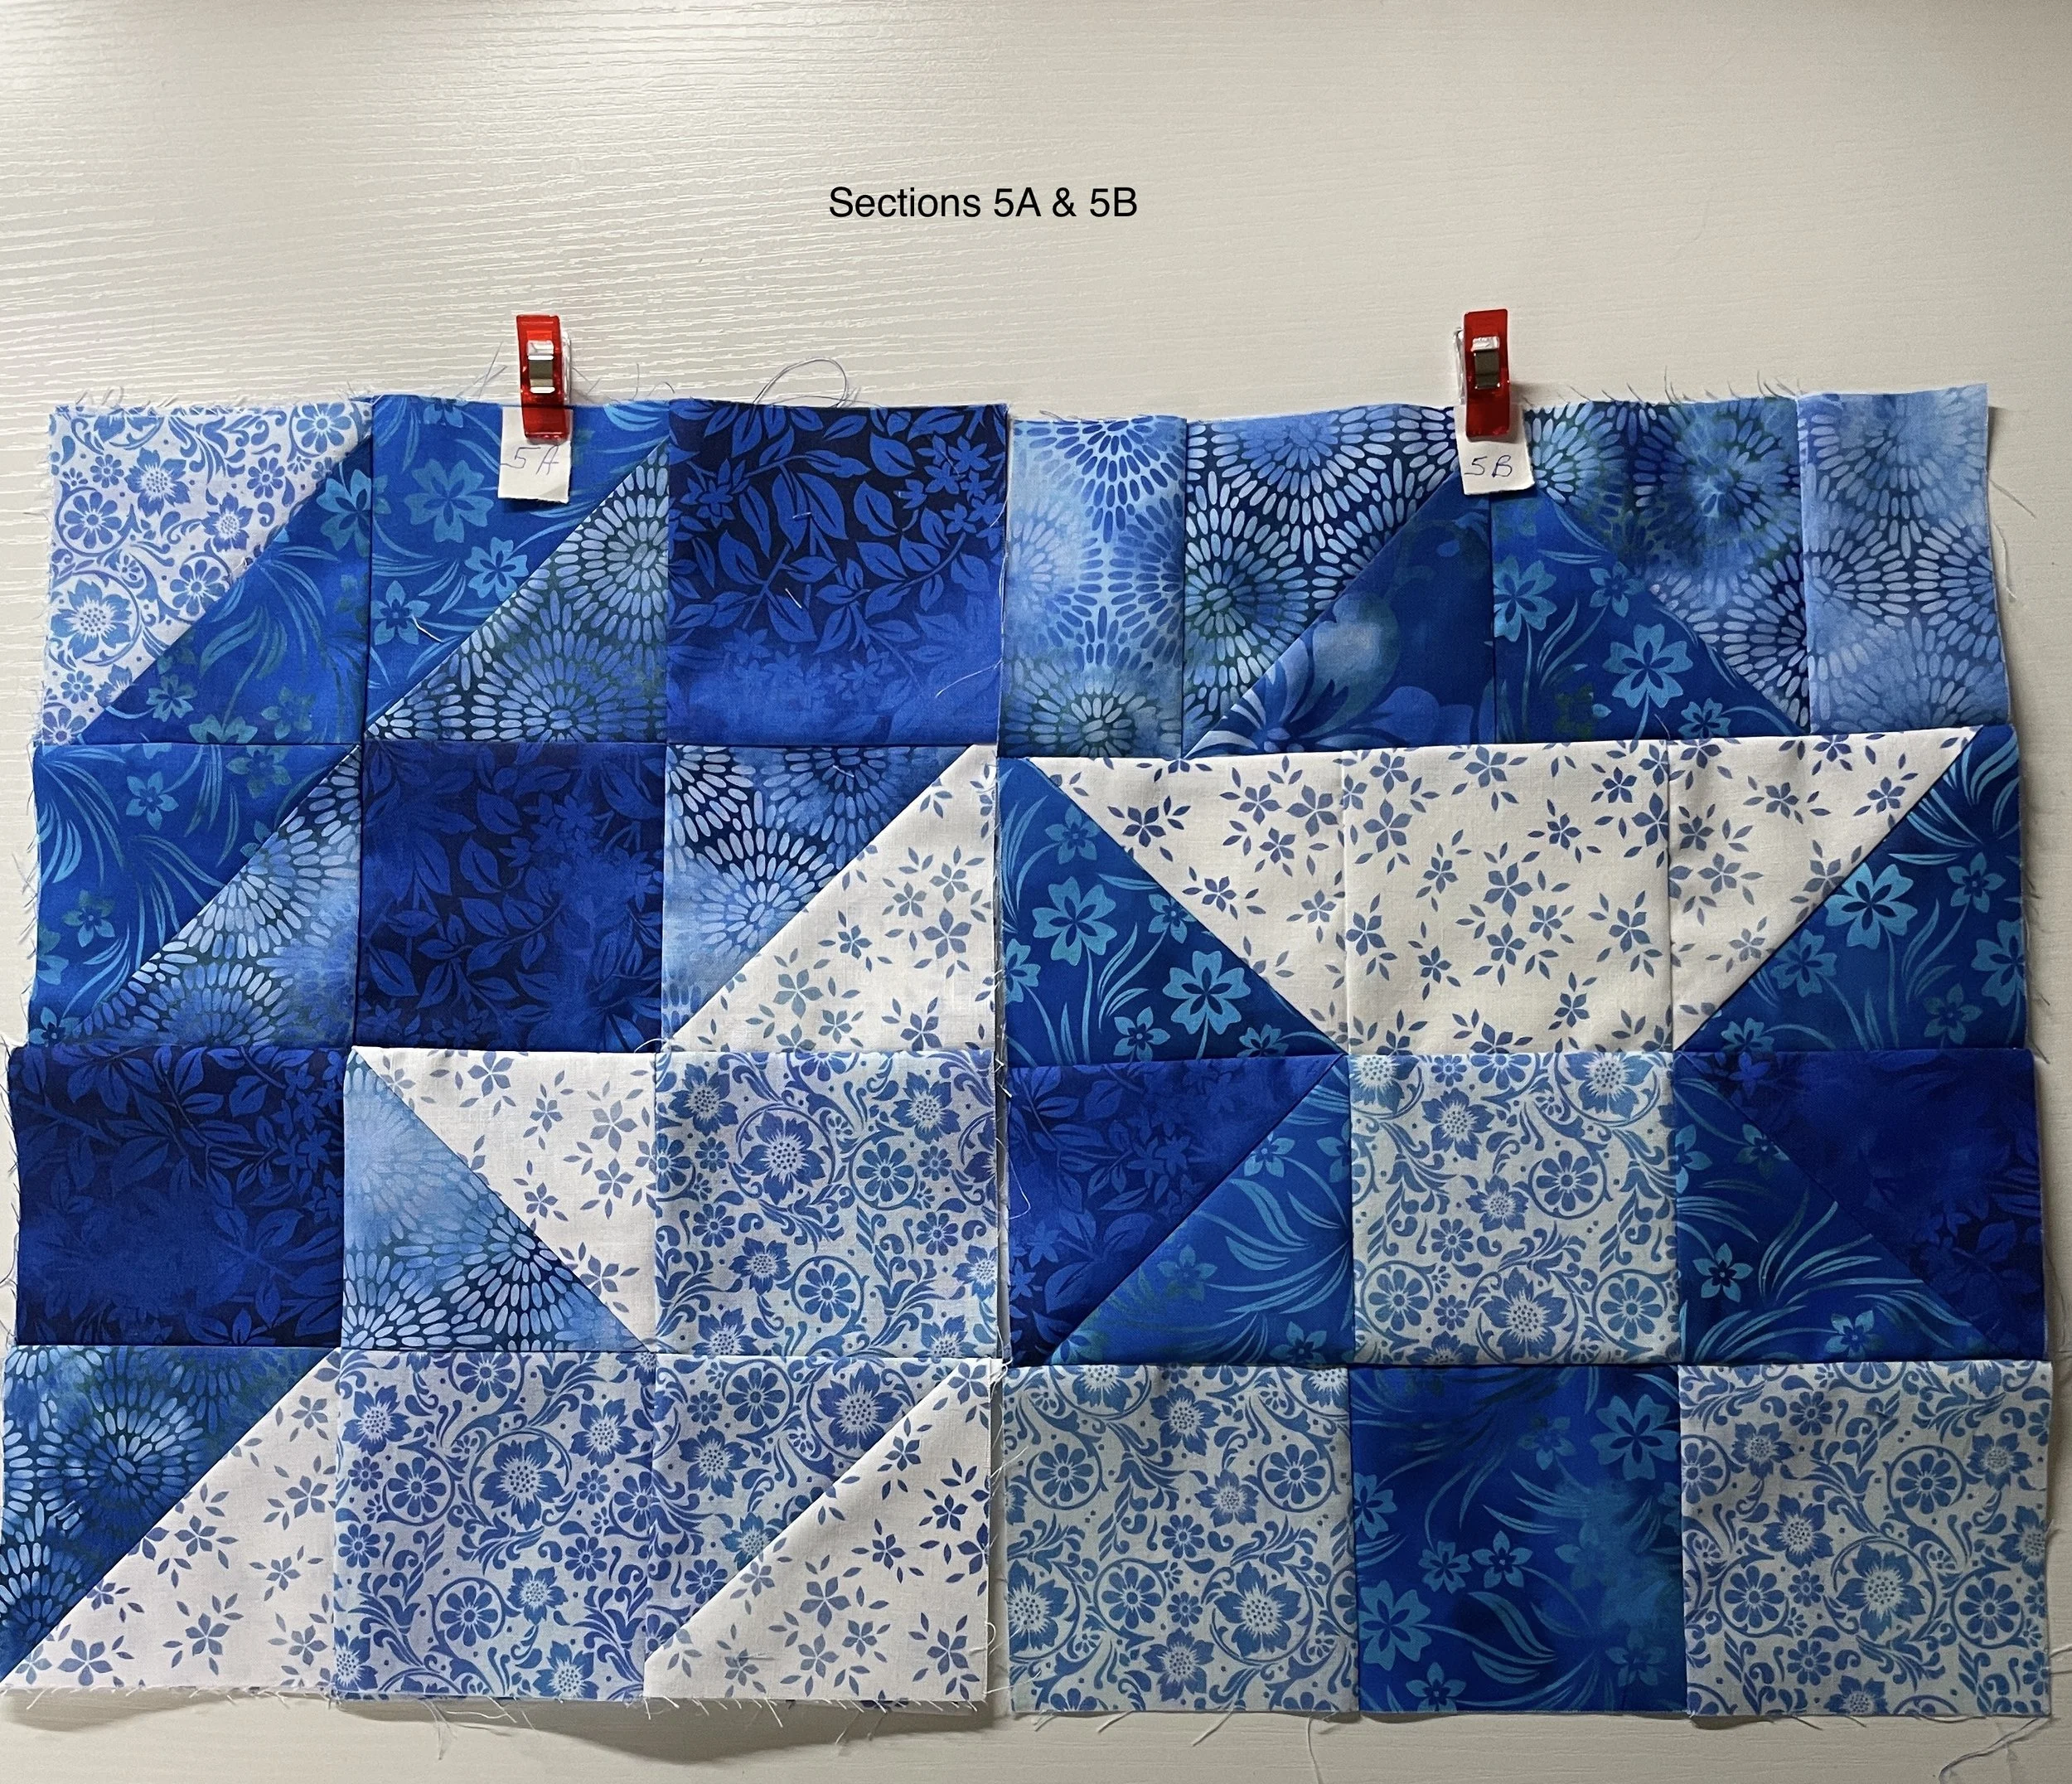
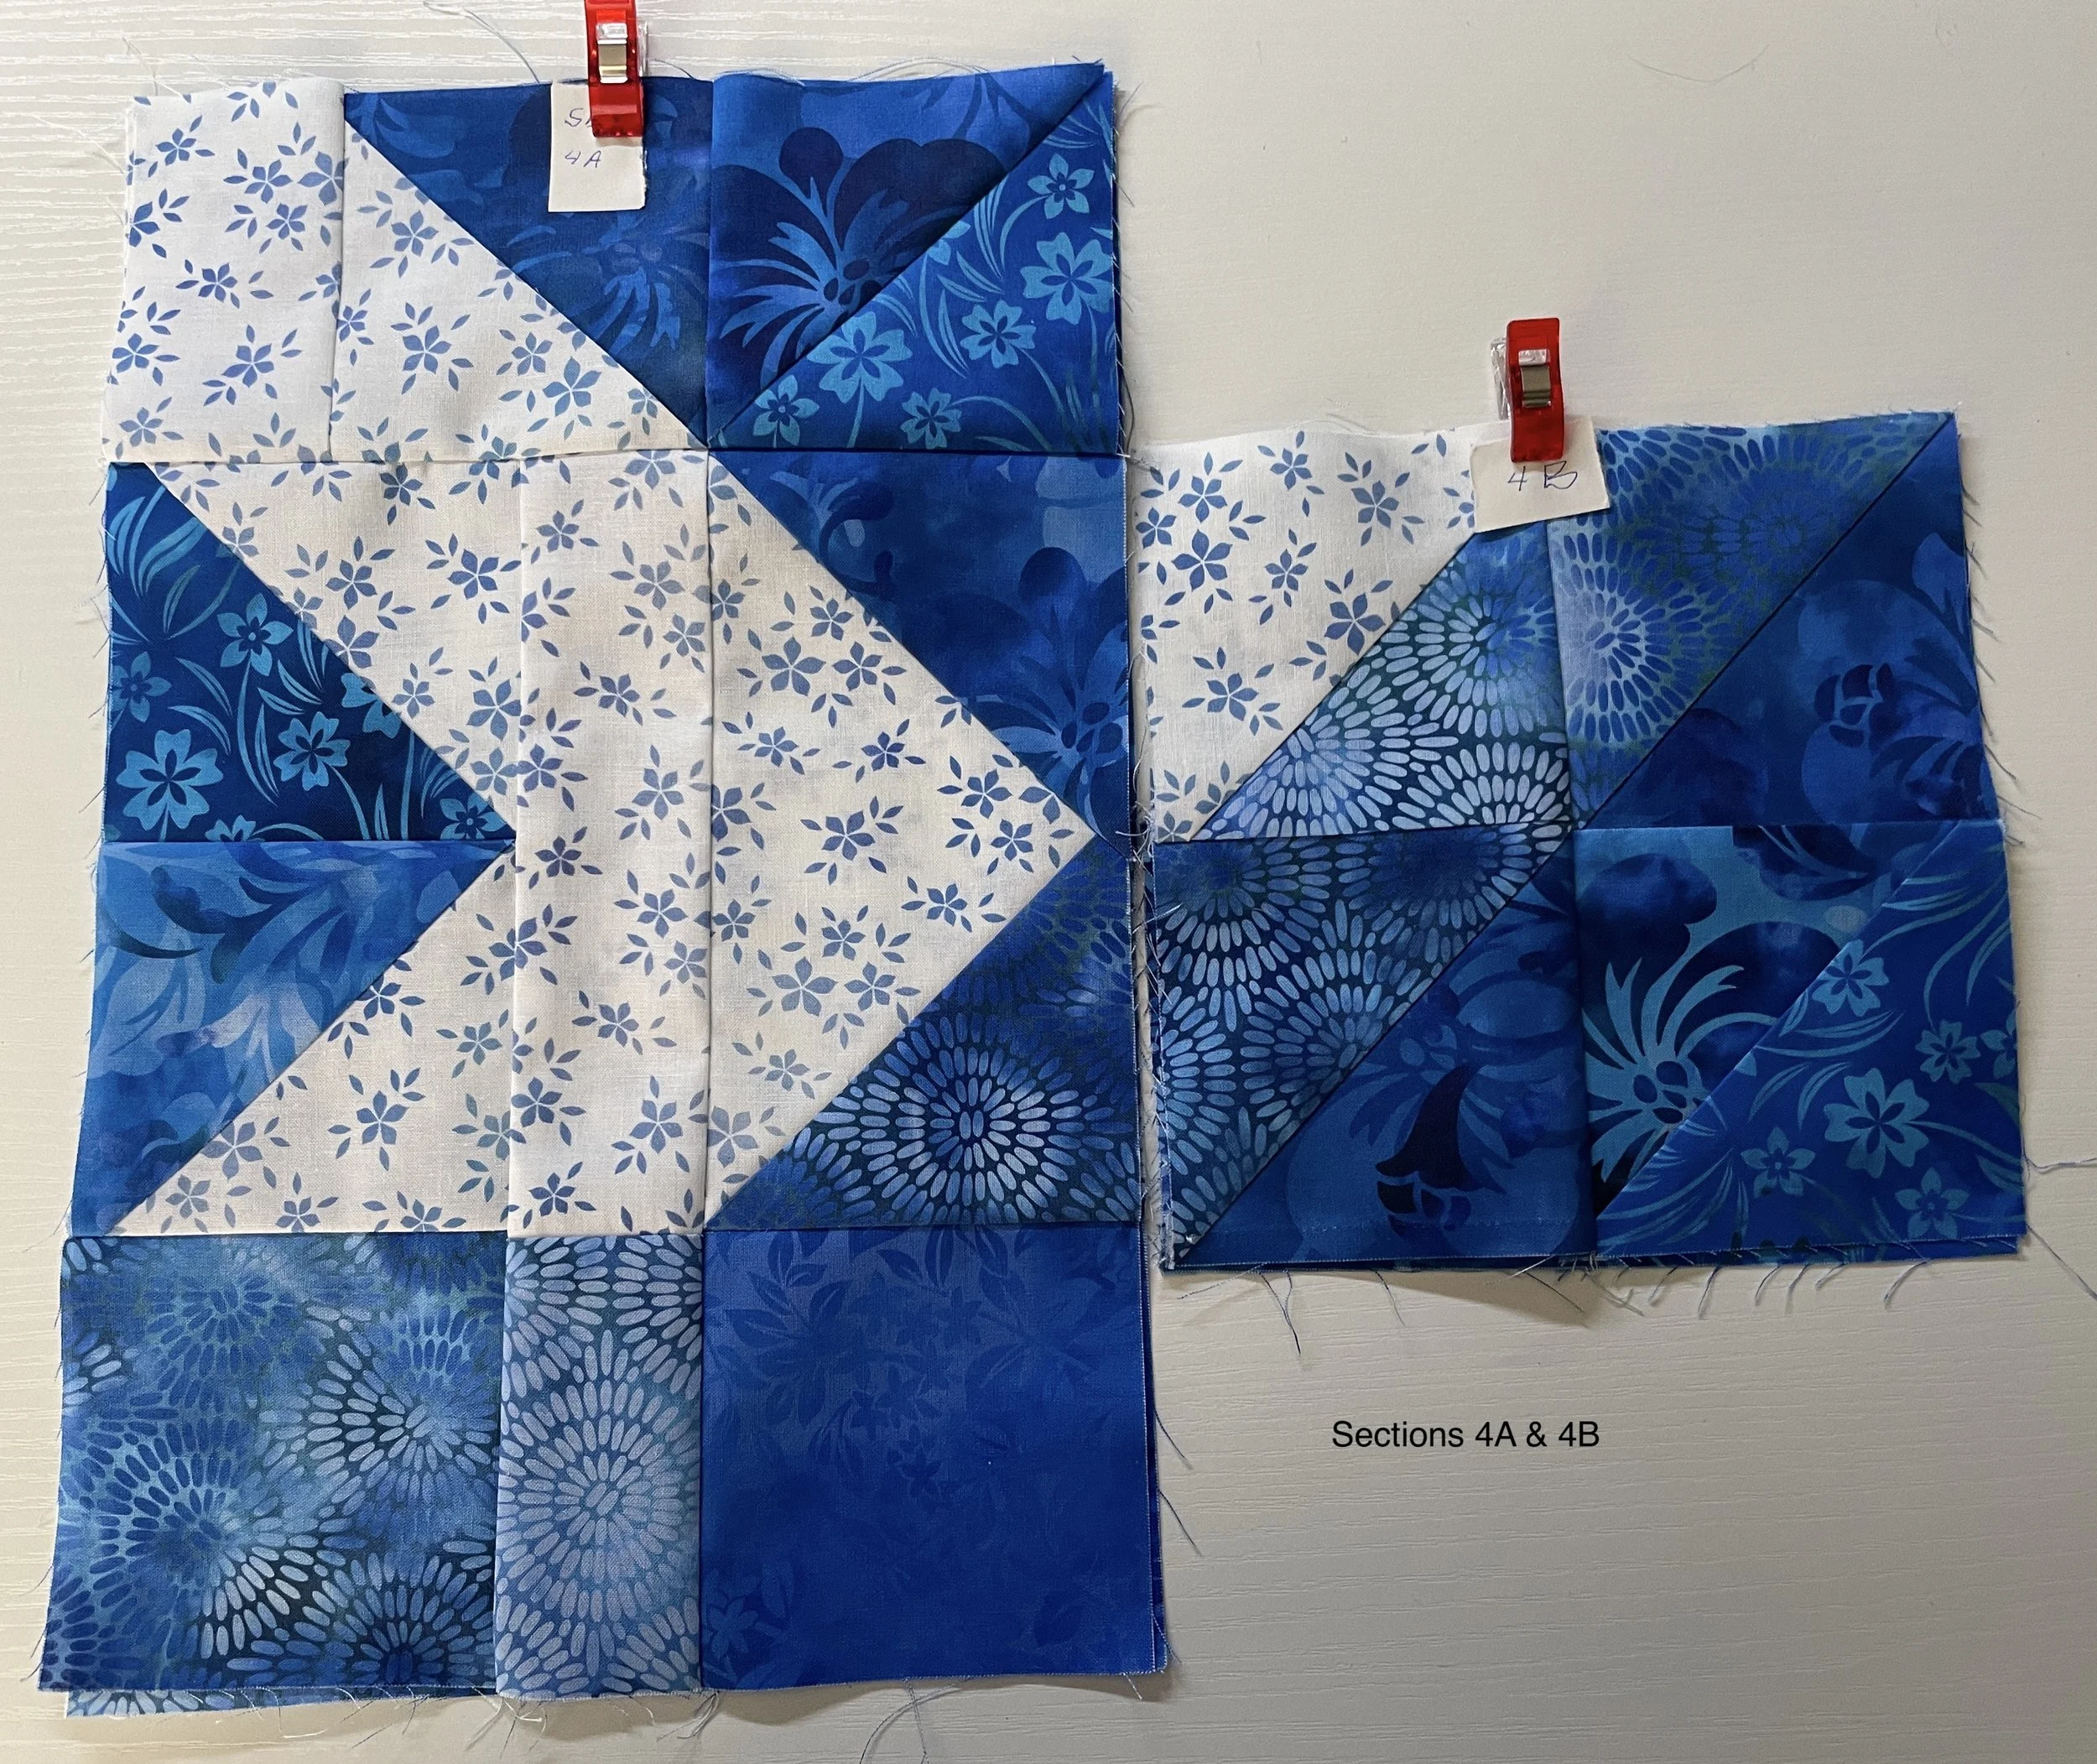
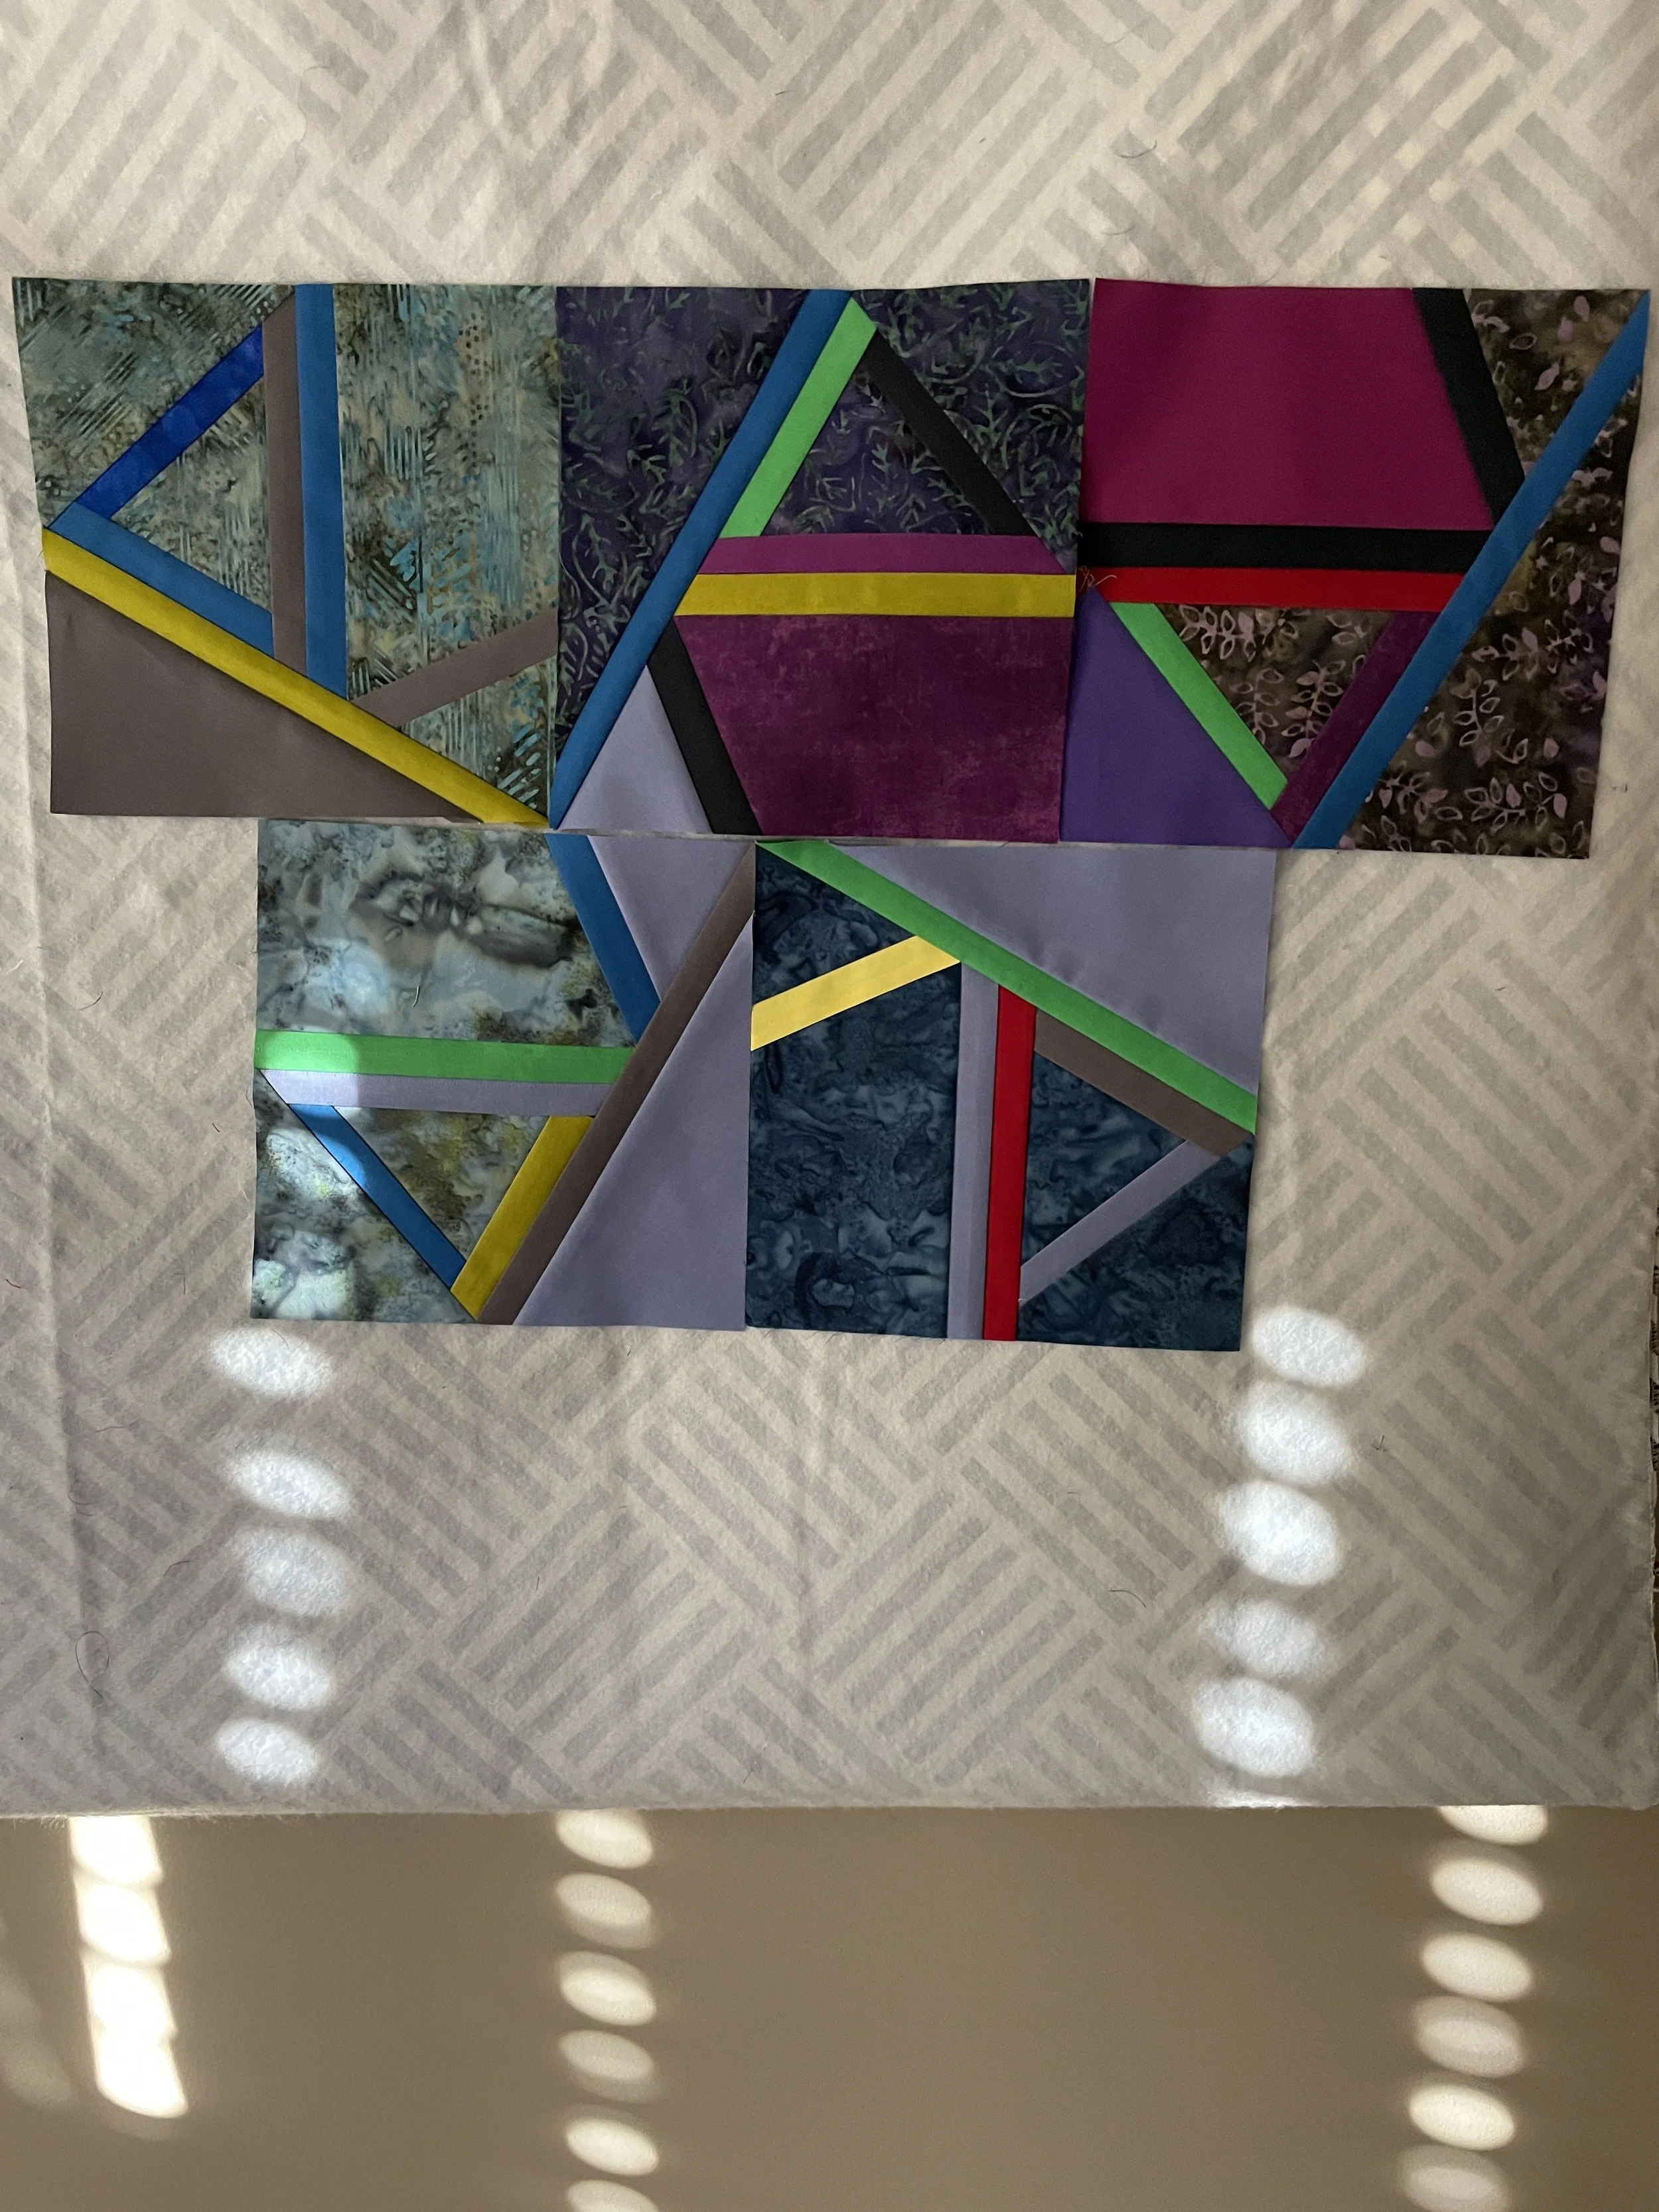
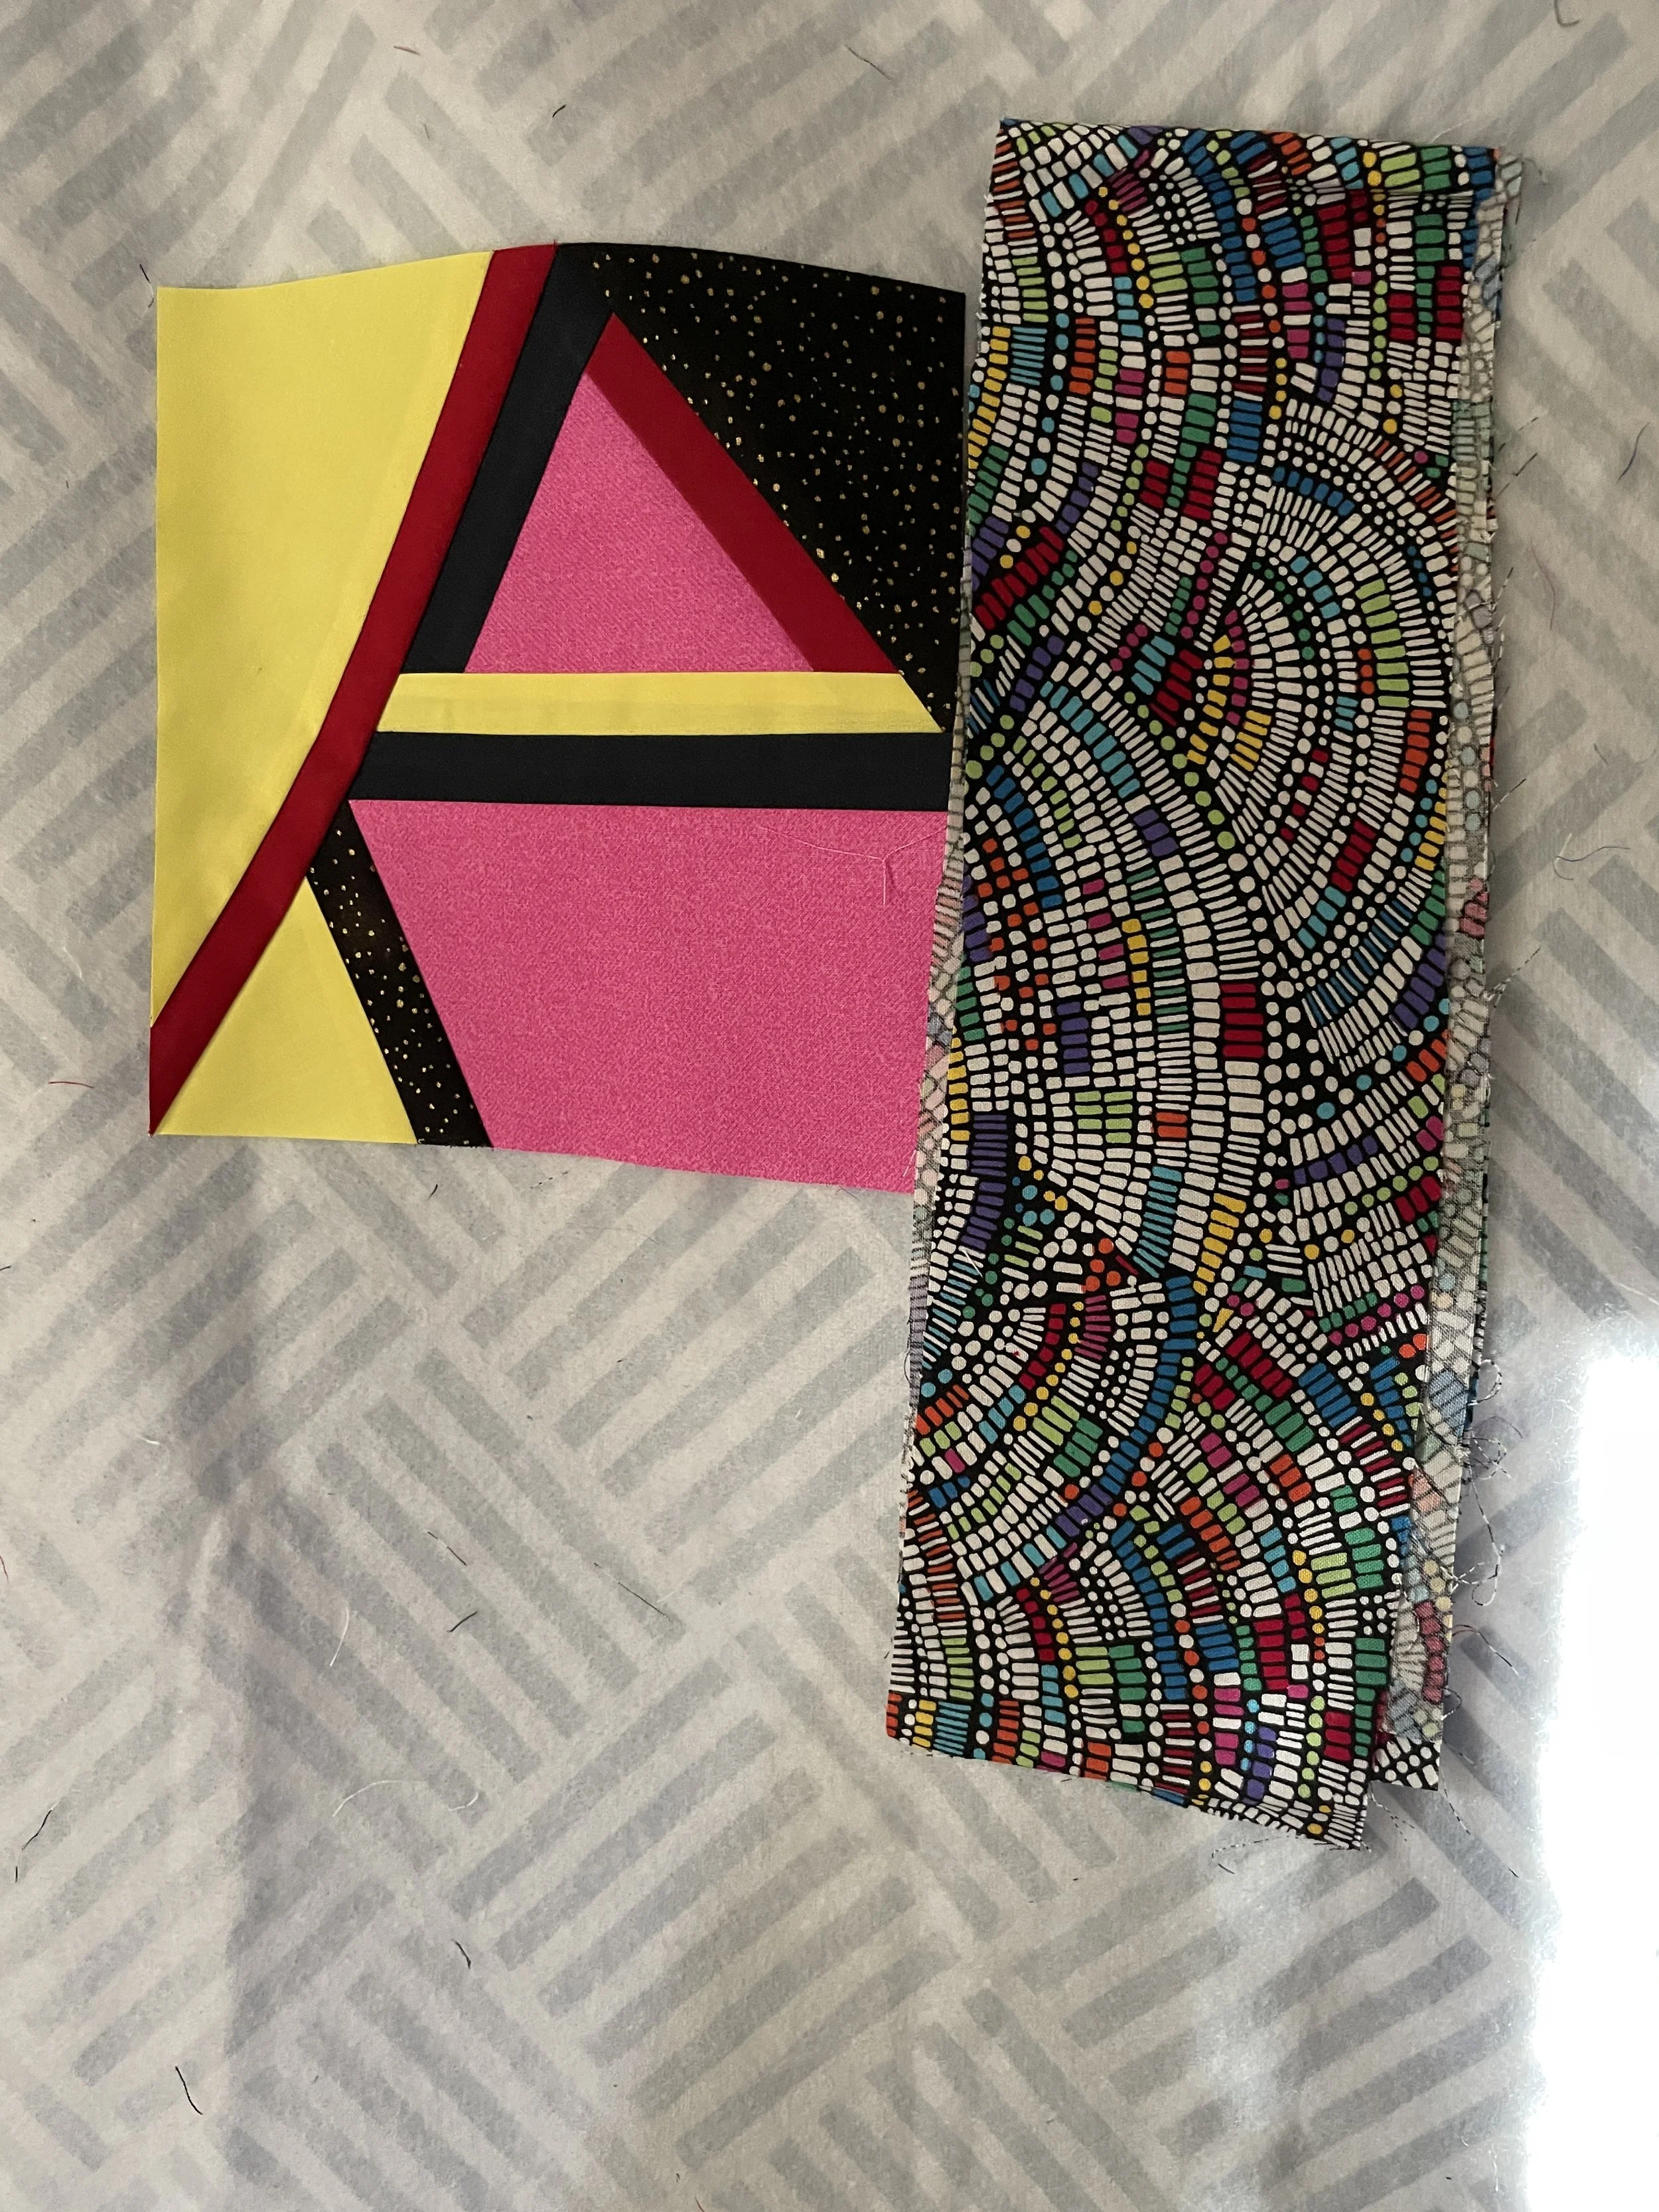
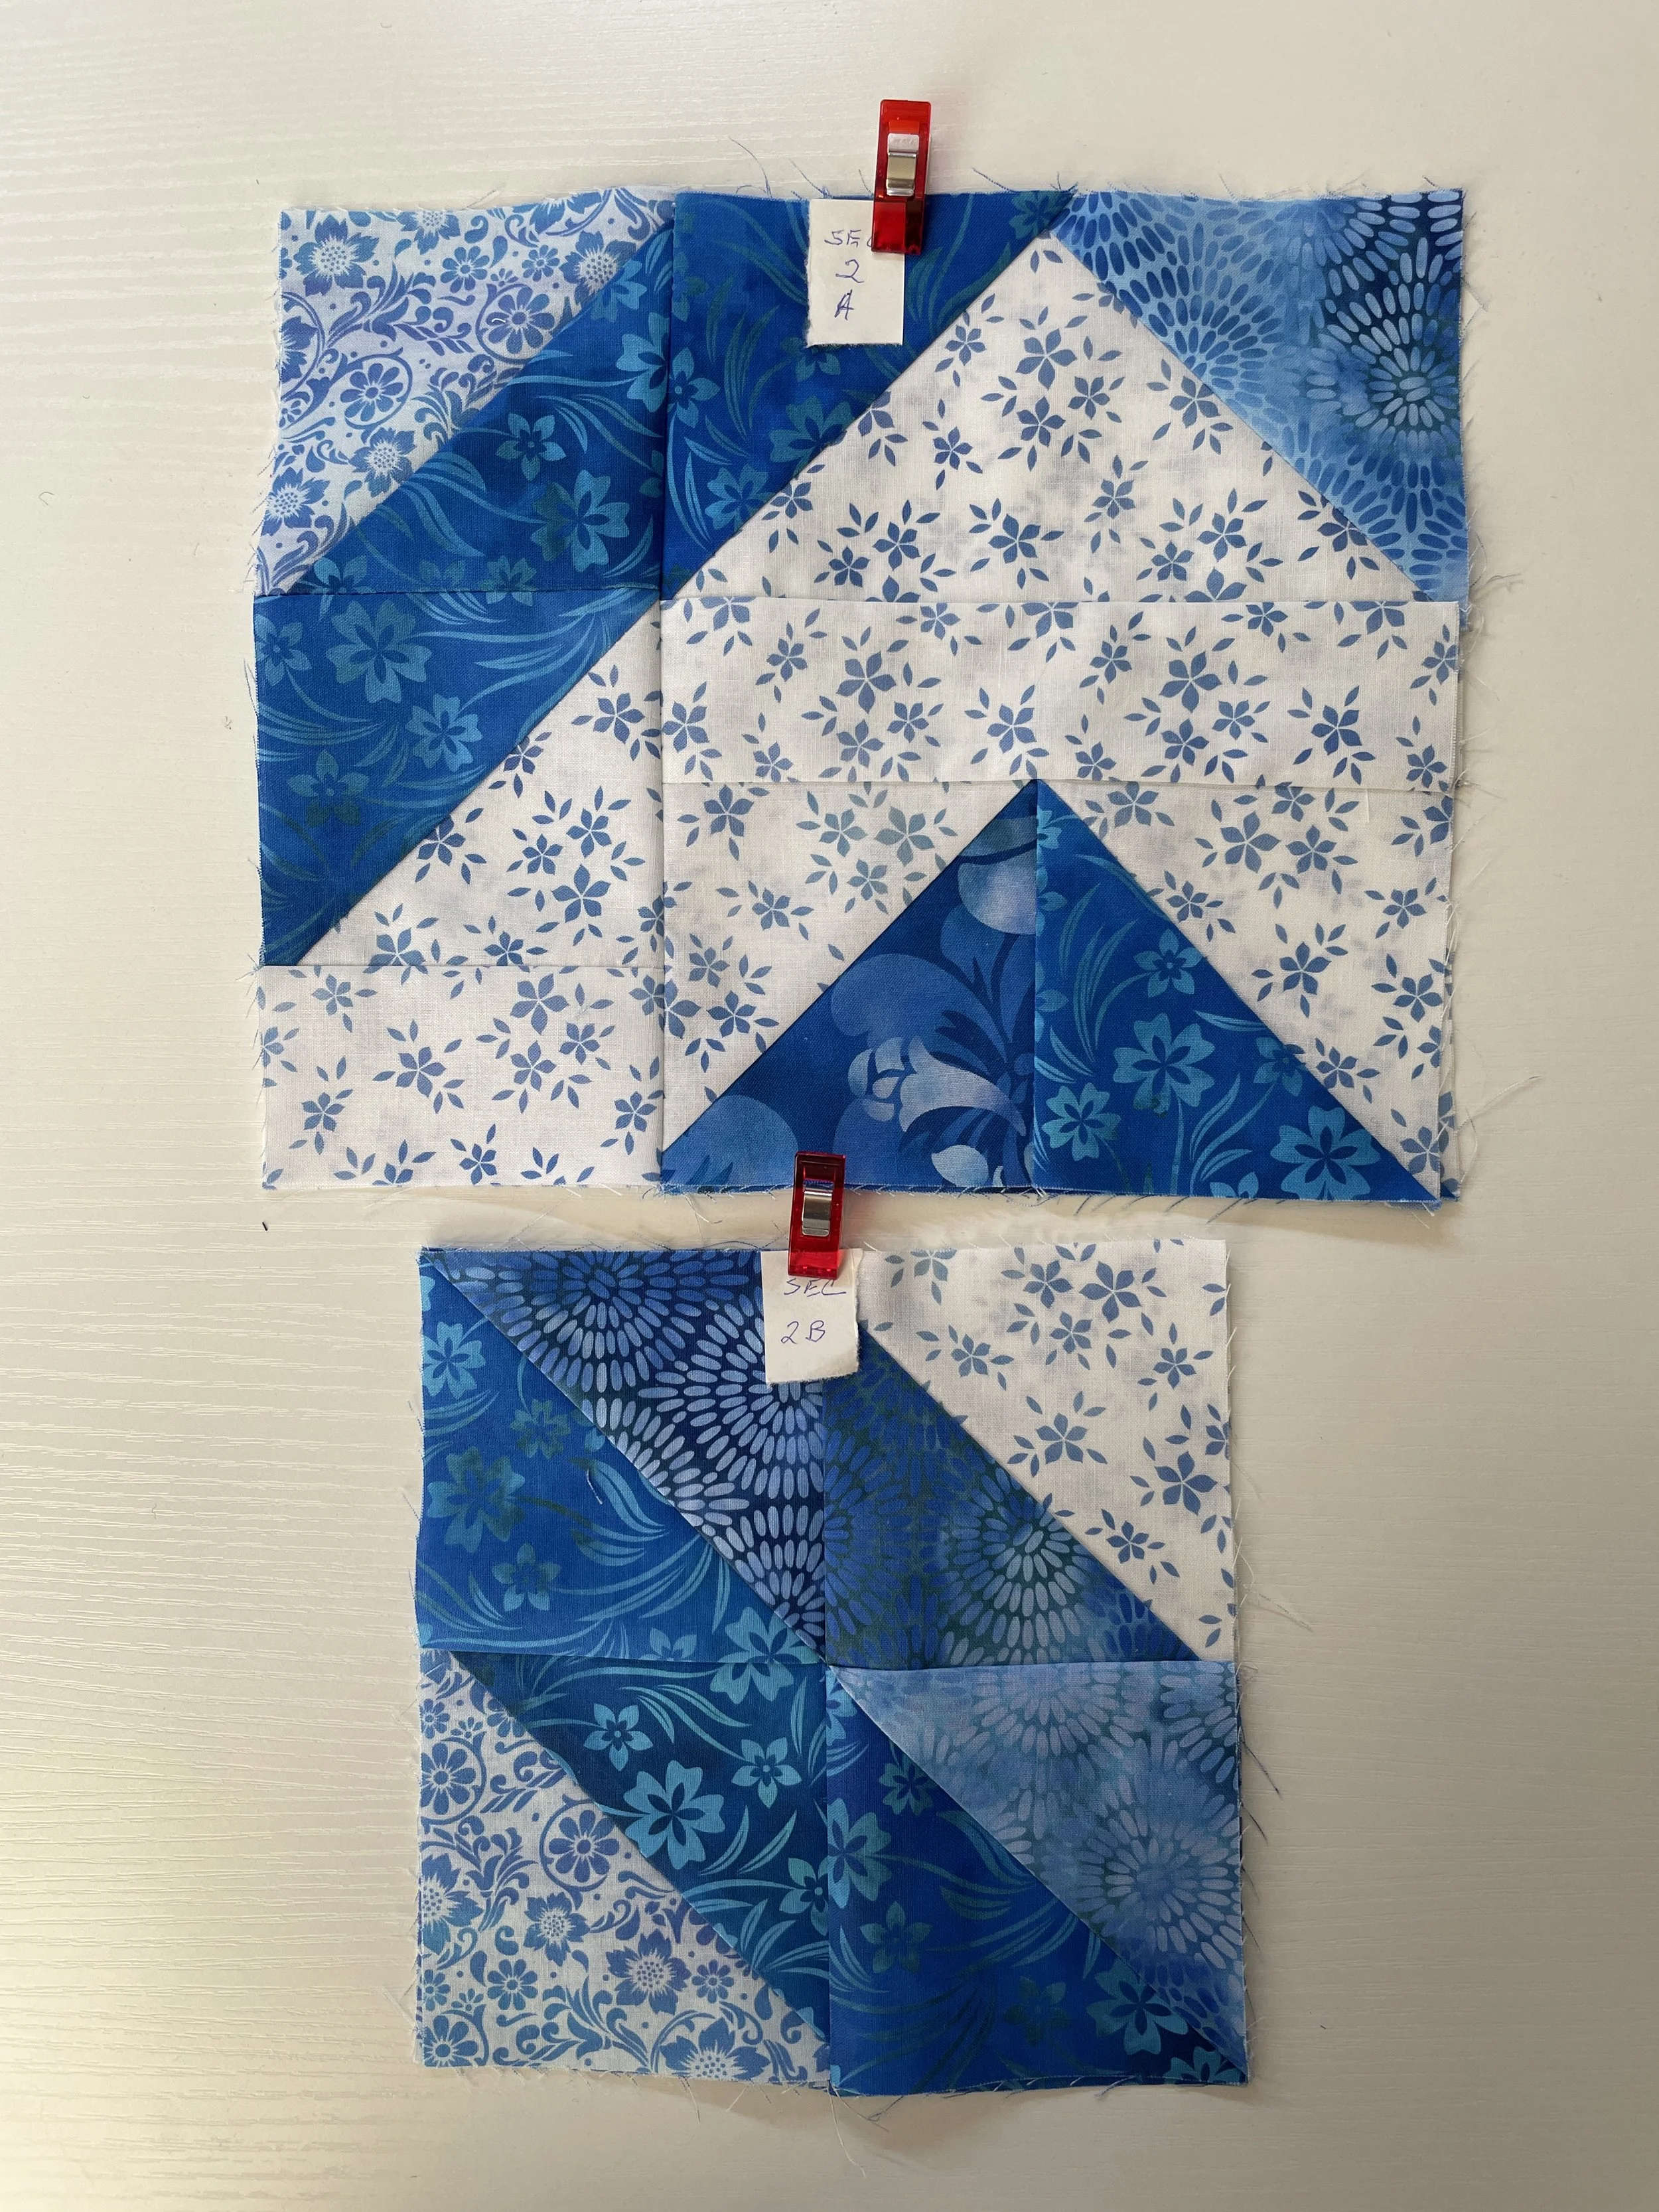
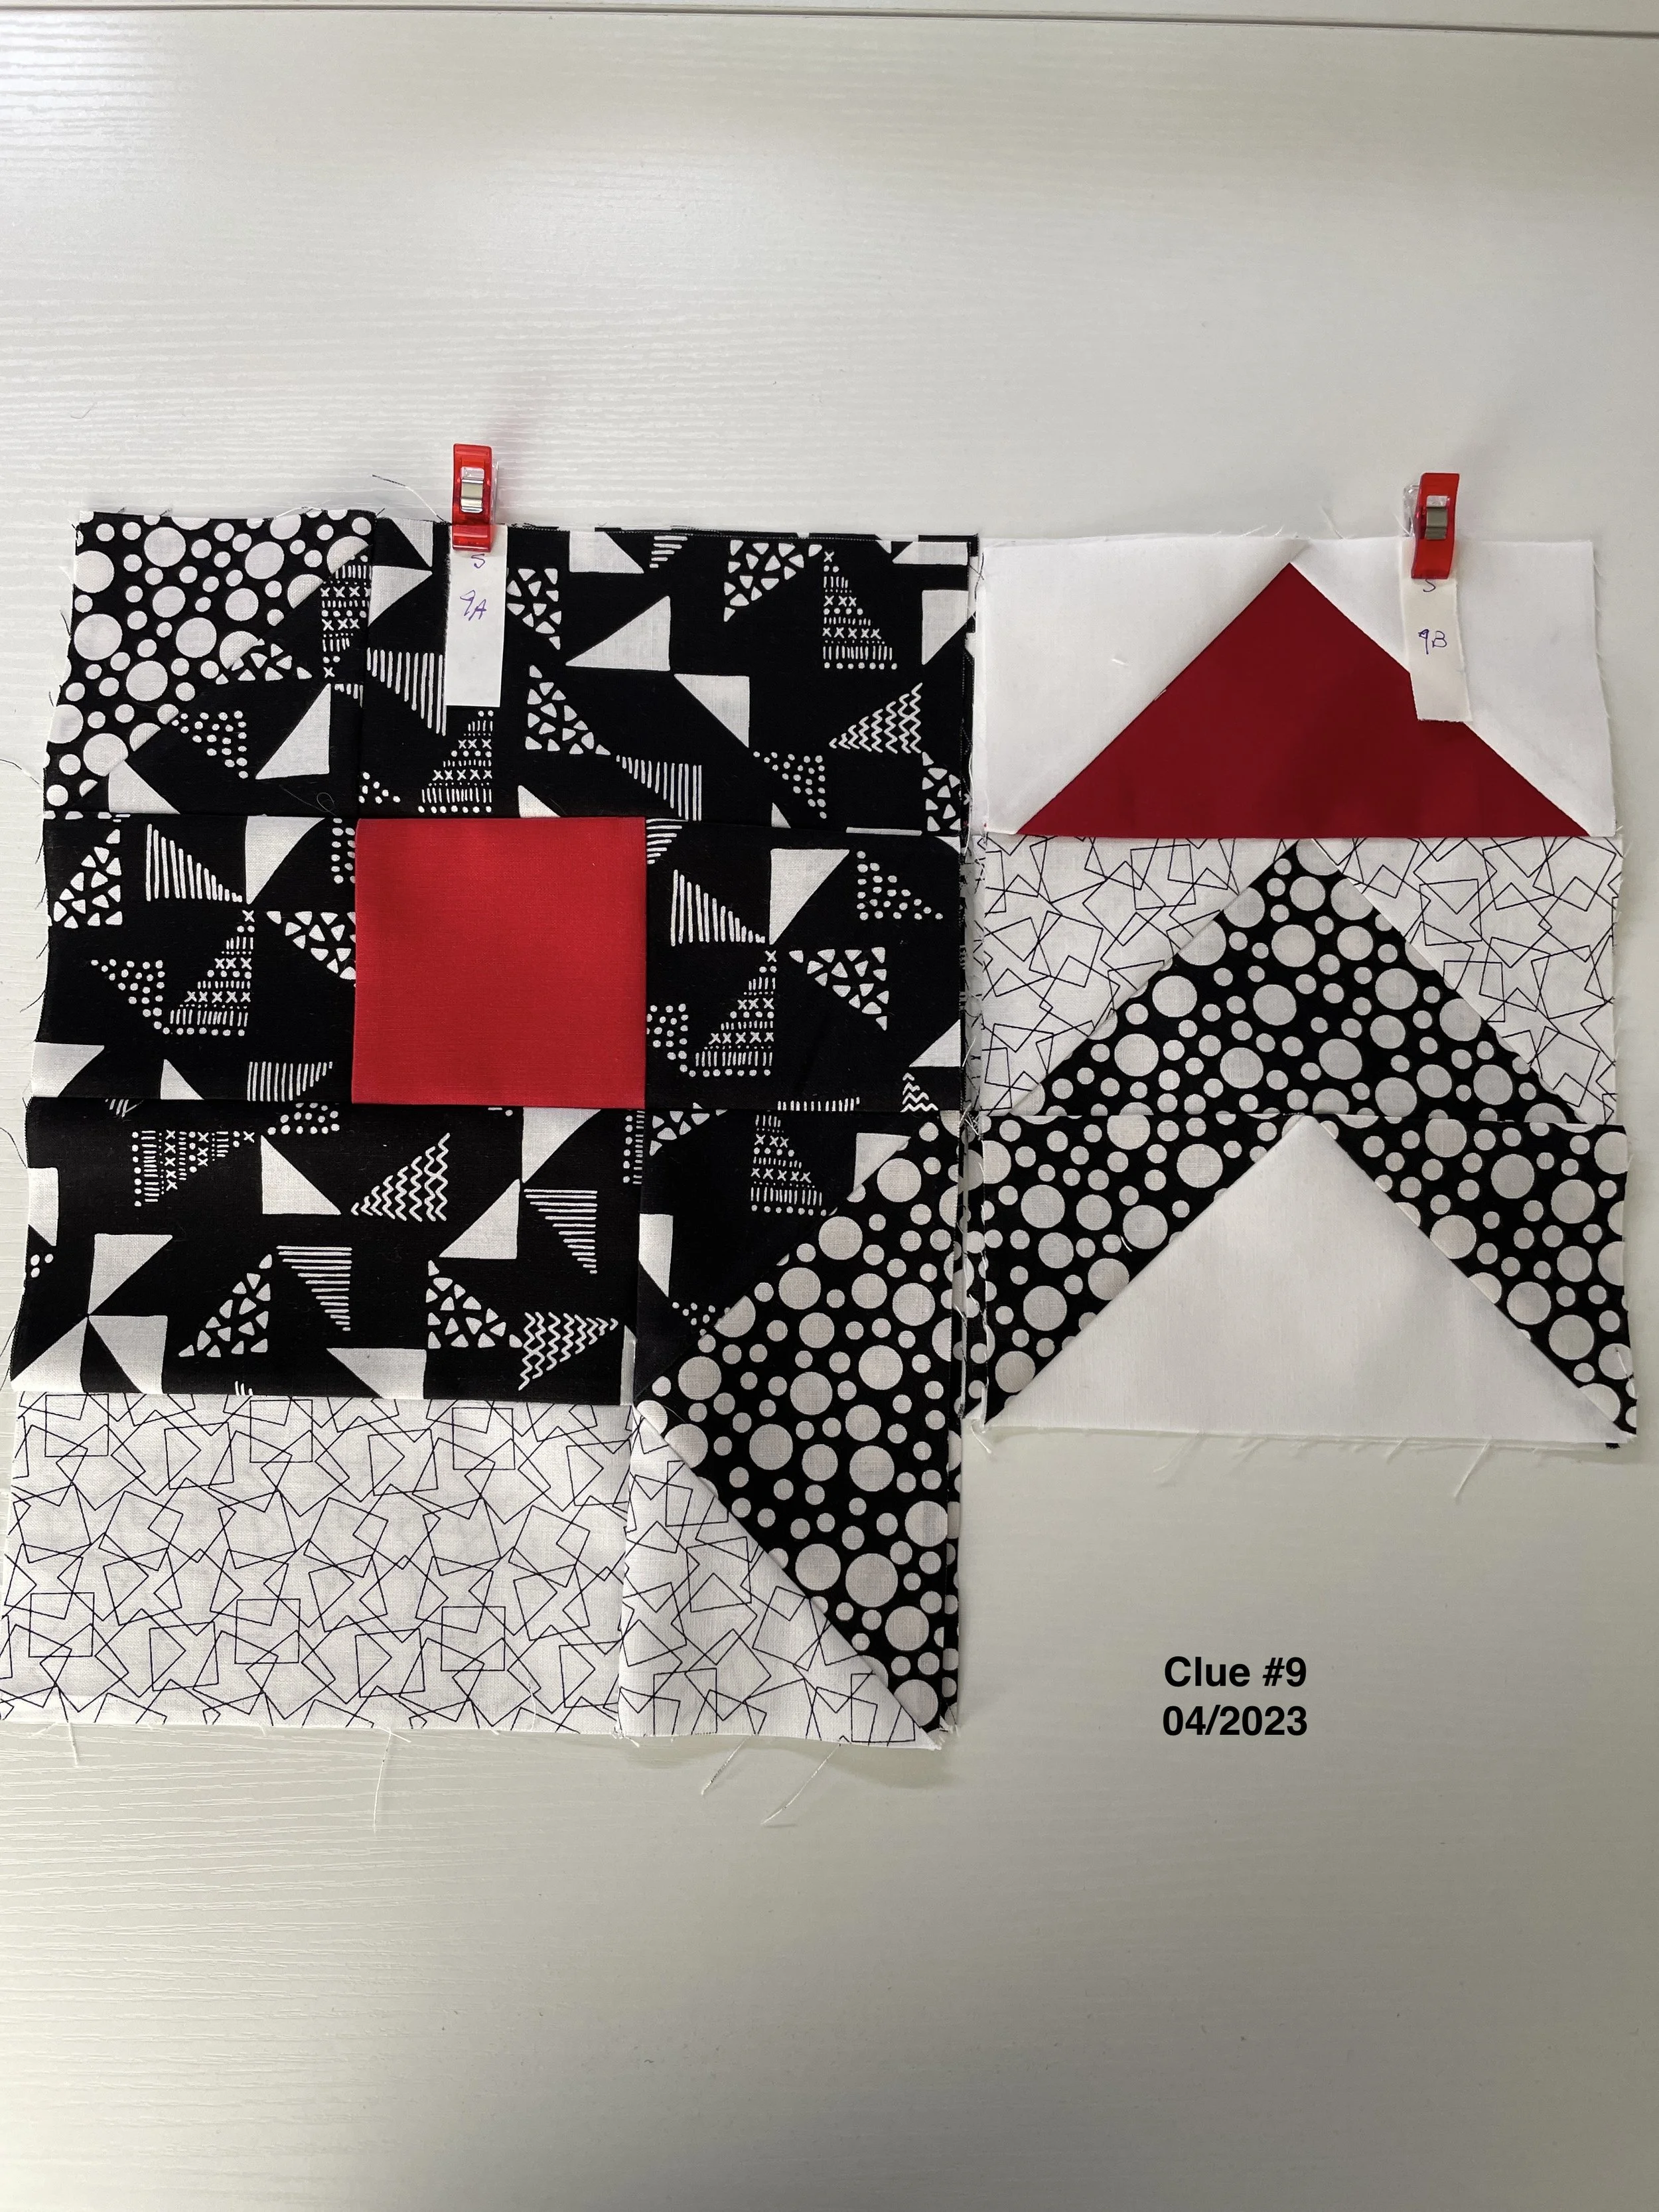
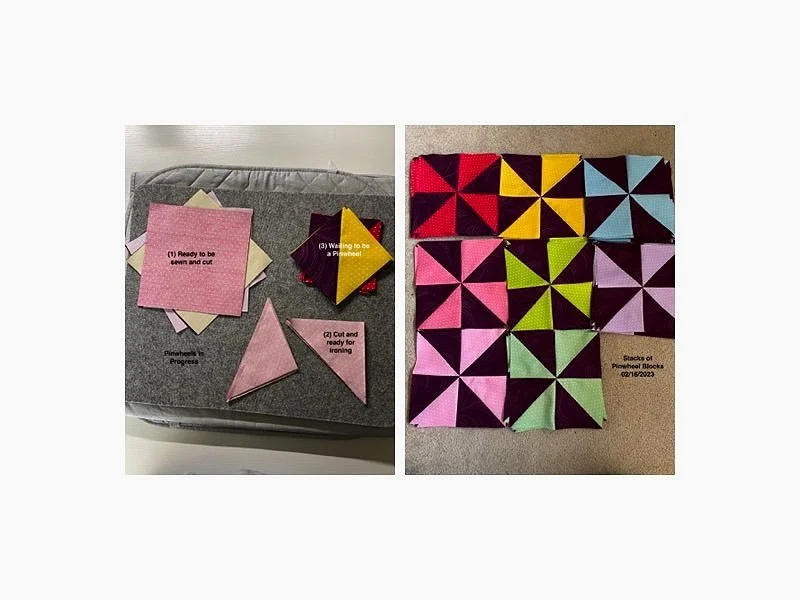
Here’s clue #6 in my monthly mystery quilt.

And a look ahead to the Deco quilt by Lo and Behold Stitchery. Brittany at Lo & Behold had some mockups of the small quilt in a variety of colors and I found myself pulled toward the greens. I realized that as an adult I never wear green and own nothing green; yet in my late teens and early twenties I wore lots of green. So I decided on this green inspiration

Bad Cold + WIP: Dutch Wax Fabric

Mike brought home a cold and was miserable between Christmas and New Year’s. I caught the cold on New Year’s Day and felt miserable for about a week. Both of us ended up going to our local urgent care clinic and came away with roughly the same meds. But we’re both feeling good again.

I completed the Dutch Wax Fabric quilt top on 1/15/2024 and I’m pretty pleased with the outcome (yes, I just realized it’s upside down. . . but hey 😬)

I’m off to my local quilt shop today to choose the backing. I’m thinking a muted chocolate or a muted blue or maroon so we’ll see what I come home with. . .

Next up, I’m planning on working on Mode Love layer cake (10” squares) in black, white and red. Here’s the inspiration quilt

I received my Mystery Quilt fabric for last month, but haven’t taken the time to look at it. More next time. . . .

Machine Went Walkabout . . .

But we’re both back and up and running. I was 99.9% finished with the Happy Colors quilt when the bobbin holder on my machine went walkabout. It slipped up and a little to the right of its rightful place. This took a bit for me to figure out what had gone wrong, put it back in its place and off it went again. Sigh. Then of course with the holidays making shipping slow it took a while to get a new bobbin case. However I was able to finish the binding and here’s the quilt

I used a high loft batting ‘cause I was curious about it. I likely won’t use this again; I prefer the less lofty batting. Just to be different, I used a square spiral in the white squares and I rather like the effect.

While I was working on Happy Colors I stumbled across a panel titled “Anisa” with two very colorful peacocks and I absolutely had to have it. Here’s the panel

I chose three border fabrics, cut the strips and sewed them on. Here’s the quilt sandwich

Next time I work on a panel I think I’ll choose border fabric that is in the same color family. For example, for this quilt I could have chosen a light, medium and dark blue, or red or green or . . . I think that might be more cohesive. Nevertheless I’m really pleased with this.

Clue #5 for my mystery quilt came in the mail. I can’t say I’m all that excited about this; perhaps I’ll like it better at the final reveal.

Up next: The panel will come together fairly quickly and I have the fabric and pattern for my next quilt. “Dutch Wax Fabric” can now be imported to the United States. This fabric is known as “Vlisco Hollandaise and “African Wax Print” and “Ankara”. It is somewhat similar to batik fabric. You can read more about here. You won’’t be surprised that I was on board immediately. Here’s the fabric I chose

I purchased a group of 10 fat quarters and here’s the inspiration quilt. I’ll be use cream for the sashing (as you see surrounding the colorful fabric) and a low volume orange print for the intermediate rows (the black rows below). More about this next time. . .

WIP: "Happy Colors" + Mystery Quilt

I had a fair amount of prep work before I could start the quilting process. I had the idea of a square spiral in the white blocks (see the post before this) and a scattering of specialty stitches in the colored blocks. Here’s an example of the specialty stitches I looked at.

I really liked the shoe and Mike did too, so I put together a test block sandwich and tried the shoe just to see what would happen.

Not so much, huh?! I think the density of the batting (I wanted to try a high loft batting) causes the shoe to shift and really doesn’t work out all that well. Ah well. I’ll do stitch in the ditch for the colored blocks.

I began the quilting process on Thursday, November 16 and it’s definitely going to be a slog. My shoulders and waist are getting a workout shoving the quilt back & forth around my machine. Maybe I’ll have all the quilting done in my next update. Wish me luck !!

The fourth clue in the mystery quilt arrived and it looks like this

WIP: "Happy Colors"

Here’s my design wall for the “Happy Colors” quilt; I have one more row that won’t fit on the wall.

I’m thinking that the white blocks will have a square spiral (possibly in a variegated thread). Here’s a look at the square spiral template.

While I was waiting for the square spiral template to come in, I decided to do a bunch of cutting for my next quilt. Sadly, I overdid it and now my right thumb is protesting vigorously. I’ll be down & out for a bit while my thumb returns to it's agreeable nature.

I use my disappearing ink pen to draw lines and then sew around the lines.

WIP: "Happy Colors" quilt - FPP blocks

The blocks for my “Happy Colors” (newly named by me) quilt are coming along. These blocks will not be jammed together like you see in the picture below. I’ll be sewing black borders around each block; I envision the quilt will be one FPP block, one block in a neutral color, then another FPP block. I think the neutral block will be a low volume neutral like a white-on-white print, but I’ll wait to decide that a little further down the line.

WIP: Cleo #2 + FPP + Mystery Quilt

Cleo #2 is complete and boy, am I pleased !! Mike chose the border fabric and I took it from there. Here is the front and the back with Bridges the photobombing cat. The picture below that is the back; if you zoom in you’ll see the outline of the cat’s head. I made sure the quilting (which I did) didn’t go through the cat’s face.

I’ve been working a bit through FPP (foundation paper piecing, aka paper piecing. I didn’t much care for the batik colors and so I’m going to put it to use by making a pillow for the cat/dog. Here is part 1 — the paper piecing blocks. Next I’ll create the pillow case with some nice backing fabric which will wrap around these blocks.

I seem to gravitate toward bright, vivid fabric so I’m going to continue my FPP journey by making more blocks like the following. I have four different patterns for the blocks; you can see two of the blocks below. I’m not sure if this will be a quilt or a wall hanging, or. . .

Here’s the third clue in my Cotton Cuts Mystery Quilt.

WIP: Cleo #2 + FPP

I’m working on a second Cleo panel. When I bought the first one, I asked my chief designer (aka “the hubs”) which fabrics in the collection would work for borders. Each of us independently chose three entirely different fabrics. So I bought a second panel and six different fabrics for the two panels. Here’s Cleo #1 and the following is quilt sandwich Cleo #2

He asked that each of the borders be the same width and specified the color progression. Cleo #1 was too wide for regular fabric backing (up to 42 inches) so I had to piece the backing widthwise and lengthwise using leftover fabric. Cleo #2 was wide enough for regular backing so I used leftover fabric to make it long enough, as you see here

I’ll be quilting Cleo #2 using a wavy quilting pattern (and avoiding the cat’s face) and will bind the quilt in red.

I continue to play with FPP (paper piecing). I pulled out some batik fabric and some coordinating fabric and created blocks as you can see in the first picture below. I’m not real happy with these blocks; they seem “muddy” to me. So I pulled out the very first block, evaluated it and decided I wanted brighter colors. I’ll use bright colors for the blocks and the multi-colored fabric for sashing. We’ll see how that works before I commit to a quilt or table topper or . . . .

WIP: Cleo + NYB + Paper Piecing + Mystery Quilt

Cleo came back from the longarm quilter and I am mostly pleased. She used a brown thread for the quilt pattern. The only thing I don’t like (and there’s nothing to be done about it) is the quilting in the cat’s face. I have a second panel and will probably do the quilting myself.

Here’s a picture of my design wall

Foundation paper piecing examples: complete and incomplete

All of these are foundation paper piecing (FPP) - some complete, some not. I worked on NYB (New York Beauty) blocks for what felt like years. I got the spires working pretty well and was able to complete the quarter circle competently. However, I could not figure out the cutting of the block. It should have come out to 8.5” but I had virtually no luck with that. So, for the moment, I’ve decided to abandon the NYB for the moment and stick to simple FPP which I like a lot. I really like the second block on the upper row and plan to make placemats or a table topper using that block using batik fabric.

I received clue #2 on my mystery quilt; you can see all the clues here (there’ll be nine clues).

Complete: Delilah Jelly Roll Quilt + Cleo #1

The Delilah Jelly Roll Quilt and I’m pretty pleased with the finished product. It’s hanging in my sewing room but will be passed on when I’m tired of it or have a new one to hang. Here’s my attempt at some quilt/flower porn 😁

In my last update I showed you a picture of Cleo the cat fabric panel. She’s 23” wide by 44” long. Here it is

I spent a couple of days researching what to do with a fabric panel and then mulled over what I’d seen. I ended up attaching three borders. Sadly, I don’t have a picture of that, but the quilt is at the longarmer so I’ll have a full picture next time.

I signed up with Cotton Cuts for another mystery quilt, this one in blues — the last one was red, white and black which you can see here. Here’s what the first step looks like.

I’ve set up a gallery here so you can follow along with the clues as I complete them.

I’ve begun building practice blocks for the New York Beauty quilt. Here’s my first practice block. You’ll notice at the lower right I haven’t quite covered the edge of the paper — I’ll charge on and place the semicircle which will be my first attempt at curved piecing. The block below mine is what the block will look like when it’s completed correctly.

WIP: Delilah Jelly Roll Quilt + more

The last couple of quilts I’ve made — or techniques I’ve been learning — have been intense so I’m ready to make a simple utility quilt for donating to some organization or person. Here’s what I’ve been working on for the last couple of days:

Doesn’t look like too much at this point, does it? 😉 I went looking for a fun fabric collection and I had gardens on my mind. I found “Delilah” — butterflies, flowers and stripes in lovely colors. This fabric is “Delilah” (hence the title) designed by Whistler Studios for Windham Fabric. I already had a jelly roll quilt in mind (jelly rolls are 2.5” wide by width of fabric [usually 240-42”] and I had some blue ombre fabric for the “sky”.

I’ve sewed the three columns with one more to go and then I’ll sew the rows together. I’m thinking of diagonal quilting, but I might decide on something else. We’ll see. . . .

As I was evaluating jelly rolls, I stumbled across this panel titled “Cleo the Bejeweled Cat designed by Chong-a Hwang (take a look at her other collections — they’re fabulous ! ):

and instantly my brain & heart said “ WE. MUST. HAVE. THIS”. It’s a panel 24” wide by 43” long. I haven’t worked with panels at all — I’ve never even been attracted to any that I’ve seen. This one definitely called my name. I’ll add some borders to make it large enough to call it a quilt. This will be a quick but satisfying project.

After I finish Cleo I’ll go back to paper piecing with a refreshed brain eager to take on a new challenge . . . I’ve decided on the pattern and will be searching our local quilt shop for fabric. More about that next time. . .

Complete: Family Birthstones + Jelly Roll Strip Quilt

“Family Birthstones” (formally known as “Aftershock” designed by Wren Collective) is complete. This quilt commemorates my family by using their birthstones as the colors. I think the double borders with mitered corners is effective and I kept the quilting simple. Overall, I’m quite pleased.

My next quilt is a “palate cleanser” - a simple quilt using a jelly roll (2 1/2” by width of fabric) of fabric I fell in love with - and I think you’ll be surprised by the fabric I chose:

This fabric line is titled “Delilah” designed by Whistler Studios for Wyndham Fabrics. And here’s the inspiration quilt that I liked:

I think I’ll be using sky blue ombre as the background color (her background fabric above is white).

The first clue in my mystery quilt will be here in early August and I’ll talk about that soon. New York Beauty needs more practice and I need to settle on the fabric I’ll use for that. Right now my brain is exploding with ideas for the fabric — too many to keep straight.

Complete: Mystery Quilt + Family Birthstones

Whoo whooo. The mystery quilt came back from the longarmer and Mike & I were beside ourselves with delight. Amy (my go-to longarm quilter) chose a “bubble” quilting pattern using white thread and we think it’s outstanding. Zoom in a bit and you can see the bubbles dancing around the quilt.

I am so delighted with this quilt that I’ve signed on to do another (different) mystery quilt. I’ll tell you about it in August.

You’ll recall that I started paper piecing in my last update and I decided to use “Waiting for Rain” to practice mitered corners (see next entry). Mitered corners are a bit tricky and I wanted a double border. Here’s how my first attempt worked out.

The borders turned out pretty well for a first attempt but the whole thing is a bit funky and warped looking. I’ll be doing some more practice to see if I can get better at this process.

Some of you know that my brother died in January 2023; I am now the last living member of a family of six. I’ve had a memorial quilt in mind since then and in February I found the perfect pattern and some great new fabric I haven’t worked with called “shot cotton”. Shot cotton uses two different colors of thread for the warp and weft (horizontal and vertical threads) to create the fabric. I started cutting the fabric but laid it aside until a week or two ago. Here’s the quilt top with the blocks completed.

The official name of the pattern is “Aftershock” by Wren Collective. I call it “Family Birthstones” because I used birthstone colors to denote family members. The first is my dad Edwyn, then my sister Lydia, then my mom Dean, then sister Sue, then my brother Mike. My sisters and brother are indented to show family relationships.

I decided I wanted two borders for this quilt and I wanted mitered corners rather than butt corners hence the practice with mitered corners above.

A new technique I'm learning

When I first started learning the quilt process back in 2019 I flailed around trying all sorts of things. One of the techniques I tried was “foundation paper piecing” (FPP) aka paper piecing. I got nowhere with it and decided to stick to “patchwork” quilting (building blocks and rows and columns).

Recently I ran across (in a novel I was reading) the “New York Beauty” quilt and delved into the block. I ran searches and was blown away by the block and the quilts it could create. You can see some of them here One that particularly caught my eye was this one. One item I’ve had on list is curved piecing — this is the epitome of curves 😜

Guyon Grey - New York Beauty

I decided I wanted to make this or something very like it. So I started learning about FPP or paper piecing. I looked at many explainers, both blog pictorial and videos. Here’s a peek at my current design wall. I’ll explain. . .

At the upper top left is my first FPP project. There were only four elements to each block and I made two blocks, just to be sure I had the process down. FPP is very, very different from what I’ve been doing. FPP uses a paper pattern that I sew through to the fabric below so I’m building the block upside down. Brain freeze !! Now you see why I build two.


One of the very best video explanations (here if you want to see it) was “Waiting for Rain” — top row, two of the pattern. While I wasn’t all that enthralled by the pattern, she walked through each and every step of the process and that was invaluable. I think my current project will use a mitered border so the purple fabric draped over the railing will frame the tree and be the start of my learning mitered borders.

Third row, far let is “Tsuru” - origami crane. Another pattern that enthralled me. Perhaps I’ll make a table topper using this block.

I’ll explain the last two rows in my next post. . . .

Complete: Asian-Inspired quilt + Mystery Quilt reveal

It’s been a while, hasn’t it ! I completed the Asian-inspired quilt and here’s what it looks like. I’m not entirely sure about the orange-ish fabric - sometimes I like it and sometimes I wonder how in the world I decided to use it.

And here’s the backing fabric I used; it’s titled “Dragonfly Dreams” by Hoffman. I think it perfectly suits the quilt top.

The final month of the mystery quilt (you can see each month’s clues here) was the REVEAL month — and wow — here’s the finished quilt top. The quilt top is now at the longarmer who’ll be quilting it. I had a devil of a time getting this top put together — I ripped out more seams in this one quilt than I’ve done before. . . It fought me every inch of the way. So what did I learn and why am I going to do another:

  1. I need to pay close attention to the size of the sections they send; I did pay attention to the first couple and then I got lazy — which created problems when I tried to put it together. Sooooo — pay attention to each-and-every segment of each section.

  2. Because it was a mystery quilt, I didn’t know how it would come together; for all my other quilts, I had a vision of what it would look like. I didn’t for this one and I think that contributed to my problems. Also I was working along on another project (more about that next time) and my attention was partly focused on that project, not the mystery quilt. Once I got concentrated on the mystery quilt, things moved along better.

  3. I love the look of the quilt; my fabric selection was spot on. Some people were disappointed because their fabrics were too muted and didn’t show off the triangles. (there are 12 or so coordinated fabrics [called “colorways”] you can choose from). See the upcoming mystery quilts for colorways.

  4. I’m going to do another - I think it begins in late June. I enjoyed the process—this was my first experience with “flying geese” blocks which I’d been avoiding because they scared me. Turns out I put them together just fine.

WIP: Asian-inspired quilt + Mystery Quilt + Upcoming

The Asian-inspired fabric quilt is coming along well; I’ve completed the quilting. I decided to use “stitch in the ditch” technique since there’s a lot going on with the fabric. You’re seeing the quilt sandwich that hasn’t been squared up yet; I’ll square it up, create and apply the binding and it’ll be complete. A finished quilt display in my next update.

I’ve received Clue #9 in my mystery quilt project. This is the last fabric I’ll receive; the next clue will be how to put the sections together to create the quilt top. I’m eager to see what this will look like. . . 😁

I’m looking forward to more practice with paper piecing — generally known as Foundation Paper Piecing (FPP). I have several small and simple projects lined up (not necessarily in this order) shown in the pictures below. I’m not sure how many blocks I’ll make — maybe one, maybe more for a table topper, for example. I’m not sure a quilt is in the picture, except, perhaps, the origami crane.

“Waiting for Rain” by Jennifer Ofenstein


Origami crane (Tsuru) by Alyce Blyth for Blossom Heart Quilts (my taste for bright colors will come into play with this one — and might become a quilt)

Pinwheel Baby Quilt + Asian-Inspired + Paper Piecing

I wanted to point something out about the Pinwheel Baby Quilt. This quilt was too wide (about 45”) so I couldn’t just use yardage for the backing. So, for the first time, I pieced a backing with some leftover blocks and I was quite pleased with the outcome. Here’s the back and the front of the quilt.

I’ve been wanting to find some Asian-inspired fabric that knocks my socks off — and I found some. Take a look at this collection titled “Dragonfly Dance” by Kanvas Studio.

I found and bought a half-yard bundle of 10 of these fabrics and then went looking for a pattern that would showcase these gorgeous fabrics. I found “Three Step” by Annie of Annie’s Craft Store that would be ideal for my purpose. The blocks were easy to make and here’s the final layout that Mike and I agree with.

The project is on hold as I write this; I’m waiting for the big A to deliver a template so I can cut these to 9.5”. It’ll probably be complete the next time I post.

Back when I started quilting I tried a bunch of things and realized I needed to focus on building my sewing, cutting and ironing skills and creating simple quilts. Now I’m ready to add some skills — like the pieced backing at the top of this post.

One thing that has lingered in the back of my mind is “paper piecing”. There are two broad categories of paper piecing: English paper piecing and Foundation paper piecing. Very different techniques are used for each category. Foundation paper piecing (FPP) is where you slap fabric onto a paper pattern and sew through the pattern and the fabric. My first attempt was an “oops” (wrong cutting method left ONLY the 1/4” seam) but the second worked out. Here are the two pictures. I’ll be practicing this and a couple of other simple patterns and will have more for you next time.

Completed: Pinwheel Baby Quilt + Mystery Quilt Blocks + New Project

I’ve completed the pinwheel baby quilt and I’m very pleased with it. I decided to use wavy quilting, hoping this would make you think of a breeze turning the pinwheels.

The 8th clue instructions and fabric arrived in late February and here’s what the two sections look like. The 9th clue should arrive around the end of March and that will be the last clue with fabric. The 10th clue is how to put the sections together to create the quilt top.

And finally my next project will be what I call “Family Birthstones” formally titled “Aftershock” by Wren Collective. Here’s the fabric I’ll be using and what it will look like. More on this quilt in my next update.

Shot cotton fabric

My quilt will have fewer rows (5 rows representing my deceased family members)

WIP: Pinwheel Baby Quilt

I’m still working on the pinwheel quilt. My chief designer (aka the Hubs) helped me lay out a stunning change to the center of the quilt. You’ll see the giant pinwheel which makes a nice centerpiece.

It took me several days to figure out how to sew the centerpiece together and I was displeased with my first attempt. Fortunately I had extra blocks so I started over with fresh blocks and am happy with it now. Another lesson in “That which looks easy isn’t necessarily”.

I’m about to start the backing for this quilt — and for the first time, I’ll be creating a pieced backing. The quilt is 42” x 42” and quilt fabric is 40-42” depending on the manufacturer. I need an overhang of 4” on all sides of the backing and the batting. Hence the necessity of the pieced backing. You can see examples of pieced backings here. So, more learning the intricacies of the quilt process.

When I started the pinwheel quilt, I created a test block to learn the process. The first block (not surprisingly) was a no-go but the second was a winner. We liked it so much that I’m going to quilt it and we’ll use it on a side table. It’s 13” x 13” so a nice size.

More next time. . .

WIP: Pinwheel Baby Quilt

The Pinwheel quilt is coming along. I need 56 blocks and have around 45 completed. Here’s what they look like:

On the left are 6.5” blocks of fabric to be sewn right sides together; then cut the fabric in half diagonally twice which creates four half-square triangles (HSTs); then iron the HSTs open and sew the HSTs together. Finally, the block is a recognizable pinwheel.

I expect to have all the blocks complete by 2/18/2023 so that I can lay them out maybe in rainbow order, maybe not. More next time. . . .